
Deployment Guide

• 1043.mst
• 2052.mst
• 3076.mst
• Command_Configure.msi
• mup.xml
• package.xml
5. To access the Dell Command | Configure installation wizard, double-click
Command_Configure.msi.
6. Run the installation wizard.
For more information, see Running the installation wizard.
After you install Dell Command | Configure , you can use the GUI or the CLI to configure the client
systems. For more information on configuring the systems, see the following documents at
dell.com/dellclientcommandsuitemanuals:
• Dell Command | Configure Command Line Interface Reference Guide
• Dell Command | Configure User’s Guide
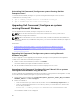
Running the installation wizard
1. Browse to the folder in which you have extracted the Command_Configure.msi file.
2. Double-click the MSI file or the DUP.
The installation wizard is displayed.
3. Click Next.
The License Agreement screen is displayed.
4. Read the license agreement and click I accept the terms in the licence agreement, and then click
Next.
The Customer Information screen is displayed.
5. Type the user name and organization, select any one of the following options, and then click Next.
• For multiple users select Anyone who uses this computer (all users).
• For a single user select Only for me (Dell Computer Corporation).
The custom setup screen is displayed.
6. Click Next to install Dell Command | Configure CLI and GUI in the default directory. The default Dell
Command | Configure installation directories are:
• For 32-bit system; C:\Program Files\Dell\Command Configure
• For 64-bit system; C:\Program Files (x86)\Dell\Command Configure
NOTE: Click Change to install Dell Command | Configure in a specified directory.
The Ready to Install the Program screen is displayed.
7. Click Yes.
The Installing Dell Command | Configure screen is displayed. When the installation completes, the
installation wizard completed screen is displayed.
8. Click Finish.
If the Dell Command | Configure GUI is successfully installed, the shortcut for the GUI is displayed on
the desktop.
6