Dell Command | Configure Version 3.
Notes, cautions, and warnings NOTE: A NOTE indicates important information that helps you make better use of your computer. CAUTION: A CAUTION indicates either potential damage to hardware or loss of data and tells you how to avoid the problem. WARNING: A WARNING indicates a potential for property damage, personal injury, or death. Copyright © 2009 - 2015 Dell Inc. All rights reserved. This product is protected by U.S. and international copyright and intellectual property laws.
Contents 1 Introduction........................................................................................................... 4 Accessing Dell Command | Configure installer................................................................................... 4 Installation prerequisites....................................................................................................................... 4 Installing Dell Command | Configure on systems running Microsoft Windows.............................
Introduction Dell Command | Configure is a packaged software application that provides BIOS configuration capability to business-client platforms. You can configure the client systems in two methods: Using the Graphical User Interface (GUI) or using the Command Line Interface (CLI). This guide provides the installation instructions for Dell Command | Configure . NOTE: Dell Command | Configure was formerly Dell Client Configuration Toolkit (CCTK). After CCTK version 2.2.
Installing Dell Command | Configure on systems running Microsoft Windows You can install Dell Command | Configure from the downloaded DUP using the GUI, or perform a silent and unattended installation. You can perform both types of installation using the DUP or MSI file. NOTE: Microsoft .NET 4.0 or later must be installed on the client system for Dell Command | Configure GUI installation. NOTE: If User Account Control (UAC) is enabled on Windows Vista, Windows 7, Windows 8, Windows 8.
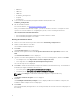
• 1043.mst • 2052.mst • 3076.mst • Command_Configure.msi • mup.xml 5. • package.xml To access the Dell Command | Configure installation wizard, double-click Command_Configure.msi. 6. Run the installation wizard. For more information, see Running the installation wizard. After you install Dell Command | Configure , you can use the GUI or the CLI to configure the client systems. For more information on configuring the systems, see the following documents at dell.
Installing Dell Command | Configure in silent mode using DUP Perform the following steps to install Dell Command | Configure in silent mode: 1. Browse to the folder where you have downloaded the DUP and then, open the command prompt. 2. Run the following command: Systems-Management_Application__WN32_3.1.0._A00 /s. NOTE: For more information on using commands, type the following command: SystemsManagement_Application__WN32_3.1.0._A00 /h.
• 2052 — Simplified Chinese • 3076 — Chinese Hongkong Important information Common scenarios for Hardware Application Programming Interface (HAPI) installation include: • If you have installed only Dell Command | Configure CLI, you must install HAPI version 8.2 on the system. • If the system does not have HAPI installed, when you run a Dell Command | Configure command, HAPI is automatically installed. After the option is configured, HAPI is uninstalled.
• Installing Dell Command | Configure on systems running Red Hat Enterprise Linux 6 Installing Dell Command | Configure on systems running Red Hat Enterprise Linux 7 To install Dell Command | Configure on systems running Red Hat Enterprise Linux 7 systems using 64-bit RPMs, untar the file, and run the commands in the following order: 1. rpm -ivh srvadmin-hapi-8.2.0-1650.7979.el7.x86_64.rpm 2. rpm -ivh command_configure-linux-3.1.0-.el7.x86_64.
Uninstalling Dell Command | Configure on systems Running Red Hat Enterprise Linux 6 To uninstall Dell Command | Configure on systems running Red Hat Enterprise Linux 6, run the commands in the following order: 1. rpm -e command_configure-linux-3.1.0-.el6.x86_64 2. rpm -e srvadmin-hapi-8.2.0-1650.7979.el6.x86_64 Upgrading Dell Command | Configure on systems running Microsoft Windows You can upgrade Dell Command | Configure using a DUP or the MSI file. NOTE: Microsoft .
3. Follow the instructions on the screen to upgrade. NOTE: For a silent upgrade, run the following command: msiexec.exe /i Command_Configure.msi REINSTALL=ALL REINSTALLMODE=VOMUS /qn Upgrading Dell Command | Configure on systems running Linux For minor upgrades like upgrading Dell Command | Configure (formerly Dell Client Configuration Toolkit) version 3.0 to Dell Command | Configure 3.1: 1. From dell.com/support, download the command_configure-linux--.tar.
Dell Command | Configure for Microsoft Windows Preinstallation Environment (Windows PE) Windows PE provides a standalone preinstallation environment that is used to prepare a system for Windows installation. For client systems that do not have an operating system installed, you can create a bootable image that contains Dell Command | Configure to run the Dell Command | Configure commands on Windows PE. To create Windows PE 2.0 and 3.
Creating Microsoft Windows PE 10.0 64-bit image 1. Browse to C:\Program Files(x86)\Dell\Command Configure\X86_64. 2. Open the command prompt with Administrator privileges. 3. Run the following command: cctk_x86_64_winpe_10.bat C:\winpe_x86_64 C: \Progra~2\Dell\Comman~1. NOTE: Make sure that the path mentioned in the command directs to the Dell Command | Configure folder. 4. Browse to C:\winpe_x86_64\WIM and copy the ISO image. Creating Microsoft Windows PE 10.0 32-Bit Image 1. Browse to C:\Program
NOTE: Make sure that the path mentioned in the command directs to the Dell Command | Configure folder. 4. Browse to C:\winpe_x86\WIM and copy the ISO image. Integrating Dell Command | Configure directory structure to an ISO file using Microsoft Windows PE 4.0 1. Install Windows 7 SP1 or Windows 8 operating system. 2. Download and install Windows ADK for Windows 8. 3. Create Windows PE 4.0 image. Related Links: • Creating Microsoft Windows PE 4.0 64-bit image • Creating Microsoft Windows PE 4.
Integrating Dell Command | Configure directory structure to an ISO file using Microsoft Windows PE 3.0 Dell Command | Configure provides the cctk_x86_winpe_3.bat and cctk_x86_64_winpe_3.bat scripts to integrate Dell Command | Configure , HAPI, and related Dell drivers to the ISO image. To integrate the Dell Command | Configure directory structure to an ISO file: 1. Browse to the directory where the script is located. NOTE: By default, the script for 32-bit system is located in the Command Configure\x86 dir
Integrating Dell Command | Configure directory structure in WIM file using Microsoft Windows PE 2.0 Dell Command | Configure provides the cctk_x86_winpe.bat and cctk_x86_64_winpe.bat scripts to integrate Dell Command | Configure , HAPI, and related Dell drivers into the WIM file. To integrate the Dell Command | Configure directory structure in a WIM file: 1. Browse to the directory where the script is located. NOTE: By default, the script for 32-bit system is located at C:\Program Files\Dell\Command Config
For example, oscdimg –n –bc:\winPE_x86\etfsboot.com c:\winPE_x86\ISO c: \winPE_x86\WinPE2.0.iso. This command creates a bootable ISO image, WinPE2.0.iso, in the path C:\winPE_x86 directory. Reference In addition to this guide, you can access the following guides available at dell.com/ dellclientcommandsuitemanuals.