
Deployment Guide

• 1031.mst
• 1034.mst
• 1036.mst
• 1040.mst
• 1041.mst
• 1043.mst
• 2052.mst
• 3076.mst
• command_configure.msi
• mup.xml
• package.xml
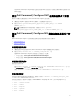
5. 若要存取 Dell Command | Configure 安裝精靈,連按兩下 command_configure.msi。
6. 執行安裝精靈。
如需更多資訊,請參閱執行安裝精靈。
在安裝後, Dell Command | Configure 您可以使用 GUI 或 CLI 設定用戶端系統。有關設定系統的更多
資訊,請參閱下列文件,可從 dell.com/dellclientcommandsuitemanuals 取得:
• Dell Command | Configure
命令列介面參考指南
• Dell Command | Configure
使用者指南
執行安裝精靈
1. 瀏覽至您解壓縮 Command_Configure.msi 檔案的資料夾。
2. 在 MSI 檔案或 DUP 上按兩下滑鼠。
將顯示安裝精靈。
3. 按一下 Next (下一步)。
將顯示授權合約畫面。
4. 閱讀授權合約並按一下我接受授權合約的條款,然後按一下下一步。
將顯示客戶資訊畫面。
5. 輸入使用者的名稱和組織,從以下選項中任選一項,然後按一下 Next (下一步)。
• 如果有多位使用者,請選擇所有使用這台電腦的使用者 (所有使用者)。
• 如果僅有一位使用者,請選擇只有我 (Dell Computer Corporation)。
將顯示自訂設定畫面。
6. 按一下下一步開始安裝 Dell Command | Configure CLI 和圖形化使用者介面 (GUI) 至預設目錄。預設
Dell Command | Configure 安裝目錄為:
• 32 位元系統;C:\Program Files\Dell\Command Configure
• 64 位元系統;C:\Program Files (x86)\Dell\Command Configure
註: 按一下變更開始安裝 Dell Command | Configure 至指定目錄。
將顯示準備就緒可安裝程式畫面。
7. 按一下是。
將顯示正在安裝 Dell Command | Configure 畫面。安裝完成後,將顯示安裝精靈已完成畫面。
8. 按一下 Finish (完成)。
8