
Setup Guide


Complete Installation
1. On the Setup Type screen, select Complete and click Next.
The Click Install to begin the installation screen is displayed.
2. Click Install.
After the installation is complete, the Installation Completed Successfully screen is displayed.
3. Click Finish.
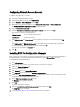
Custom Installation
1. On the Setup Type screen, select Custom and click Next.
You can install the following components of Dell Client Integration Pack:
– Console Manager Extensions
– Warranty Utility
– Intel vPro OOB Management Extensions.
NOTE: All the components are selected to install by default.
2. Click on the drop-down icon to select/deselect a component of DCIP.
3. Click Next.
The Ready to Install the Program screen is displayed.
4. Click Install.
After the installation is complete, the Installation Completed Successfully screen is displayed.
5. Click Finish.
Using the Modify Option in the Installer
The Modify option on the DCIP for Configuration Manager installer, modifies the program features that are installed. This
option enables you to perform the following actions:
• Install a feature that you did not install earlier.
• Remove a feature that you have installed earlier.
To install a feature that you did not install earlier:
1. Run the Dell_Client_Integration_Pack.msi package from the folder where you extracted it.
The Welcome screen for DCIP is displayed.
2. Click Next.
The installer displays three options.
3. Select the Modify option. Click Next.
4. Select the component you want to install or uninstall. Click Next.
The Click Install to begin the installation screen is displayed.
5. Click Install.
After the installation is complete, the Installation Completed Successfully screen is displayed.
6. Click Finish.
7