
Users Guide


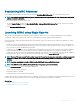


NOTE: The CMC Server Cloning application retrieves and displays the settings for a specic server, only if the Collect System
Inventory on Restart (CSIOR) option is enabled.
To enable CSIOR on:
• 11th generation servers — After rebooting the server, from the Ctrl-E setup, select System Services, enable CSIOR and save the
changes.
• 12th generation servers — After rebooting the server, from the F2 setup, select iDRAC Settings > Lifecycle Controller, enable CSIOR
and save the changes.
• 13th generation servers —After rebooting the server, when prompted, press F10 to access Lifecycle Controller. Go to the Hardware
Inventory
page by selecting Hardware Conguration > Hardware Inventory. On the Hardware Inventory page, click Collect System
Inventory on Restart.
Related links
Accessing Server Proles Page
Viewing Stored Prole Settings
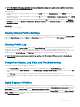
To view prole settings of server proles stored on the CMC nonvolatile media (SD Card) or on a network share, go to the Server Proles
page. In the Stored Proles section, click View in the View Prole column for the required prole. The View Settings page is displayed.
For more information on the displayed settings, see the CMC Online Help.
Viewing Prole Log
To view the prole log, in the Server Proles page, see the Recent Prole Log section. This section lists the 10 latest prole log entries
directly from server conguration operations. Each log entry displays the severity, the time and date of submission of the server
conguration operation, and the conguration log message description. The log entries are also available in the RAC log. To view the other
available entries, click Go to Prole Log. The Prole Log page is displayed. For more information, see the CMC Online Help.
NOTE
: For information on operation and associated log reporting in Dell PowerEdge M4110 servers, refer to the EqualLogic
documentation.
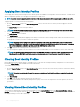
Completion Status, Log View, and Troubleshooting
To check the completion status of an applied server prole:
1 In the Server Proles page, note down the Job ID (JID) of the submitted job from the Recent Prole Log section.
2 In the system tree, go to Server Overview and click Troubleshooting > Lifecycle Controller Jobs. Look up the same JID in the Jobs
table.
3 Click View Log link to view the results of Lclogview from the iDRAC Lifecycle Controller for the specic server.
The results displayed for the completion or failure are similar to the information displayed in the iDRAC Lifecycle Controller log for the
specic server.
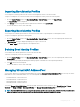
Quick Deploy of Proles
The Quick Deploy feature enables you to assign a stored prole to a server slot. Any server supporting server cloning inserted into that slot
is congured using the assigned prole. You can perform the Quick Deploy action only if the Action When Server is Inserted option in the
Deploy iDRAC page is set to Server Prole option or Quick Deploy and Server Prole option. Selecting one of these options allows to
apply the server prole assigned when a new server is inserted in the chassis. To go to the Deploy iDRAC page, select Server Overview >
Setup > iDRAC. Proles that can be deployed are stored in the SD card or remote share. To set up the proles for quick deploy, you must
have Chassis Administrator privileges.
Conguring
Server 121