
Users Guide
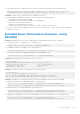

Table Of Contents
- Dell Chassis Management Controller Version 6.10 for PowerEdge M1000e User’s Guide
- Overview
- What is new in this release
- Key Features
- Chassis Overview
- CMC Port Information
- Minimum CMC Version
- Latest Firmware Versions for This Release
- Supported Remote Access Connections
- Supported platforms
- Supported Management Station Web Browsers
- Viewing Localized Versions of the CMC Web Interface
- Supported Management Console Applications
- Other Documents You May Need
- Contacting Dell
- Social Media Reference
- Installing and Setting Up CMC
- Before You Begin
- Installing CMC Hardware
- Installing Remote Access Software on a Management Station
- Configuring Web Browser
- Setting Up Initial Access to CMC
- Interfaces and Protocols to Access CMC
- Downloading and Updating CMC Firmware
- Setting Chassis Physical Location and Chassis Name
- Setting Date and Time on CMC
- Configuring LEDs to Identify Components on the Chassis
- Configuring CMC Properties
- Understanding Redundant CMC Environment
- Logging In to CMC
- Accessing CMC Web Interface
- Logging Into CMC as Local User, Active Directory User, or LDAP User
- Logging Into CMC Using Smart Card
- Logging Into CMC Using Single Sign-on
- Logging In to CMC Using Serial, Telnet, or SSH Console
- Accessing CMC Using RACADM
- Logging in to CMC Using Public Key Authentication
- Multiple CMC Sessions
- Changing Default Login Password
- Enabling or Disabling Default Password Warning Message
- Updating Firmware
- Downloading CMC Firmware
- Signed CMC Firmware Image
- Viewing Currently Installed Firmware Versions
- Updating CMC Firmware
- Updating iKVM Firmware
- Updating IOM Infrastructure Device Firmware
- Updating Server iDRAC Firmware Using Web Interface
- Updating Server iDRAC Firmware Using RACADM
- Updating Server Component Firmware
- Server Component Update Sequence
- Supported Firmware Versions for Server Component Update
- Enabling Lifecycle Controller
- Choosing Server Component Firmware Update Type Using CMC Web Interface
- Upgrading Server Component Firmware
- Filtering Components for Firmware Updates
- Viewing Firmware Inventory
- Saving Chassis Inventory Report Using CMC Web Interface
- Configuring Network Share Using CMC Web Interface
- Lifecycle Controller Job Operations
- Recovering iDRAC Firmware Using CMC
- Viewing Chassis Information and Monitoring Chassis and Component Health
- Viewing Chassis Component Summaries
- Viewing Chassis Summary
- Viewing Chassis Controller Information and Status
- Viewing Information and Health Status of All Servers
- Viewing Health Status and Information for Individual Server
- Viewing Storage Array Status
- Viewing Information and Health Status of All IOMs
- Viewing Information and Health Status For Individual IOM
- Viewing Information and Health Status of Fans
- Viewing iKVM Information and Health Status
- Viewing PSU Information and Health Status
- Viewing Information and Health Status of Temperature Sensors
- Viewing LCD Information and Health
- Configuring CMC
- Viewing and Modifying CMC Network LAN Settings
- Viewing and Modifying CMC Network LAN Settings Using CMC Web Interface
- Viewing CMC Network LAN Settings Using RACADM
- Enabling the CMC Network Interface
- Enabling or Disabling DHCP for the CMC Network Interface Address
- Enabling or Disabling DHCP for DNS IP Addresses
- Setting Static DNS IP addresses
- Configuring IPv4 and IPv6 DNS Settings
- Configuring Auto Negotiation, Duplex Mode, and Network Speed for IPv4 and IPv6
- Setting the Maximum Transmission Unit for IPv4 and IPv6
- Configuring CMC Network and Login Security Settings
- Configuring Virtual LAN Tag Properties for CMC
- Federal Information Processing Standards
- Configuring Services
- Configuring CMC Extended Storage Card
- Setting Up Chassis Group
- Adding Members to Chassis Group
- Removing a Member from the Leader
- Disbanding a Chassis Group
- Disabling an Individual Member at the Member Chassis
- Launching a Member Chassis’s or Server’s Web page
- Propagating Leader Chassis Properties to Member Chassis
- Server Inventory for Multi Chassis Management Group
- Saving Server Inventory Report
- Chassis Group Inventory and Firmware Version
- Viewing Chassis Group Inventory
- Viewing Selected Chassis Inventory Using Web Interface
- Viewing Selected Server Component Firmware Versions Using Web Interface
- Obtaining Certificates
- Chassis Configuration Profiles
- Saving Chassis Configuration
- Restoring Chassis Configuration Profile
- Viewing Stored Chassis Configuration Profiles
- Importing Chassis Configuration Profiles
- Applying Chassis Configuration Profiles
- Exporting Chassis Configuration Profiles
- Editing Chassis Configuration Profiles
- Deleting Chassis Configuration Profiles
- Configuring Multiple CMCs through RACADM Using Chassis Configuration Profiles
- Configuring Multiple CMCs through RACADM Using Configuration File
- Viewing and Terminating CMC Sessions
- Configuring Enhanced Cooling Mode for Fans
- Viewing and Modifying CMC Network LAN Settings
- Configuring Server
- Configuring Slot Names
- Configuring iDRAC Network Settings
- Configuring iDRAC VLAN Tag Settings
- Setting First Boot Device
- Configuring Server FlexAddress
- Configuring Remote File Share
- Configuring Profile Settings Using Server Configuration Replication
- Accessing Server Profiles Page
- Adding or Saving Profile
- Applying Profile
- Importing Profile
- Exporting Profile
- Editing Profile
- Deleting Profile
- Viewing Profile Settings
- Viewing Stored Profile Settings
- Viewing Profile Log
- Completion Status, Log View, and Troubleshooting
- Quick Deploy of Profiles
- Assigning Server Profiles to Slots
- Boot Identity Profiles
- Saving Boot Identity Profiles
- Applying Boot Identity Profiles
- Clearing Boot Identity Profiles
- Viewing Stored Boot Identity Profiles
- Importing Boot Identity Profiles
- Exporting Boot Identity Profiles
- Deleting Boot Identity Profiles
- Managing Virtual MAC Address Pool
- Creating MAC Pool
- Adding MAC Addresses
- Removing MAC Addresses
- Deactivating MAC Addresses
- Launching iDRAC using Single Sign-On
- Launching Remote Console from CMC Web Interface
- Configuring CMC To Send Alerts
- Configuring User Accounts and Privileges
- Types of Users
- Modifying Root User Administrator Account Settings
- Configuring Local Users
- Configuring Active Directory Users
- Supported Active Directory Authentication Mechanisms
- Standard Schema Active Directory Overview
- Configuring Standard Schema Active Directory
- Extended Schema Active Directory Overview
- Configuring Extended Schema Active Directory
- Configuring Generic LDAP Users
- Configuring CMC For Single Sign-On Or Smart Card Login
- Configuring CMC to Use Command Line Consoles
- Using FlexAddress and FlexAdress Plus Cards
- About Flexaddress
- About FlexAddress Plus
- FlexAddress and FlexAddress Plus Comparison
- Activating FlexAddress
- Activating FlexAddress Plus
- Verifying FlexAddress Activation
- Deactivating FlexAddress
- Configuring FlexAddress
- Viewing WWN or MAC Address Information
- Viewing Basic WWN or MAC Address Information Using Web Interface
- Viewing Advanced WWN or MAC Address Information Using Web Interface
- Viewing WWN or MAC Address Information Using RACADM
- Viewing World Wide Name or Media Access Control IDs
- Command Messages
- FlexAddress DELL SOFTWARE LICENSE AGREEMENT
- Managing Input Output Fabric
- Fabric Management Overview
- Invalid Configurations
- Fresh Power-up Scenario
- Monitoring IOM Health
- Viewing Input Output Module Uplink and Downlink Status Using Web Interface
- Viewing Input Output Module FCoE Session Information Using Web Interface
- Viewing Stacking Information for Dell PowerEdge M Input Output Aggregator
- Configuring Network Settings for IOMs
- Resetting IOM to Factory Default Settings
- Updating IOM Software Using CMC Web Interface
- IOA GUI
- Input Output Aggregator Module
- Managing VLAN for IOM
- Configuring Management VLAN on IOMs Using Web Interface
- Configuring Management VLAN on IOMs Using RACADM
- Configuring VLAN settings on IOMs Using CMC Web Interface
- Viewing the VLAN settings on IOMs Using CMC Web Interface
- Adding Tagged VLANs for IOMs Using CMC Web Interface
- Removing VLANs for IOMs Using CMC Web Interface
- Updating Untagged VLANs for IOMs Using CMC Web Interface
- Resetting VLANs for IOMs Using CMC Web Interface
- Managing Power Control Operation for IOMs
- Enabling or Disabling LED Blinking for IOMs
- Configuring and Using iKVM
- iKVM User Interface
- iKVM Key Features
- Physical Connection Interfaces
- Using OSCAR
- Managing Servers With iKVM
- Managing iKVM From CMC
- Managing and Monitoring Power
- Redundancy Policies
- Extended Power Performance
- Dynamic Power Supply Engagement
- Default Redundancy Configuration
- Power Budgeting For Hardware Modules
- Server Slot Power Priority Settings
- Viewing Power Consumption Status
- Viewing Power Budget Status
- Redundancy Status and Overall Power Health
- Configuring power budget and redundancy
- Power Conservation and Power Budget
- Maximum Power Conservation Mode
- Server Power Reduction to Maintain Power Budget
- 110V PSUs AC Operation
- Server Performance Over Power Redundancy
- Remote Logging
- External Power Management
- Configuring Power Budget and Redundancy Using CMC Web Interface
- Configuring Power Budget and Redundancy Using RACADM
- Executing Power Control Operations
- Troubleshooting and Recovery
- Gathering Configuration Information, Chassis Status, and Logs Using RACDUMP
- First Steps to Troubleshoot a Remote System
- Troubleshooting Alerts
- Viewing Event Logs
- Using Diagnostic Console
- Resetting Components
- Saving or Restoring Chassis Configuration
- Troubleshooting Network Time Protocol Errors
- Interpreting LED Colors and Blinking Patterns
- Troubleshooting Non-responsive CMC
- Troubleshooting Network Problems
- Resetting Administrator Password
- Using LCD Panel Interface
- Frequently Asked Questions
- Use Case Scenarios

● Selecting the check box to enable Max Power Conservation Mode (MPCM), displays the following message:
Enabling Max Power Conservation Mode option will force servers into a low power,
limited performance mode and disable server power up. Press OK to continue.
Scenario 3: The EPP option is grayed out and not available for selection, if:
● EPP is disabled with 3000W PSUs, and any of the following power settings is enabled:
○ Server Based Power Management (SBPM)
○ Redundancy Policy: Power Supply Redundancy or No Redundancy
○ Max Power Conservation Mode (MPCM).
○ Dynamic Power Supply Engagement (DPSE).
○
System Input Power Cap is set to value less than or equal to 13300W or (45381 BTU/h) .
● The chassis does not have six 3000W PSUs or all the PSUs do not support EPP , the EPP option is grayed out and not
available for selection.
Extended Power Performance Scenarios - Using
RACADM
Scenario 1: Managing EPP feature control (enable/disable) using racadm getconfig/config set commands
●
To enable EPP feature on a 3000W AC PSU configuration, use:
racadm config -g cfgChassisPower -o cfgChassisEPPEnable 1
● To disable EPP feature on a 3000W AC PSU configuration, use:
To disable EPP feature on a 3000W AC PSU configuration, use:
● To verify if the EPP feature is enabled on a 3000W AC PSU configuration, use:
racadm getconfig -g cfgChassisPower -o cfgChassisEPPEnable
Scenario 2: Viewing EPP feature status using racadm getpbinfo:
racadm getpbinfo
Extended Power Performance(EPP) Status = Enabled (inactive)
Available Power in EPP Pool = 3167 W (10806 BTU/h)
Used Power in EPP Pool = 0 W (0 BTU/h)
EPP Percent - Available = 100.0
Scenario 3: Viewing EPP feature control operations recorded in CMC logs:
racadm getraclog
Jul 31 14:16:11 CMC-4C2WXF1 Log Cleared
Jul 31 14:15:49 CMC-4C2WXF1 Extended Power Performance is Enabled
Jul 31 14:15:49 CMC-4C2WXF1 Extended Power Performance is Disabled
Scenario 4: Changing Power configuration properties that are incompatible with EPP, when EPP is enabled:
● Enabling Server Based Power Mangement (SBMP) on a 3000W AC PSU
racadm config -g cfgChassisPower -o cfgChassisServerBasedPowerMgmtMode 1
This feature is not supported while Extended Power Performance is enabled.
● Enabling Dynamic Power Supply Engagement on a 3000W AC PSU
racadm config -g cfgChassisPower -o cfgChassisDynamicPSUEngagementEnable 1
This feature is not supported while Extended Power Performance is enabled.
● Changing Power Redundancy Policy from Grid Redundancy Policy to PSU Redundancy Policy on a 3000W AC PSU
racadm config -g cfgChassisPower -o cfgChassisRedundancyPolicy 2
This feature is not supported while Extended Power Performance is enabled.
Use Case Scenarios
249