
Users Guide

Conguring CMC Network Using LCD Panel Interface
NOTE: The option to congure CMC using the LCD panel is available only until CMC is deployed or the default password
is changed. If the password is not changed, you can continue to use the LCD to reset the congurations of the CMC
causing a possible security risk.
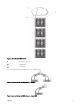
The LCD panel is on the bottom-left corner on the front of the chassis.
To set up a network using the LCD panel interface:
1. Press the chassis power button to turn it on.
The LCD screen displays a series of initialization screens as it powers up. When it is ready, the Language Setup screen is
displayed.
2. Select the language using the arrow buttons, press the center button to select the Accept/Yes, and press the center button
again.
The Enclosure screen displays the following question: Congure Enclosure?
• Press the center button to continue to CMC Network Settings screen. See step 4.
• To exit the Congure Enclosure menu, select the NO icon and press the center button. See step 9.
3. Press the center button to continue to CMC Network Settings screen.
4. Select the network speed (10Mbps, 100Mbps, Auto (1 Gbps)) using the down arrow button.
The Network Speed setting must match your network conguration for eective network throughput. Setting the Network
Speed lower than the speed of your network conguration increases bandwidth consumption and slows network
communication. Determine whether your network supports the above network speeds and set it accordingly. If the
network conguration does not match any of these values, it is recommended to use Auto Negotiation (the Auto option) or
refer to your network equipment manufacturer.
Press the center button to continue to the next CMC Network Settings screen.
5. Select the duplex mode (half or full) that matches the network environment.
NOTE: The network speed and duplex mode settings are not available if Auto Negotiation is set to On or 1000MB
(1Gbps) is selected.
If auto negotiation is turned on for one device but not the other, then the device using auto negotiation can determine the
network speed of the other device, but not the duplex mode; in this case, duplex mode defaults to the half duplex setting
during auto negotiation. Such a duplex mismatch results in a slow network connection.
Press the center button to continue to the next CMC Network Settings screen.
6. Select the Internet Protocol (IPv4, IPv6, or both) that you want to use for CMC and press the center button to continue to the
next CMC Network Settings screen.
7. Select the mode in which CMC must obtain the NIC IP addresses:
Dynamic Host
Conguration
Protocol (DHCP)
CMC retrieves IP conguration (IP address, mask, and gateway) automatically from a DHCP server on
your network. CMC is assigned to a unique IP address allotted over your network. If you have selected
the DHCP option, press the center button. The Congure iDRAC screen appears; go to step 9.
Static You manually enter the IP address, gateway, and subnet mask in the screens that immediately follows:
If you have selected the Static option, press the center button to continue to the next CMC Network
Settings screen, then:
• Set the Static IP Address by using the right or left arrow keys to move between positions, and the
up and down arrow keys to select a number for each position. When you have nished setting the
Static IP Address, press the center button to continue.
• Set the subnet mask, and then press the center button.
• Set the gateway, and then press the center button. The Network Summary screen displays.
The Network Summary screen lists the Static IP Address, Subnet Mask, and Gateway settings
you entered. Check the settings for accuracy. To correct a setting, navigate to the left arrow
button then press the center key to return to the screen for that setting. After making a correction,
press the center button.
30