
Users Guide


Related link
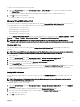
Conguring SNMP Trap Alert Destinations
Conguring Email Alert Settings
Conguring SNMP Trap Alert Destinations
You can congure the IPv6 or IPv4 addresses to receive the SNMP traps.
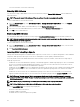
Conguring SNMP Trap Alert Destinations Using CMC Web Interface
To congure IPv4 or IPv6 alert destination settings using CMC Web interface:
1. In the system tree, go to Chassis Overview, and then click Alerts → Trap Settings.
The Chassis Event Alert Destinations page is displayed.
2. Enter the following:
• In the Destination eld, enter a valid IP address. Use the quad-dot IPv4 format, standard IPv6 address notation, or FQDN.
For example: 123.123.123.123 or 2001:db8:85a3::8a2e:370:7334 or dell.com .
Choose a format that is consistent with the networking technology or infrastructure. The Test Trap functionality cannot
detect incorrect choices based on the current network conguration (example, use of an IPv6 destination in an IPv4-only
environment).
• In the Community String eld, enter a valid community string to which the destination management station belongs.
This community string diers from the community string on the Chassis → Network → Services page. The SNMP traps
community string is the community that CMC uses for outbound traps destined to management stations. The community
string on the
Chassis → Network → Services page is the community string that management stations use to query the
SNMP daemon on CMC.
NOTE: CMC uses a default SNMP community string as public. To ensure higher security, it is recommended to
change the default community string and set a value which is not blank.
• Under Enabled, select the check box corresponding to the destination IP to enable the IP address to receive the traps. You
can specify up to four IP addresses.
3. Click Apply to save the settings.
4. To test whether the IP address is receiving the SNMP traps, click Send in the Test SNMP Trap column.
The IP alert destinations are congured.
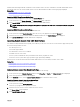
Conguring SNMP Trap Alert Destinations Using RACADM
To congure IP alert destination using RACADM:
1. Open a serial/Telnet/SSH text console to CMC and log in.
NOTE: Only one lter mask may be set for both SNMP and email alerting. You can skip step 2 if you have already
selected the lter mask.
2. Enable alert generation:
racadm config -g cfgAlerting -o cfgAlertingEnable 1
3. Specify the events for which alerts must be generated:
racadm config -g cfgAlerting -o cfgAlertingFilterMask <mask value>
where <mask value> is a hex value between 0x0 and 0x.
To obtain the mask value, use a scientic calculator in hex mode and add the second values of the individual masks (1, 2, 4, and
so on) using the <OR> key.
For example, to enable trap alerts for Battery Probe Warning (0x2), Power Supply Failure (0x1000), and KVM failure (0x80000),
key 2 <OR> 1000 <OR> 80000 and press the <=> key.
The resulting hex value is 81002, and the mask value for the RACADM command is 0x81002.
116