
Users Guide

To add MAC addresses to the network share:
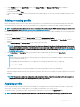
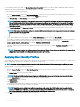
1 Go to the Server Proles page. In the Boot Identity Proles > Manage Virtual MAC Address Pool section, click Add MAC
Addresses.
2 Enter the starting MAC address of the MAC address pool in the Starting MAC Address eld.
3 Enter the count of the MAC addresses that you want to add, in the Number of MAC Addresses eld.
The valid values are from 1 to 3000.
4 Click OK to add MAC addresses.
For more information, see the CMC for Dell PowerEdge FX2/FX2s Online Help.
Removing MAC Addresses
You can remove a range of MAC addresses from the network share by using the Remove MAC Addresses option available in the CMC
web interface.
NOTE: You cannot remove MAC addresses if they are active on the node or are assigned to a prole.
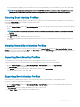
To remove MAC addresses from the network share:
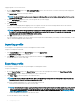
1 Go to the Server Proles page. In the Boot Identity Proles > Manage Virtual MAC Address Pool section, click Remove MAC
Addresses.
2 Enter the starting MAC address of the MAC address pool in the Starting MAC Address eld.
3 Enter the count of the MAC addresses that you want to remove, in the Number of MAC Addresses eld.
4 Click OK to remove MAC addresses.
Deactivating MAC Addresses
You can deactivate MAC addresses that are active by using the Deactivate MAC Address(es) option in the CMC web interface.
NOTE
: Use the Deactivate MAC Address(es) option only if the server is not responding to the Clear Identity action or the MAC
address is not used in any server.
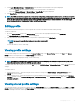
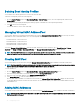
To remove MAC addresses from the network share:
1 Go to the Server Proles page. In the Boot Identity Proles > Manage Virtual MAC Address Pool section, select the active MAC
address(es) that you want to deactivate.
2 Click Deactivate MAC Address(es).
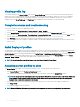
Launching iDRAC using Single Sign-On
CMC provides limited management of individual chassis components, such as servers. For complete management of these individual
components, CMC provides a launch point for the server’s management controller (iDRAC) web-based interface.
A user may be able to launch the iDRAC web interface without having to log in a second time, as this feature utilizes single sign-on. Single
sign-on policies are:
• A CMC user who has server administrative privilege, is automatically logged in to iDRAC using single sign-on. Once on the iDRAC site,
this user is automatically granted Administrator privileges. This is true even if the same user does not have an account on iDRAC, or if
the account does not have the Administrator’s privileges.
• A CMC user who does NOT have the server administrative privilege, but has the same account on iDRAC is automatically logged in to
iDRAC using single sign-on. Once on the iDRAC site, this user is granted the privileges that were created for the iDRAC account.
• A CMC user who does not have the server administrative privilege, or the same account on the iDRAC, is not automatically logged in to
iDRAC using single sign-on. This user is directed to the iDRAC login page when the Launch iDRAC GUI is clicked.
Conguring
servers 99