
Users Guide


Generating public keys for systems running Windows
Before adding an account, a public key is required from the system that accesses the CMC over SSH. There are two ways to generate the
public/private key pair: using PuTTY Key Generator application for clients running Windows or ssh-keygen CLI for clients running Linux.
This section describes simple instructions to generate a public/private key pair for both applications. For additional or advanced usage of
these tools, see the application Help.
To use the PuTTY Key Generator to create a basic key for clients running Windows:
1 Start the application and select SSH-2 RSA for the type of key to generate (SSH-1 is not supported).
2 Enter the number of bits for the key. Ensure that the RSA key size is between 1024 and 4096.
NOTE:
• CMC may not display a message if you add keys less than 1024 or greater than 4096, but when you try to log in with these
keys, it fails.
• CMC accepts RSA keys up to key strength 4096, but the recommended key strength is 1024.
3 Click Generate, and move the mouse in the window as directed.
After the key is created, you can modify the key comment eld.
You can also enter a passphrase to make the key secure. Ensure that you save the private key.
4 You have two options for using the public key:
• Save the public key to a le to upload later.
• Copy and paste the text from the Public key for pasting window when adding the account using the text option.
Generating public keys for systems running Linux
The ssh-keygen application for Linux clients is a command line tool with no graphical user interface. Open a terminal window and at the
shell prompt type:
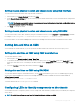
ssh-keygen –t rsa –b 1024 –C testing
where,
–t must be rsa.
–b species the bit encryption size between 768 and 4096.
–c allows modifying the public key comment and is optional.
The < passphrase > is optional. After the command completes, use the public le to pass to the RACADM for uploading the le.
Accessing CMC web interface
Before you log in to CMC using the web interface, make sure that you have congured a Supported Web Browser and the user account is
created with the required privileges.
NOTE
: If you are using Microsoft Internet Explorer, connect using a proxy, and if you see the error The XML page cannot be
displayed, you must disable the proxy to continue.
To access the CMC web interface:
1 Open a web browser supported on your system.
38
Logging into CMC