
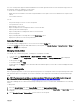
Users Guide


NOTE: The Network Share option is enabled and the details are displayed in the Stored Proles section only if the
network share is mounted and is accessible. If the Network Share is not connected, congure the Network Share for
the chassis. To congure the Network Share, click Edit in the Stored Proles section. For more information, see
Conguring Network Share Using CMC web Interface
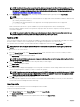
4. In the Prole Name and Description elds, enter the prole name and description (optional), and click Save Prole.
NOTE:
When saving a Server Prole the list of characters that are not supported for the Prole Name include the character hash
(#), comma (,) and question mark (?).
The standard ASCII extended character set is supported. The following special characters are not supported:
), “, ., *, >, <, \, /, :, and |
CMC communicates with the LC to get the available server prole settings and store them as a named prole.
A progress indicator indicates that the Save operation is in progress. After the action is complete, a message, "Operation
Successful" is displayed.
NOTE: The process to gather the settings runs in the background. Hence, it may take some time before the new
prole is displayed. If the new prole is not displayed, check the prole log for errors.
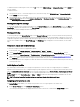
Applying prole
Server cloning is possible only when server proles are available as stored proles in the nonvolatile media on the CMC or stored on
the remote share. To initiate a server cloning operation, you can apply a stored prole to one or more servers.
The operation status, slot number, slot name, and model name is displayed for each server in the Apply Prole table.
NOTE: If a server does not support Lifecycle Controller or the chassis is turned o, you cannot apply a prole to the
server.
To apply a prole to one or more servers:
1. Go to the Server Proles page. In the Save and Apply Proles section, select the server or servers for which you want to
apply the selected prole.
The Select Prole drop-down menu gets enabled.
NOTE: The Select Prole drop-down menu displays all available proles and sorted by type, including those that are
on the repository and SD card.
2. From the Select Prole drop-down menu, select the prole that you want to apply.
The Apply Prole option gets enabled.
3. Click Apply Prole.
A warning message is displayed that applying a new server prole overwrites the current settings and also reboots the selected
servers. You are prompted to conrm if you want to continue the operation.
NOTE: To perform server cloning operations on servers, the CSIOR option must be enabled for the servers. If CSIOR
option is disabled, a warning message is displayed that CSIOR is not enabled for the servers. To complete the blade
cloning operation, make sure to enable CSIOR option on the servers.
4. Click OK to apply the prole to the selected server.
The selected prole is applied to the servers and the servers may be rebooted immediately, if necessary. For more information,
see the CMC for Dell PowerEdge FX2/FX2s Online Help.
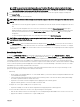
Importing prole
You can import a server prole that is stored on a management station to CMC.
To import a stored prole from CMC:
1. In the Server Proles page, in the Stored Proles section, click Import Prole.
The Import Server Prole section is displayed.
2. Click Browse to access the prole from the required location and then click Import Prole.
82