
User guide

User Guide NetXtreme II
September 2013
Broadcom Corporation
Document INGSRVT78-CDUM100-R iSCSI Boot Page 93
Note that you will use this command prompt window in all subsequent steps.
6. Enter the following commands:
attrib -r .\src\sources\boot.wim
attrib -r .\src\sources\install.wim
7. Enter run the following command to mount the boot.wim image:
dism /mount-wim /wimfile:.\src\sources\boot.wim /index:2 /mountdir:.\mnt
Note that you must always use “2” for the index value.
8. Enter the following commands to add the below drivers to the currently mounted image:
dism /image:.\mnt /add-driver /driver:C:\Temp\evbd\evbd.inf
dism /image:.\mnt /add-driver /driver:C:\Temp\bxnd\bxnd.inf
dism /image:.\mnt /add-driver /driver:C:\Temp\bxvbd\bxvbd.inf
dism /image:.\mnt /add-driver /driver:C:\Temp\bxfcoe\bxfcoe.inf
dism /image:.\mnt /add-driver /driver:C:\Temp\b57nd60a\b57nd60a.inf
dism /image:.\mnt /add-driver /driver:C:\Temp\bxois\bxois.inf
9. Enter the following command to unmount the boot.wim image:
dism /unmount-wim /mountdir:.\mnt /commit
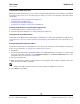
10. Enter the following command to determine the index of the desired SKU in the install.wim image:
dism /get-wiminfo /wimfile:.\src\sources\install.wim
For example, in Windows Server 2012, index 2 is identified as “Windows Server 2012 SERVERSTANDARD.”
11. Enter the following command to mount the install.wim image:
dism /mount-wim /wimfile:.\src\sources\install.wim /index:X /mountdir:.\mnt
Note that X is a placeholder for the index value that you obtained in step 10.
12. Enter the following commands to add these drivers to the currently mounted image:
dism /image:.\mnt /add-driver /driver:C:\Temp\evbd\evbd.inf
dism /image:.\mnt /add-driver /driver:C:\Temp\bxnd\bxnd.inf
dism /image:.\mnt /add-driver /driver:C:\Temp\bxvbd\bxvbd.inf
dism /image:.\mnt /add-driver /driver:C:\Temp\bxfcoe\bxfcoe.inf
dism /image:.\mnt /add-driver /driver:C:\Temp\b57nd60a\b57nd60a.inf
dism /image:.\mnt /add-driver /driver:C:\Temp\bxois\bxois.inf
13. Enter the following command to unmount the install.wim image:
dism /unmount-wim /mountdir:.\mnt /commit
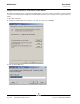
14. Enter the following command to create an .iso file:
oscdimg -e -h -m -n -lslipstream -bootdata:2#p0,e,b"c:\Program Files\Windows
AIK\Tools\PETools\amd64\boot\etfsboot.com"#pEF,e,b"c:\Program Files\Windows
AIK\Tools\PETools\amd64\boot\efisys.bin" c:\temp\x\src c:\temp\Win20xxMOD.iso
Note that Platform is a placeholder for the architecture of the operating system that you want to install, such as amd64
or x86. Also, xx in the file names is a placeholder for the Windows Server OS version (2012, 2008R2, 2008SP2.)
15. Using a DVD-burning application, burn the .iso file you created to a DVD.
16. Use the DVD that you created in step 15 to install the applicable Windows Server version.