
User's Manual


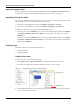


Table Of Contents
- Contents
- About This Guide
- Chapter 1
- Active System Manager Overview
- Chapter 2
- Getting Started
- Chapter 3
- Account Management
- Chapter 4
- User Profile Management
- Managing Security Functions
- Managing Groups
- Defining Permissions
- Modifying Permissions
- Managing Authentication Repositories
- Chapter 5
- Inventory Management
- Understanding Resource Modeling
- Building a Standard Active System Manager Inventory
- Configuring Discovery Setup
- Running Discovery
- Using Resource Types
- Using Resource Instances
- Building Resource Instances
- Modifying Core Properties for Resource Instances
- Modifying Resource Instance Resource Availability Dates
- Modifying Resource Instance Interfaces
- Displaying the Resource Availability Calendar View
- Deleting Resource Instances
- Setting Inventory Parameter Values
- Resolving Resource Dependencies
- Using Resource Interface Types
- Linking Resources
- Importing Inventory
- Importing Connectivity
- Exporting Connectivity
- Managing Resource Pools
- Managing Maintenance Windows
- Managing Virtual Resources
- Chapter 6
- Firmware Management
- Creating Active System Manager Software Repositories
- Updating Dell Chassis Firmware from the Operations Center
- Updating Dell Server Firmware
- Updating Dell Blade/Rack Servers Firmware from the Operation Center
- Updating Dell Blade/Rack Servers Firmware from an Active Session
- Updating Dell Blade/Rack Servers Firmware Using the Attach Server Profile Virtual Operation
- Updating Dell Blade/Rack Servers Firmware through an Orchestration
- Updating Dell Blade/Rack Servers Firmware Using the Attach Server Profile Custom Operation
- Minimum Firmware Versions for Active System Manager Components
- Chapter 7
- Server Template and Profiles
- Creating a Server Template
- Editing a Server Template
- Adding or Editing BIOS Information on a Server Template
- Adding or Editing RAID Information on a Server Template
- Adding or Editing Firmware Settings on a Server Template
- Adding or Editing Networks Settings on a Server Template
- Naming Conventions when using Orchestrations
- Server Profiles
- Chapter 8
- Using Inventory
- Chapter 9
- Repository Management
- Chapter 10
- Network Management
- Chapter 11
- Template Management
- Template Types
- Working with Templates
- Creating New Templates
- Saving Templates
- Changing Template Ownership and Permissions
- Opening Templates
- Closing Templates
- Deleting Templates
- Managing Template History Details
- Filtering Templates
- Validating Templates
- Importing Templates
- Exporting Templates
- Attaching a Template Image
- Scheduling Templates
- Archiving Templates using the Templates View
- Restoring Archived Templates
- Updating Templates using the Template Editor
- Viewing and Modifying Template Properties
- Adding Resource Types
- Setting Resource Type Properties for Scheduling
- Deleting Resource Types
- Adding Resource Types Based on Manufacturer Only
- Adding Resource Instances
- Modifying Resource Properties
- Deleting Resource Instances
- Defining Provisioning Policies
- Supporting Layer 2 Switching
- Using Annotations
- Updating Templates using the Link Editor
- Associating an Orchestration Workflow with Templates
- Chapter 12
- Session Management
- Introducing the Sessions Perspective
- Working with Running Sessions
- Scheduling a Session Using Templates
- Creating an Instant Session
- Opening Sessions
- Opening the Session Editor
- Using the Sessions Calendar
- Viewing Session Properties
- Editing Default Session Properties
- Assigning and Changing Session Ownership
- Canceling Sessions
- Deleting Sessions
- Purging Sessions
- Rescheduling Sessions
- Managing Session Links
- Handling Link Preemption
- Managing Session Resources
- Associating Scripts to Sessions
- Archiving Sessions
- Supporting Layer 2 Switching
- Saving Sessions
- Configuring Session Notifications and Reminders
- Starting and Stopping ASAP Rescheduling
- Managing Virtual Resources
- Chapter 13
- Orchestration Management
- Chapter 14
- Working with Test and Script Execution
- Chapter 15
- Reports
- Chapter 16
- Settings
- Chapter 17
- Dashboard

Active System Manager User Interface Elements
1-22 Active System Manager User Guide, Release 7.1
3. Delete content from the database, by highlighting records and selecting either Edit > Delete, using the
Delete option on the right-click menu, or pressing the Delete or Backspace key.
Note You must resolve any existing dependencies before you delete the record.
4. Save your changes to the database, either by selecting File > Save, or right-clicking and then selecting
Save.
5. Optional. Discard your changes by closing the multi-editor without saving your changes, or
right-clicking and selecting Revert.
The multi-editor manages the following functions:
• Column Header Functionality
• Icon Overlays
• Pasting Functions
• Drag-and-Drop
• Fill Feature
• Context Menu Options Using Right-Mouse Click
Column Header Functionality
When viewed in the multi-editor, the resource types and resource instances display in a tabular format,
similar to a spreadsheet. The column headers support menu options for sorting and hiding the columns. The
sort order for each column can be switched from ascending to descending with the right-click menu, or by
left-clicking the column header. The Hide menu controls what columns are visible in the multi-editor. Use
the Hide and Show options to control the column display. You can rearrange the columns by dragging the
headers with your mouse pointer.
In addition, you can create new columns for the configuration parameter and inventory parameter values,
and then use the special Paste or Fill functions to populate the fields, which is effective at ensuring global
consistency for these values.
Icon Overlays
The icon overlays are unique to the multi-editor. The plus sign (+) signifies that the record is new and has
not been saved to the database. The minus sign (-) signifies that the record has been marked for deletion
from the database. The asterisk (*) signifies that the record exists in the database and has been modified in
the multi-editor, but those changes have not yet been saved to the database. When you save your changes
to the database, these options go into effect and the icon overlays disappear. For a listing of icon overlays,
see Table 1-11 on page 1-37.