
Install Guide
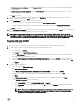


7. Select Manual from the Method drop-down list.
8. In the Addresses table, type the static IP address, subnet mask, gateway, and then click Add.
9. Click Apply to set the static IP address of the appliance.
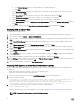
Conguring Virtual Appliance with Two NICS
If the OS Installation network is not routed, you must add an extra vNIC to the ASM appliance to make it communicate and respond
to TFTP requests on the OS Installation network.
1. In VMware vSphere, select the Virtual Appliance and select “Power O”.
2. Select Virtual Appliance and select “Edit Settings”.
3. Select “Add” in the properties page and choose “Ethernet Adapter”. Select Adapter Type as “VMXNET3”.
4. Select the PXE port group name that needs to be associated with the new network.
5. Select “Next” and then “OK” to ensure that the settings are updated on the Virtual Appliance.
6. Assign static IP address on the new network using the steps provided in section “Conguring Static IP Address in the Virtual
Appliance”.
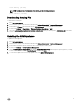
Conguring ASM Virtual Appliance as PXE Boot Responder
ASM may be congured to act as the DHCP server and PXE responder on an OS Installation network if one is not present in the
environment. This can be congured through the Getting Started menu for appliance setup in the ASM user interface. If an external
DHCP or PXE server is used for the OS Installation network, follow the instructions in the section Conguring DHCP or PXE on
External Servers.
NOTE: Ensure that your DHCP scope has enough IP addresses. The installation process can temporarily consume
between 4-8 IPs during the initial PXE boot process. This is based on interface card conguration and the number of
physical interfaces on the server. These IPs only used temporarily during server conguration and installation.
19