
Users Guide

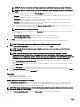


Table Of Contents
- Active System Manager Release 8.3.1 User’s Guide
- Overview
- Getting started with ASM 8.3.1
- Initial Setup
- Dashboard
- Services
- Deploying service
- Add existing service
- Viewing service details
- Editing service information
- Deleting service
- Exporting service details
- Retrying service
- Viewing all settings
- Migrating servers (service mobility)
- Migrating servers
- Upgrading components
- Adding components to an existing service deployment
- Deleting resources from service
- Templates
- Managing templates
- Viewing template details
- Creating template
- Editing template information
- Building template overview
- Building and publishing template
- Importing template
- Exporting template
- Uploading external template
- Editing template
- Viewing template details
- Deleting template
- Cloning template
- Deploying service
- Deploying multiple instances of service
- Adding Attachments
- Decommissioning services provisioned by ASM
- Component types
- Component combinations in templates
- Additional template information
- Managing templates
- Resources
- Resource health status
- Resource operational state
- Port View
- Resource firmware compliance status
- Updating firmware
- Removing resources
- Viewing firmware and software compliance report
- Discovery overview
- Configuring resources or chassis
- Removing discovered resources
- Configuring default firmware repository
- Running firmware compliance
- Configuring global chassis settings
- Configuring unique chassis settings
- Configuring unique server settings
- Configuring unique I/O module settings
- I/O module configuration
- Completing the chassis configuration
- Adding or editing Chassis Management Controller (CMC) user
- Adding or editing Integrated Dell Remote Access Controller (iDRAC) user
- Updating resource inventory
- Viewing resource details
- Understanding server pools
- Settings
- Troubleshooting

a. Under Chassis, select one of the following methods for obtaining IP addresses for the chassis:
• Use existing chassis IP address — ASM does not change the IP address of the chassis.
NOTE: This option is valid only for chassis that have been previously congured and deployed inside or
outside of ASM. Do not choose this option for new chassis.
Assign static IP address from the network — Assign a static IP address from the pool of IP addresses in a
management network. To add a network, click New and complete the Dene Network page.
b. Under Servers, select one of the following methods for obtaining IP addresses for the chassis:
• Use existing chassis IP address — ASM does not change the IP address of the chassis.
NOTE: This option is valid only for servers that have been previously congured and deployed inside or
outside of ASM. Do not choose this option for new chassis.
• Assign IP address via DHCP — Use DHCP to automatically allocate an IP address. This option is not valid for chassis.
• Assign static IP address from the network — Assign a static IP address from the pool of IP addresses in a
management network. To add a network, click New and complete the Dene Network page.
c. Under I/O Modules, select one of the following methods for obtaining IP addresses for the chassis:
• Use existing chassis IP address — ASM does not change the IP address of the device.
NOTE: This option is valid only for I/O modules that have been previously congured and deployed inside or
outside of Active System Manager. Do not choose this option for new devices.
• Assign IP address via DHCP — Use DHCP to automatically allocate an IP address. This option is not valid for chassis.
• Assign static IP address from the network — Assign a static IP address from the pool of IP addresses in a
management network. To add a network, click New and complete the Dene Network page.
2. In the Credentials section, perform the following actions to select or modify the root credentials for chassis and associated
servers and I/O modules:
a. From the Chassis Credentials drop-down list, select the credentials for accessing the chassis. To create a root credential,
click Create New. To edit a credential, select the credential from the Chassis Credentials drop-down list and click Edit.
b. From the Blade Credentials drop-down list, select the credentials for accessing blade server within the chassis. To create
a root credential, click Create New. To edit a credential, select the credential from the Blade Credentials drop-down list
and click Edit.
c. From the I/O Module Credentials drop-down list, select the credentials for accessing I/O modules within the chassis. To
create a root credential, click Create New. To edit a credential, select the credential from the I/O Module Credentials
drop-down list and click Edit.
3. Click Next.
Discovery and onboarding of rack servers
ASM supports not only discovering rack servers but also allows you to onboard the servers by setting up the initial conguration of
management IP and iDRAC credentials.
NOTE: To perform initial discovery and conguration, ensure that the management IP is set on the rack server and that
the IP is accessible through the network by ASM. While conguring IPs on the rack server, you must also ensure that the
nal IP range used for hardware management is accessible through the network by ASM to complete discovery of these
servers.
To discover and add rack servers to the resource pool,
1. On the home page, click Resources, and then click Discover.
2. On the Welcome page, click Next.
3. On the Identify Resources page, click Add Resource Type.
4. From the Resource Type drop-down menu, select Server.
5. In the IP Address Range eld, type the iDRAC IP address.
73