
Users Guide


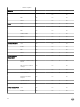
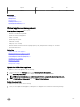


Table Of Contents
- Active System Manager Release 8.3.1 User’s Guide
- Overview
- Getting started with ASM 8.3.1
- Initial Setup
- Dashboard
- Services
- Deploying service
- Add existing service
- Viewing service details
- Editing service information
- Deleting service
- Exporting service details
- Retrying service
- Viewing all settings
- Migrating servers (service mobility)
- Migrating servers
- Upgrading components
- Adding components to an existing service deployment
- Deleting resources from service
- Templates
- Managing templates
- Viewing template details
- Creating template
- Editing template information
- Building template overview
- Building and publishing template
- Importing template
- Exporting template
- Uploading external template
- Editing template
- Viewing template details
- Deleting template
- Cloning template
- Deploying service
- Deploying multiple instances of service
- Adding Attachments
- Decommissioning services provisioned by ASM
- Component types
- Component combinations in templates
- Additional template information
- Managing templates
- Resources
- Resource health status
- Resource operational state
- Port View
- Resource firmware compliance status
- Updating firmware
- Removing resources
- Viewing firmware and software compliance report
- Discovery overview
- Configuring resources or chassis
- Removing discovered resources
- Configuring default firmware repository
- Running firmware compliance
- Configuring global chassis settings
- Configuring unique chassis settings
- Configuring unique server settings
- Configuring unique I/O module settings
- I/O module configuration
- Completing the chassis configuration
- Adding or editing Chassis Management Controller (CMC) user
- Adding or editing Integrated Dell Remote Access Controller (iDRAC) user
- Updating resource inventory
- Viewing resource details
- Understanding server pools
- Settings
- Troubleshooting

Updating repository path
By default, it comes with a repository path. To update the repository path, perform the following tasks:
1. Click Settings, click Virtual Appliance Management under Settings.
Virtual Appliance Management page is displayed
2. Click Edit beside Update Repository Path option.
3. Update Repository Path window is displayed. You can update the path using Update Repository Path eld.
4. Click Save to save the updated path.
5. It directs you to Virtual Appliance Management page. On the page, under Update Repository Path, you get the updated
information regarding Current Virtual Appliance Version, Available Virtual Appliance Version, Repository Path
6. To perform the update, click Update Virtual Appliance.
7. After you click Update Virtual Appliance, a dialogue box is displayed with few statement and warning message.
NOTE: The message displayed in the dialogue box is “ Updating the appliance restarts the system. The action will
log o all current users and cancel all jobs in progress.” It even displayed the message “ The update process takes
approximately 25 minutes depending on your data connection: 15 minutes to download the update and 10 minutes to
apply.” Apart from these, it gives you information about number of logged-in users, and in progress jobs. At the end,
it asks for your conrmation “ Are you sure you want to perform an appliance update?”
8. After reading the message, if you decide that it’s good to proceed with update virtual appliance, click Yes on the dialogue box.
It updates your appliance.
NOTE: This process restarts your system. Once update and restore is complete, you will be logged in again. Once the
update process is complete, it redirects you to a login page. In the meantime, it monitors the progress of the update and
messages you accordingly. At the end, you get a tab stating
Click to log in. After you click the tab, you will be directed to
a login page to log in again to the appliance.
Adding Dell ASM Service Tag
To add Dell ASM Service Tag:
1. On the home page, click Settings, and then click Virtual Appliance Management.
2. Under Dell ASM Service Tag, click Edit, type Dell ASM Service Tag, and click Save.
IP Verication Port Number
To verify if IP addresses are in, use before they are used for deployment:
1. On the home page, click Settings, and then click Virtual Appliance Management.
2. Under IP Verication Port Number, click Edit.
3. In the Port Numbers Used for IP Verication box, add or remove the port numbers used by ASM to verify IP addresses and
click Save.
NOTE: Port numbers must be entered in comma-separated list, and must be between 1 and 65535.
NOTE: Default ports used by ASM are 135, 22, and 80.
Virtual identity pools
In ASM, virtual identity pools provide a conceptual way to categorize the virtual identities that help in network communication.
A virtual identity pool can include any combination of following virtual identities:
• MAC
• IQN
119