CLEANING GUIDE
SensorScope and DigitalDuster System The safest and most effective system for cleaning your digital SLR image sensor. Table of Contents Introduction.........................................................................1 Getting Started....................................................................1 Product Product Contents.................................................................3 Contents.................................................................
Getting Started Congratulations on purchasing the SensorScope System. You are on your way to ensure that you produce the clearest photographs possible. Read this guide carefully before you start cleaning your digital SLR image sensor. This guide will help you clean your sensor safely and effectively. DO NOT ATTEMPT TO CLEAN YOUR SENSOR WITHOUT READING THIS ENTIRE MANUAL. You need to clean your sensor. Dirty sensors are a real problem. What you can’t see can affect your pictures.
Take better pictures. Cleaner sensors make cleaner images. Save time and money by taking cleaner images and minimizing time sitting at the computer with Photoshop®. SensorScope just works. No other product on the market is safer for cleaning your sensor. With SensorScope you know if your camera needs cleaning and you know when to stop cleaning. The SensorScope combined with the SensorVac, SensorWands and SensorSolution makes it the safest and most effective system for cleaning your digital SLR image sensor.
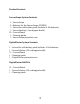
Product Contents SensorScope System Contents 1 – SensorScope 2 – Batteries for the SensorScope (CR2025) 1 – SensorVac with battery pack (includes 4 AA batteries) 1 – SensorSolution (.5 oz dropper bottle) 24 – SensorWands 1 – Cleaning guide 1 – SensorScope protective case DigitalDuster System Contents 1 – SensorVac with battery pack (includes 4 AA batteries) 1 – SensorSolution (.
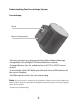
Understanding Your SensorScope System SensorScope Power Battery Compartment •Prevents unnecessary cleaning and possible accidental damage. •Compatible with all digital SLR removable lens cameras. •5x magnification lens for enhanced view of CCD or CMOS sensor surface. •4 ultra bright white LED bulbs provide total focused illumination of the sensor chamber. •Small design fits easily into your camera bag. Note: The SensorScope is designed to fit specifically on Nikon, Canon, and Fuji digital SLR cameras.
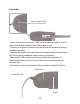
SensorVac Power / Light Switch SENSOR VAC DELKIN DEVICES, INC. •Uses non-contact suction to safely remove abrasive debris such as silica, quartz, and metallics from the image sensor. •“Power Up” function increases suction power to remove heavier or stubborn particles. •Specially designed soft static free non-shedding brush tip protects the sensor from accidental hard contact or damage. •Powered by USB or battery pack (provided) for portable use.
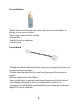
SensorSolution •Breaks the chemical bond that causes dirt, dust, oils, and debris to adhere to the sensor surface. •Easily wipes away with no residue. •Alcohol free. •Safe for travel on airplanes. •Quick drying. SensorWand •Wicked wand head effectively draws any excess liquid away from your camera to prevent pooling. •Double sided design allows for wet/dry cleaning while leaving no streaks. •Soft non-abrasive lint-free fabric. •Heat sealed fabric to prevent tearing and exposure of plastic wand .
Before you get started •It is recommended to use an AC adapter to power your camera during cleaning. Check your owner’s manual to see if your camera came with an AC adapter. Some cameras require an AC adapter to enter sensor-cleaning mode. •If you do not have an AC adapter for your camera, make sure your camera’s battery is fully charged before cleaning its sensor. Some cameras require that the battery be charged to certain percentage before the sensor cleaning option becomes available.
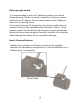
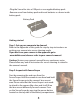
•Plug the SensorVac into a USB port or use supplied battery pack. •Remove cover from battery pack and insert batteries as shown inside battery pack. Battery Pack Getting started Step 1: Set up your camera to be cleaned Refer to the Appendix of this guide for step by step instructions on putting your camera into sensor-cleaning mode. If you don’t see your camera in the appendix go to www.delkin.com/clean or refer to your camera’s manual. Caution: Review your camera’s manual for any cautionary notes.
Examine the sensor for any contaminants. You may want to rotate the SensorScope left and right to fully examine all areas of the sensor chamber. Dirty Clean If your sensor appears clean, stop here. Do not clean your sensor if it doesn’t need it. Over cleaning your sensor increases the risk of permanent damage to your sensor and your camera. Note: If you did not purchase the SensorScope System or DigitalDuster System, you will still be able to clean your sensor safely and effectively.
Step 4: Inspect again with SensorScope Inspect your sensor with the SensorScope to make sure all the large debris has been removed. Step 5: Apply SensorSolution and wipe with SensorWand Remove one SensorWand from its packaging. Moisten one end of the wand with two drops of SensorSolution. Caution: Do not use more than two drops of SensorSolution. Using more than two drops of SensorSolution may cause damage to your camera and its sensor.
After wiping once left to right and then once more right to left, flip the SensorWand over and use the dry end (Side B) to wipe any extra SensorSolution that may have accumulated on your sensor. Use the same wiping technique that you used with the wet end. (see diagram) Caution: Be sure to only wipe your sensor as directed in these instructions; over wiping can cause damage and reapply dust accumulated on the wand during the first wipe.
FAQs What if my camera has an integrated sensor cleaning function? Most digital SLR integrated sensor cleaning systems use a vibration technique to remove the dust from the sensor. However, this function simply shakes the dust off the sensor and does not remove it from the digital camera chamber. Since the sensor is electronically charged, the static build up will attract the dust back on to the sensor during continued use.
How does a sensor get dirty? Contaminants can enter your digital SLR camera in various forms and in many different ways, but they all affect the quality of your photographs. Some contaminants come from internal man made sources within the camera such as chamber lubricant and manufacturing dust that become shaken out, and others from external sources in the environment such as pollen, small fibers from clothing, dew and organic dust.
Appendix Camera Sensor Cleaning Mode For a complete up to date list of cameras go to: www.delkin.com/clean We strongly recommend reading your camera manual to learn how to put your camera into sensor cleaning mode. This guide is intended to be a quick reference only. Canon Canon Digital Rebel – 300D •Make sure the battery is fully charged. •Set the mode dial to M and turn the power on. •Press the Menu button and use the arrow buttons to select Sensor Clean located in the tools menu. •Press the Set button.
Canon Digital Rebel XTi – 400D •Make sure the battery is fully charged. •Set the mode dial to M and turn the power on. •Press the Menu button and use the arrow buttons to select Sensor Cleaning located in the tools menu. •Press the Set button. •Use the arrow buttons to select OK and press the Set button. •The mirror will lock up and the shutter will remain open until the power is turned off. •Remove the camera lens. •Turning the power off will reset the mirror and shutter.
Canon 20D •Make sure the battery is fully charged. •Set the mode dial to M and turn the power on. •Press the Menu button and use the dial to select Sensor Clean located in the tools menu. •Press the Set button. •Use the dial to select OK and press the Set button. •The mirror will lock up and the shutter will remain open until the power is turned off. •Remove the camera lens. •Turning the power off will reset the mirror and shutter. Canon 30D •Make sure the battery is fully charged.
•Press the shutter button. The mirror will lock up and the shutter will remain open until the power is turned off. •Remove the camera lens. •Turning the power off will reset the mirror and shutter. Canon 1Ds •Make sure the battery is fully charged. •Turn the power on. •Press and hold the Menu button and turn the dial to the tool2 menu. •Release the Menu button to select the tool2 menu. •Press and hold the Select button and turn the dial to Sensor Cleaning.
Canon 1DS Mark II •Make sure the battery is fully charged. •Turn the power on. •Press and hold the Menu button and turn the dial to the tool2 menu. •Release the Menu button to select the tool2 menu. •Press and hold the Select button and turn the dial to Sensor Cleaning. •Release the Select button to select Sensor Cleaning. •Press and hold the Select button and turn the dial to OK. •Release the Select button to select OK. •Press the shutter button.
Fuji S3 •Make sure the battery is fully charged. •Set the exposure mode dial to M. •Set the release mode switch to single-frame. •Press and hold the Synchro and LCD Illumination buttons and turn the power on. •Press the shutter button. The mirror will lock up and the shutter will remain open until the power is turned off. •Remove the camera lens. •Turning the power off will reset the mirror and shutter. Konica Minolta Maxxum 5D •Make sure the battery is fully charged. •Set the camera to M mode.
•Press the left arrow to highlight Yes and press the Enter button •The mirror will lock up and the shutter will remain open until the power is turned off. •Remove the camera lens. •Turning the power off will reset the mirror and shutter. Nikon Nikon D50 •Make sure the battery is fully charged. •Turn the camera on and press the Menu button. •Use the multi selector to scroll to the tools menu and select Mirror Lock-up. •Press the multi selector to the right to open the Mirror Lock-up sub menu.
Nikon D80 •Make sure the battery is fully charged. The battery level must be at or above 4 bars for the mirror lock-up option to be available. •Turn the camera on and press the Menu button. •Use the multi selector to scroll to the tools menu and select Mirror Lock-up. •Press the multi selector to the right to open the Mirror Lock-up sub menu. •Highlight ON and press the multi selector to the right. •Press the shutter button.
•Press the multi selector to the right to select Start. •Press the shutter button. The mirror will lock up and the shutter will remain open until the power is turned off. •Remove the camera lens. •Turning the power off will reset the mirror and shutter. Nikon D1X •With the camera power off, connect the EH-4 AC adapter. The AC adapter is required for sensor inspection and cleaning. •Turn the power on and press the Menu button. •Use the multi selector to scroll to the CSM menu and select 8. Mirror Lock-up.
Nikon D1H •With the camera power off, connect the EH-4 AC adapter. The AC adapter is required for sensor inspection and cleaning. •Turn the power on and press the Menu button. •Use the multi selector to scroll to the CSM menu and select 8. Mirror Lock-up. •Press the multi selector to the right to open the Mirror Lock-up for CCD Cleaning sub menu. •Highlight ON CCD Cleaning and press the multi selector to the right. The mirror will lock up and the shutter will remain open. •Remove the camera lens.
•Press the right arrow to bring up a Start button and press OK. •Press the shutter button. The mirror will lock up and the shutter will remain open until the power is turned off. •Remove the camera lens. •Turning the power off will reset the mirror and shutter. Olympus E-500 •Make sure the battery is fully charged. •Turn the power on and press the Menu button. •Scroll to the tools2 menu and highlight Cleaning Mode. •Press the right arrow to bring up a Start button and press OK. •Press the shutter button.
Sony Sony A100 •Make sure the battery is fully charged. •Turn the power on and press the Menu button. •Scroll over to the tools menu and press the Enter button. •Scroll over to the tools3 menu. •Scroll down to highlight Clean CCD and press the right arrow button. •Press the Enter button. •Press the left arrow button to highlight Yes and press the Enter button. •The mirror will lock up and the shutter will remain open until the power is turned off. •Remove the camera lens.
DELKIN DEVICES 13350 KIRKHAM WAY POWAY, CA 92064 800.637.8087 858.391.1234 DELKIN EUROPE LTD 46 SOVEREIGN ROAD KINGS NORTON BUSINESS CENTRE BIRMINGHAM B30 3HN Phone: 0800 1313 559 FAX: 08001313 441 © 2006 – Copyright Delkin Devices, Inc. All rights reserved. Delkin Devices, SensorScope, DigitalDuster, and SensorWand are trademarks of Delkin Devices, Inc. All other trademarks are the property of their respective owners.