
Instruction Manual

Page 17
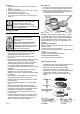
DANGER Hot surfaces may cause
burns! Allow the appliance to cool
down before you clean it.
• Clean the appliance thoroughly after each use.
This enables cooking residues to be removed more
easily and prevents these from burning when the
appliance is used.
• No special cleaning agents are required for
cleaning the appliance. Use warm water with
washing liquid, a soft cloth or sponge to clean the
product and wipe it with a dry cloth.
The surface may be damaged by some
detergents or cleaning materials. Do not
use aggressive detergents, cleaning
powder/cream or any sharp objects.
Damage of the control panel!
Do not remove the control knobs for
control panel cleaning.
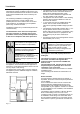
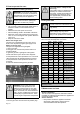
Cleaning the hob
Gas hobs
1. Remove and clean the saucepan carriers and
burner caps.
2. Clean the hob.
3. Install the burner caps and make sure that they
are seated correctly.
4. When installing the upper grills, pay attention to
place the saucepan carriers so that the burners
are centered.
Cleaning the control panel
Clean the control panel and knobs with a damp cloth
and wipe them dry.
Cleaning the oven / oven door
To clean the oven door, use warm water with washing
liquid, a soft cloth or sponge to clean the appliance
and wipe it with a dry cloth.
Don't use any harsh abrasive cleaners
or sharp metal scrapers for cleaning the
oven door. They could scratch the
surface and destroy the glass
Do not use steam cleaners for cleaning.
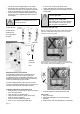
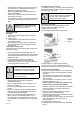
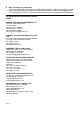
Removal of oven door
The oven door can be disassembled for easier
cleaning of the inner space of the oven.
1.Open oven door entirely.
2.Press hinged shackles back on both sides.
1 Hinged
shackles
2 Hinge
3.Put oven door in a slightly sloping position.
4.Lift the oven door to the front with both hands.
Install oven door again in reverse order after cleaning.
• Always ensure any excess liquid is thoroughly
wiped off after cleaning and any spillage is
immediately wiped dry.
• Never use high-pressure steam equipment or a
water jet for cleaning.
• Do not use cleaning agents that contain acid or
chloride.
• Never use cleaning products containing abrasive
materials as these could damage the decorative
and informative paint applications.
• Remove the burners and wipe them with a thin
damp cloth or a non-abrasive sponge. Use a
neutral detergent. Dry afterward with a soft cloth
and blow away any residual water in the gas outlet
holes.
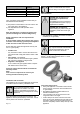
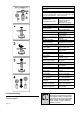
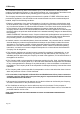
Gas Jet Cleaning Procedure
• Every six months the gas jets on your hob should
be cleaned to ensure continued efficient and safe
operation.
• This may be done using a Gas Jet Cleaning Kit
which may be purchased from your nearest Defy
Service Centre.
• The kit comprises of a sliding T-bar (A) a socket
(B) and a ‘Classic pin’ (C).
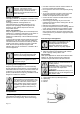
• Fit the T-bar to the socket and remove the pot
stands, burner caps and burner bodies.
1. Insert the socket into the central tube of the burner
so that it locates over the brass gas jet at the
bottom of the tube.
2. Gently loosen the brass gas jet by turning the
socket in an anti-clockwise direction.
3. Carefully lift the socket and loosened brass gas jet
from the central burner tube.
4. Insert the Classic pin into central hole of the jet and
slide it up and down until the jet is free of
accumulated dirt.
5. Re-assemble in reverse order.
6. Clean all the burner jets in the manner described
above.
• If required, the cleaning of the valves should only
be carried out by a qualified Defy technician. i.e.
Burner not functioning correctly.
• Wash removable burner parts weekly with hot
water and detergent.
• Remove any encrustations and ensure that the
burner holes are clear.
• The condition of the gas hose and valve should be
inspected for leaks every time the gas bottle is re-
filled.