
Manual
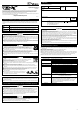

-5-
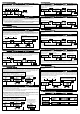
Opening and closing modes are performed after the ignition key is turned on and off.
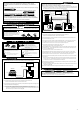
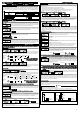
Press the ENTER button when the following figure is displayed. Use the
SELECT/BAR SELECT button to
select the number of cylinders, then press the ENTER button to set the selection.
Set 2-rotary engine at 4 cylinders and 3-rotary engine at 6 cylinders(Set RX-8 at 2 cylinders).
③Setting of Number of Cylinders③Setting of Number of Cylinders
This function is available in which case the temperature sensor(for oil or water) is installed.
Press the ENTER button when the following figure is displayed. Use the
SELECT/BAR SELECT button to
select water temperature, oil temperature, or OFF. Then press the ENTER button to set the selection. Use
the SELECT/BAR SELECT button to set the desired temperature. If the SELECT/BAR SELECT button is
pressed and held, the number is fast-forwarded.
W.TEMP OIL T. OFF
If the special display is set on, the display changes into special display when the vehicle speed continues
0km/h or 0MPH for more than 10 seconds. If 1 is selected at the setting, the engine speed is displayed in
digital. If 2 is selected at the setting, the segment animation is played. Press the ENTER button when the
following figure is displayed. Use the SELECT/BAR SELECT button to select ON or OFF.
⑤Setting of Special Display⑤Setting of Special Display
Press the ENTER button when the following figure is displayed. Use the SELECT/BAR SELECT button to
select ON or OFF of the bar display.
Press the ENTER button when the following figure is displayed. Use the SELECT/BAR SELECT button to
select ON or OFF of the warning buzzer.
Press the ENTER button when the following figure is displayed. Use the SELECT/BAR SELECT button to
select ON or OFF of the auto warning function.
Press the ENTER button when the following figure is displayed. Use the SELECT/BAR SELECT button to
select auto or manual of the dim control mode.
⑦Setting of bar display⑦Setting of bar display
⑧Setting of Warning Buzzer⑧Setting of Warning Buzzer
⑨Setting of Auto Warning⑨Setting of Auto Warning
⑩Setting of Illumination Control⑩Setting of Illumination Control
Opening mode
Closing mode
⑪Setting of Control Output⑪Setting of Control Output
④Setting of Warm-Up④Setting of Warm-Up
2. Opening and Closing Mode2. Opening and Closing Mode
Range of setting
Water temp: 21℃∼120℃(69°F∼248°F)
Oil temp: 51℃∼150℃(123°F∼302°F)
Range of setting
Water temp:21℃∼120℃(69°F∼248°F)
Oil temp:51℃∼150℃(123°F∼302°F)
W.TEMP OIL T. OFF
NOTE: The warning buzzer of the Defi-Link Control Unit II cannot be turned off.
When auto dimmer mode is selected, the brightness of the display is adjusted automatically. Press the ENTER button
to Select one from three stages of the brightness in the auto dimmer mode during the Real Mode or the Peak Mode.
When the manual dimmer mode is selected, the brightness of the display can be set manually from 5 stages in the
Real Mode or the Peak Mode. Refer to 3.Operation Mode / Adjustment of brightness of the display for the detail.
OR
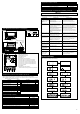
Number of cylinders setting
3 4 5 6 81 2
Warm-Up setting
1 2 OFF
Special display setting
Tachometer Warning setting
Tachometer Warning1 setting
(Green LED lights up.)
Tachometer Warning2 setting
(Green & red LEDs light up.)
Refer to 3.Operation Mode / ⑩Warm-Up Mode for the detail.
Auto Warning is a function which the displayed information is switched from the information you set to the warning
information automatically. Refer to 3.Operation Mode / ⑤Warning Set Mode and ⑥Warning Mode for the detail..
Bar Display setting
Warning Buzzer setting
Auto warning setting
Dim Control setting Auto dimmer modeManual dimmer mode
Control Output setting
This function is available in which case the temperature sensor(for oil or water) is installed.
Press the ENTER button when the following figure is displayed. Use the
SELECT/BAR SELECT button to
select water temperature, oil temperature, or OFF. Then press the ENTER button to set the selection. Use
the SELECT/BAR SELECT button to set the desired temperature. If the SELECT/BAR SELECT button is
pressed and held, the number is fast-forwarded.
Refer to 3. Operation Mode / ⑪Control Output for the detail.
When the Defi-Link VSD X is used with linking it to the Defi-Link System, there is no need to set the number of
cylinders with the Defi-Link VSD X. The setting of the Defi-Link Control Unit II is applicable. Refer to the
operation manual of the Defi-Link Control Unit II for the detail.
※The Defi-Link VSD X is not applicable to 1 and 2 cylinders vehicles if it is connected the Defi-Link
Control Unit II(DF05001) or the Defi-Link Control Unit(DF01301). This product is applicable to 1 and 2
cylinders vehicles if it is connected to the Defi-Link Control Unit II Version 2.0(DF05002).
Warm-Up function is not available when the Defi-Link VSD X is used WITHOUT linking it to the the Defi-Link System.
Auto Warning function is not available when the Defi-Link VSD X is used WITHOUT linking it to the Defi-
Link System.
Control Output function is not available when the Defi-Link VSD X is used WITHOUT linking it to the Defi-
Link System.
OR
OR
OR
OR
OR OR
When the Defi-Link VSD X is used with linking to the Defi-Link System, set warning1 by the D.C.Unit, and
warning2 by the Defi-Link Control Unit II(or the Defi-Link Control Unit). If a warning value for the Defi-Link
tachometer is already set, it is applied as warning2.
※Set up the Defi-Link tachometer warning higher than the tachometer warning1 value. If the value is
set lower than the warning1 value, the warning1 will be invalid.
Press the ENTER button when the following figure is displayed. Green LED is lighted up. Use the
SELECT/BAR SELECT button to set the desired warning1 value. If the SELECT/BAR SELECT button is
pressed and held, the number is fast-forwarded. Press the ENTER button again.
※Refer to operation manual of the Defi-Link Control Unit II(or the Defi-Link Control Unit) as for setting
of warning2. Both green and red LEDs light up during setting of warning2.
OR OR
OR
※Set by Defi-Link Control Unit II
(or Defi-Link Control Unit)
OR OR
W/O LinkingW/O Linking
CommonCommon W/ LinkingW/ LinkingW/O LinkingW/O Linking
CommonCommon W/ LinkingW/ LinkingW/O LinkingW/O Linking
W/O LinkingW/O Linking
W/O LinkingW/O Linking
CommonCommon W/ LinkingW/ LinkingW/O LinkingW/O Linking
CommonCommon W/ LinkingW/ LinkingW/O LinkingW/O Linking
CommonCommon W/ LinkingW/ LinkingW/O LinkingW/O Linking
W/ LinkingW/ Linking
W/ LinkingW/ Linking
CommonCommon W/ LinkingW/ LinkingW/O LinkingW/O Linking
W/O LinkingW/O Linking
W/ LinkingW/ Linking
W/ LinkingW/ Linking
W/ LinkingW/ Linking
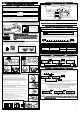
⑥Setting of Tachometer Warning⑥Setting of Tachometer Warning
Range of setting
Tachometer Warning1:1,000RPM∼9,900RPM
Tachometer Warning2: larger value than warning1∼9,900RPM
Tachometer Warning setting
Tachometer Warning1 setting
(Green LED lights up.)
Tachometer Warning2 setting
(Green & red LEDs light up.)
OR
Range of setting
Tachometer Warning1:1,000RPM∼9,900RPM
Tachometer Warning2: larger value than warning1∼9,900RPM
Press the ENTER button when the following figure is displayed. Green LED is lighted up. Use the
SELECT/BAR SELECT button to
set the desired warning1 value. Press the ENTER button again. Green
and red LEDs are lighted up. Use the
SELECT/BAR SELECT button to
set the desired warning2 value. If
the SELECT/BAR SELECT button is pressed and held, the number is fast-forwarded.