
Product Manual


18
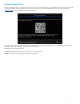
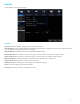
CAPTURE SCHEDULE
Set up a schedule for the DVR to take snap shots.
Channel: Set the Image Capture Schedule for the selected channel.
Continuous: Set the DVR to capture snapshots continuously.
Motion: Set the DVR to capture snapshots only when motion is detected.
Calendar: To choose the days of the week and time frames you want to capture snapshots for, click each
square. Each square represents a 30 minute time frame. Click and drag to highlight and select multiple time
frames at once.
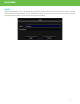
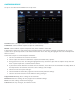
Follow these steps to set the Capture Schedule:
1. Set the schedule for the selected channel.
2. Select if you wish to have continuous capture, or motion only capture.
3. Using your mouse, click and drag to highlight the days and times you wish to capture snap shots for.
Each square represents a 30 minute time frame.
4. If you wish to have different schedules for all channels, select the next channel from the drop down at
the top. To have all channels have the same settings, select Copy.
5. Select Save to save your changes.
6. Select Default to restore this page back to the factory default settings.
7. Select Cancel to leave the menu without saving changes.
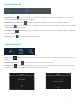
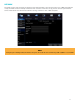
Copy CH1 to All: Copy these settings to all channels.
Default: Restore the settings on this page back to default settings.
Save: Save the settings made on that page.
Cancel: Revert any changes, and exit the menu.