
Setup guide

Dedicated Micros ©2006
76
DS2 Network Guide
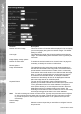
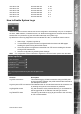
Keyword Triggers This ties in with the 32 keywords previously congured. Enable
the keyword(s) that is be used as a trigger for the camera being
congured.
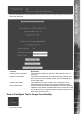
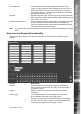
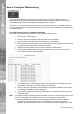
How to Congure the Onboard Firewall
The unit supports an on-board Firewall to add to the security of the unit. The Firewall can be enabled
and work in conjunction with the security applications that are already present in the network.
This feature ensures that unauthorised users can not gain access to the unit and therefore have
any affect of the operation of the system. With IP address and port ltering the rewall has been
designed to let the authorised people access and keep everyone else out.
Note: The Firewall function is always enabled on the unit.
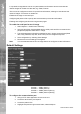
To congure the rewall functionality:
1. If the web Firewall page is not already enabled, enable the Firewall function within
System -> Advanced Features and Reset the unit for the settings to take affect.
2. Select Network -> Firewall.
3. Enable the PING response option by placing a tick in the adjacent box. Disabling this
feature will make the unit less visible on the network.
4. Enter the IP addresses that can have access to the unit, these can be a range of
addresses or a single IP address.
If there is a range of address then enter the rst IP address in the sequence followed
by /nn where nn is the last IP address in the range. Refer to IP Address and Subnet
Calculation below.
5. Enter the subnet of the network, if a subnet has been specied in the IP address then
that will take precedence over this subnet.
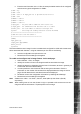
6. Identify the TCP ports that are enabled and available on the unit, enter the same
number in the To and From values if a single port is required.
Note: Access to the unit, even with a valid IP address, will not be possible unless the port used is
on this list
7. Enter the UDP ports on the system that are available, enter the same number in the To
and From values if a single port is require.
Note: Access to the unit, even with a valid IP address, will not be possible unless the port used is
on this list
8. Save the conguration by selecting Save Settings!
Note: For conguration via the OSD refer to Appendix G where all menu options are described.