
Setup guide

Dedicated Micros ©2006
56
DS2 Network Guide
Note: The ISDN TA could be replaced with a modem which then dials another modem connected
to a PPP Server.
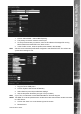
The unit is now congured for ethernet dialout on primary, and ISDN on secondary.
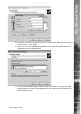
Set up the unit serial port to dial out
The system now has the Dialout prole used to control the connection, and the information on which
number to call to. We now need to congure the serial port to use the TA (or modem)
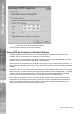
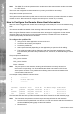
How to Congure the Remote Alarm Host Information
When an alarm is triggered the unit will send a message via the serial port or over the network using
PPP.
This section identies the details of the receiving station and the route the message will take.
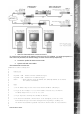
When using the Ethernet network to transmit the alarm message all conguration for the remote
receiving station can be carried out using the web interface, to enable PPP via a modem the
‘proles’ (\etc\proles) le will need to be edited.
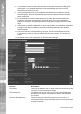
To congure the ’proles’ le:
1. Using an FTP client application connect to the unit.
2. Locate the \etc directory and expand.
3. Locate the proles le.
4. Select open/view/edit (depending on the application) to open the le for editing.
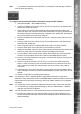
5. The prole information will be displayed, enter the information regarding the modem
link; Username (& Prole Label), Password, Port, Phone No, IP Address Range, Subnet
Mask.
The port options available are:
PPP_Link2 = Serial 2
PPP_Link2 = Serial 1
Ether = Ethernet
Note: The port option is case sensitive, entering the information incorrectly will result in
the function not operating. It is recommended that Serial 2 be used for PPP for the
serial options as Serial 1 is by default set as Debug and this would still enable serial
communication with the unit.
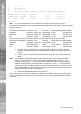
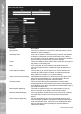
An example of the proles le is shown below:
# —————————-
# Profiles Table List
# —————————-
<Username> <Password> <Port> <Phone No> <IP Address Range> <Subnet Mask>
dm password PPP_Link2 1234567890 10.0.0.1 255.255.255.0
username password PPP_Link2 1234567890 10.0.0.1 255.255.255.0
test password PPP_Link2 1234 10.0.0.1 255.255.255.0
The username will also be the prole information that will be entered in the web interface page.
Note: The username and password must be unique and they will both be case sensitive.
6. Save the le and upload back onto the unit. You will now need to add this information to
the Alarm/VMD Reporting page via the web interface.
7. Reset the unit.