
Setup guide


Dedicated Micros ©2006
40
DS2 Network Guide
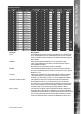
Note: There are a number of zones which have been pre-congured; Zone 27 Archive Slow, Zone
28 Archive Fault, Zone 29 Disk Low, Zone 30 Disk Full, Zone 31 Disk Fault, Zone 32 Panic
alarm.
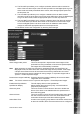
Zone Title This information is stored along with the images in the database,
ensure this has relevance to the alarm trigger. There is an option
to use the camera title.
Pre-Alarm Time This is the period of time prior to the alarm start that will be
included along with the alarm recording for archive and these
images will also be protected from being overwritten.
Alarm Duration This is the minimum time period in seconds from the start of the
alarm that will be protected from being overwritten. This time will
include the alarm trigger, the pulse extension and any post alarm
recording, it will not include the pre-alarm images.
Zone Alarm Input This determines which input or system function will trigger the
zone alarm, the options are; Contacts 1 to 32, VMD 1 to 16,
Presets 1 to 16, Disk Low, Keywords, Disk full, Panic, Archiving
slow, Archiving fault, Disk fault and no contact.
Zone OR Input The Zone OR Input identies an alternative input that can also be
used to trigger the zone alarm. This means an alarm trigger can
be received on the Zone Alarm Input or the Zone OR Input for the
trigger to be activated, the options available are the same as the
Zone Alarm Input.
Zone AND Input The Zone AND Input identies that an alarm trigger needs to
be received on both the Zone Alarm Input and the Zone AND
Input for the trigger to be activated and the alarm action to the
automatically initiated. The options available are the same as the
Zone Alarm Input.
Zone NOT Input The unit will only issue the alarm actions if the trigger is received
on the zone alarm input and not on the Zone NOT input. The
allocated alarm triggers available are the same as the Zone Alarm
Input.
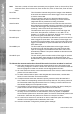
To allocate the cameras and actions that will be carried out when an alarm is received:
13. Select the cameras from the select zone camera list which are to be included in the
zone being congured. To select a camera click the mouse over the cameras these will
then be highlighted. At least one camera must be highlighted at all times.
14. All of the alarm zone actions can be allocated to each of the zones, to select all actions,
place a tick in the select all box.
15. To select individual actions place a tick alongside the relevant action, see the table
below for more information on the actions listed.
16. If multiple cameras have been selected a primary camera must be allocated to the
zone, select the corresponding camera from the drop down list. The primary camera is
the camera that a still image will be taken from for e-mailing on alarm and will be the
rst camera displayed on the Operator monitor.
17. It is possible to send a camera to a preset position on receipt of an alarm, identify the
preset number and the corresponding camera that is to be switched.
18. It is possible to automatically close a relay output when an alarm zone is triggered,
the relay can be connected to an external device; door entry system, loudspeaker
announcement system which means the system can function automatically without user
intervention. Select the relay that is to be actioned on receipt of an alarm.
19. An e-mail can be sent to an e-mail server on alarm, enable this option and identify the
resolution of the image that will be attached to the e-mail.
20. Save the information congured by selecting Save Settings!