
Setup guide


Dedicated Micros ©2006
16
DS2 Network Guide
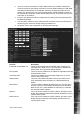
Telemetry Setup Once the protocol has been selected it is possible to access
the camera menus. This allows any functions supported by the
camera to be congured.
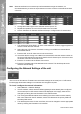
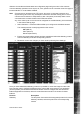
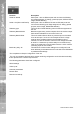
Telemetry Setup Page
1. To access the set up parameters of the camera select the Telemetry Setup button on
the Camera Set-up page.
Note: When you select the Telemetry Setup button, it may take a few seconds for the page and
video to be downloaded, during this time do not press any buttons as this will slow the
process down.
The telemetry control buttons for conguration will be displayed along with camera selection, display
options and resolution selection.
This web page allows the Operator to view any of the enabled inputs on the unit, control the
telemetry connected to the system and set up any features that are required for their application
(such as presets). It is also possible to access the dome/PTZ camera menus for conguration of the
supported parameters that are only programmable from the camera menu.
Note: Review the relevant documentation for the camera to see how you navigate the camera
menus. Remember to save any conguration settings in the dome menu!
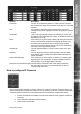
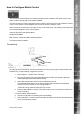
How to Enable Serial Telemetry
The unit supports numerous serial telemetry protocols, any of the video inputs on the unit can be
congured as a functional camera. Serial 3 (Bus A) and Serial 4 (Bus B) can be used for connecting
serial telemetry.
Common telemetry operations such as pan, tilt, zoom, presets can be controlled via the Live page of
the web interface or via the Viewer software.
The current 485 serial protocols supported on the unit are:
BBV-RS485 Dennard DM-Serial
Ernitec JVC Kalatel
Mark Mercer Panasonic WV-CS6/8 Pelco-P
Philips Samsung Sensormatic
Ultrak Vantage VCL
Vista Philips-232 AD-Matrix
AD168-Matrix BBV-Matrix VCL-Matrix
DM-IP AXIS IP JVC IP
1. Connect the camera and cables to the unit before conguring the unit: