
Operating instructions


Dedicated Micros ©2010
51
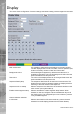
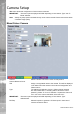
SD Advanced
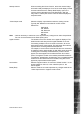
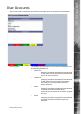
Startup Camera When accessing the Viewer function, select the camera image
which will initially be displayed. If one of the multi display formats
has been selected via the ‘Startup Multi Display’ option, the
camera channel selected here will be displayed in rst (top
left) position. Subsequent camera channels will be displayed in
sequential order.
Video Output mode Select the display output that best suits the viewing monitor.
Typically PAL Default is most suited for a CRT monitor.
Select from:
Safe Mode
PAL Default
PAL Reduced
HD Default
HD 4X3
Note: It will be necessary to reboot the unit to implement any change to the Video Output Mode.
The unit can be rebooted via the Reset (Red) option.
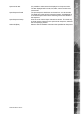
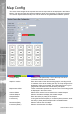
Applet Location The location of the unit’s Viewer menu applet is displayed. The
default location will always be the applet installed on the unit.
If accessing multiple units via a remote connection, all can be
assigned the same Viewer applet. This will lessen the load time
required when accessing different DVRs/Servers.
For example, if a local unit and a remote DVR are to be accessed, it
is possible to set the Applet location for both DVRs as the local unit.
If viewing the unit remotely, Dedicated Micros provide a remote
applet. This remote applet can be selected via the ‘Set Location’
option. The applet is located on the website (www.dedicatedmicros.
com/software_release/index_rmware.php). Due to possible bandwith
restrictions on the network the DVR is located, using this remote
applet may improve data transfer speeds.
Set Location Select the applet location. Choose from ‘Default location’ i.e. the
applet installed on the unit; or the ‘website’ option i.e. the
remote applet.
Reset (Red) Select to reset the unit and implement any changes made to the
‘Video Output mode’ or ‘Applet Location’ elds.