
User Manual


Video Editor 7-7
NOTE: When no Mark Out point is selected, the end of a clip is used by
default.
To set a video Mark Out point:
1 Select the clip in which you wish to set a Mark Out point by
single-clicking it (it will become outlined in green).
2
Pause the video at the frame at which you want to set the
Mark
Out
point (or drag the
Timeline Indicator to the point at which you want
to mark an out point).
3
Click the Mark Out
button.
4 The Mark Out point will be set and the clip will be automatically
shortened in the project.
NOTE: You can also in effect set a Mark Out point by directly dragging the
right edge of a video clip. This method is quicker, but less accurate than
using the Timeline Indicator.
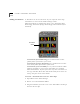
Split Button
The Split button is used for cutting a video clip in the
Video Editor into two separate segments. Split is only
available when there is at least one clip selected in the Video Editor.
To Split a clip:
1 Select the clip which you want to Split by single-clicking it (it will
become outlined in green).
2
Pause the video at the frame at which you want to Split the clip (i.e.
move the Timeline Indicator to the point at which you want to split
it).
3 Click the Split button.
4 The clip will be divided and will appear as two separate clips in the
project.
NOTE: Although the clip will appear divided in the project, the original clip
is not altered. MovieStar performs non-destructive editing, meaning that the