
User Manual


Editing Video 3-3
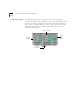
4 Preview video in the MovieStar video window.
■
Click the Video
Mode Button on MovieStar.
■
After a brief initialization, you should see the video from your
camcorder playing in the video window on your PC monitor.
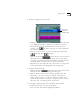
5 Capture video into the MovieStar Album.
■
Start capturing by clicking the red Record button in the
Control Buttons. The video will start recording and a "Recording…"
message box will appear.
■
Stop capturing by clicking the Stop button in the "Recording…"
message box. The captured video will appear as a thumbnail in the
Work Space Album
in Media Manager.
6 View the captured video in the MovieStar Video Window.
■
Double-click the thumbnail icon of your new video clip. The clip
will start playing immediately.
Using the above steps you can capture as many video clips as you
want to the MovieStar album. You can also use the advanced settings
in the Options Panel to capture clips in different formats.
Editing Video
After a video clip is captured, the file is saved on the hard disk and a
thumbnail of it is automatically placed in the Work Space area of
the Media Manager. The clip can now be edited using MovieStar's
Video Editor Panel.
Dazzle MovieStar has many useful editing features. In this section
you will learn about the basic editing features, such as trimming,
combining, splitting, and rearranging video clips.
Trimming a Video
Clip
A common editing application is when you may want to create a
shorter length clip by trimming the beginning and/or the end of the
clip.