
User Manual
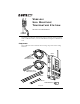
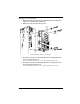

Page 2 Wireless Soil Moisture/ Temperature Station
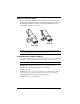
Tools for Setup
In addition to the components shown, you will need some or all of the follow-
ing materials:
✦
Adjustable wrench or 7/16" wrench
✦
Ballpoint pen or paper clip (small pointed object of some kind)
✦
Drill and 3/16" (5 mm) drill bit (if mounting on a vertical surface)
✦
Stepped Sensor Installation Tool
Installation Steps
For ease of installation, please follow steps in the order presented.
✦
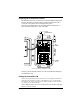
Prepare the Soil Moisture station, page 3
✦
Insert the battery, page 3
✦
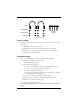
Set the transmitter ID, page 3
✦
Set ID on the Soil Moisture Station using DIP switches, page 3
✦
Set the console to recognize the signals, page 5
✦
View current temperature, page 5
✦
(If you don’t see temperature from the correct Station No., put the
transmitter in TEST mode, page 5)
✦
Choose a location for the Soil Moisture Station, page 6
✦
Test transmission from the proposed mounting location, page 7
✦
Mount the Soil Moisture Station, page 8
✦
A note on securing cables, page 10
For Technical Support, please see “Contacting Davis Technical Support” on
page 10.
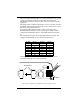
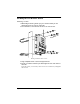
1/4" x 1-1/2"
Lag Screws
U-Bolts
1/4" Flat Washers
1/4" Lock Washers
1/4" Hex Nuts
Mounting Hardware