
User's Manual


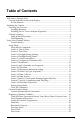
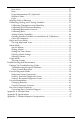


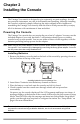

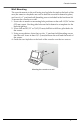
Table Of Contents
- Welcome to Vantage VueTM
- Installing the Console
- Using Your Weather Station
- Console Modes
- Setup Mode
- Setup Mode Commands
- Screen 1: Time & Date
- Screen 2: Time Zone
- Screen 3: Daylight Saving Settings
- Screen 4: Daylight Saving Status
- Screen 5: Active Transmitters
- Screen 6: Configuring Transmitter IDs
- Screen 7: Retransmit
- Screens 8 and 9: Latitude and Longitude
- Screen 10: Elevation
- Screen 11: Barometric Reduction Setting
- Screen 12: Wind Cup Type (Optional)
- Screen 13: Rain Collector
- Screen 14: Rain Season
- Screens 15 and 16: Cooling and Heating Degree Day Base
- Screens 17 and 18: Commentary and Key Beep
- Screen 19: Baud Rate (Optional)
- Exiting Setup Mode
- Clear All Command
- Current Weather Mode
- Displaying Weather Variables

Console Location
5
Wall Mounting
The console mounts to the wall using two keyholes located on the back of the
case (the same two keyholes are used to hold the console kickstand in place)
and two #6 x 1'' pan head self-threading screws included in the hardware kit.
To mount the console on a wall:
1. Use a ruler to mark two mounting hole positions on the wall 4 15/16'' inches
(125 mm) apart. Use the guide holes on the kickstand as a template for the
keyhole spacing.
2. Use a drill and a 3/32” or 7/64''(2.5 mm) drill bit to drill two pilot holes for
the screws.
3. Using a screwdriver, drive the two #6 x 1'' pan head self-threading screws
into the wall. Leave at least 1/8'' (3 mm) between the wall and the heads of
the screws.
4. Guide the two keyholes on the back of the console over the two screws.
Mounting the console on a wall