
Install Instructions
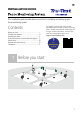
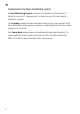
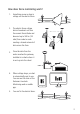
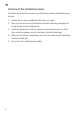
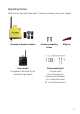
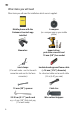
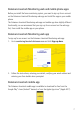
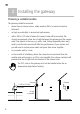
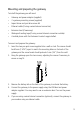
Table Of Contents
- Before you start
- Components of a fence monitoring system
- How does fence monitoring work?
- Overview of the installation process
- Unpacking the box
- Other items you will need
- Datamars Livestock Monitoring web and mobile phone apps
- Datamars Livestock Monitoring web app
- Datamars Livestock mobile app
- Installing the gateway
- Choosing a suitable location
- Mounting and preparing the gateway
- Setting up the gateway using the Datamars Livestock app
- Installing the nodes
- Parts of the node
- Pairing the nodes using the Datamars Livestock app
- Installing the nodes using the Datamars Livestock app and mounting them on the fence
- Using the Datamars Livestock Monitoring apps
- Getting help
- Help articles and videos
- Troubleshooting
- Maintenance and servicing
- Solar panel maintenance
- Servicing
- Europe - Instructions for disposal of product
- Warranty
- Compliance
- FCC ID information
- FCC notice
- FCC warning
- Responsible party in the USA
- ISED Canada ID information
- ISED Canada notice
- ISED Canada warning
- UK declaration of conformity
- EU declaration of conformity

6
Other items you will need
Other items you will need for installation which are not supplied:
Mobile phone with the
Datamars Livestock app
installed
A compass
(or a compass app on your mobile
phone)
Binoculars
Impact driver,
pozi drive screw bit and
10 mm (3/8”) hex socket
Joint clamps
(2 for each node - one for the earth
connection and one for the fence
connection)
Insulated underground fence cable
(>1.6 mm [1/16”] diameter)
for a lead-out cable and an earth cable
(2-3 m [6-9’] per node)
10 mm (3/8”) spanner Cable ties
20-30 cm (8-11”) earth rods
e.g. a 3 mm (1/8”) thick tent peg
(1 for each node)
Wire cutters/strippers