
Install Instructions
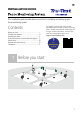
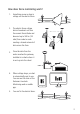
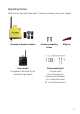
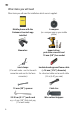
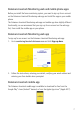
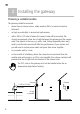
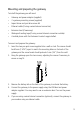
Table Of Contents
- Before you start
- Components of a fence monitoring system
- How does fence monitoring work?
- Overview of the installation process
- Unpacking the box
- Other items you will need
- Datamars Livestock Monitoring web and mobile phone apps
- Datamars Livestock Monitoring web app
- Datamars Livestock mobile app
- Installing the gateway
- Choosing a suitable location
- Mounting and preparing the gateway
- Setting up the gateway using the Datamars Livestock app
- Installing the nodes
- Parts of the node
- Pairing the nodes using the Datamars Livestock app
- Installing the nodes using the Datamars Livestock app and mounting them on the fence
- Using the Datamars Livestock Monitoring apps
- Getting help
- Help articles and videos
- Troubleshooting
- Maintenance and servicing
- Solar panel maintenance
- Servicing
- Europe - Instructions for disposal of product
- Warranty
- Compliance
- FCC ID information
- FCC notice
- FCC warning
- Responsible party in the USA
- ISED Canada ID information
- ISED Canada notice
- ISED Canada warning
- UK declaration of conformity
- EU declaration of conformity

2
Components of a fence monitoring system
A Fence Monitoring System is made up of Gateways and Fence Nodes. A
starter kit consists of 1 x gateway and 3 x nodes, but up to 50 nodes may be
included in a system.
The Gateway provides the internet/cloud interface to the on-farm network. Each
Fence Monitoring system requires a gateway to collect information from the nodes
and pass it to the cloud.
Each Fence Node communicates to the gateway through radio frequency. The
system works like a mesh, where each node can talk to all other nodes within
500 m (1/3 mile) to relay information back to the gateway.