Datalogic Formula™ www.mobile.datalogic.com World wide Sales Network available from: www.mobile.datalogic.com/contacts Datalogic Mobile S.r.l. Via S. Vitalino, 13 40012 Lippo di Calderara di Reno Bologna - Italy Telephone: (+39) 051-3147011 Fax: (+39) 051-3147561 Quick Reference Guide ©2008 Datalogic Mobile S.r.l.
Datalogic Mobile S.r.l. Via S. Vitalino 13 40012 - Lippo di Calderara di Reno Bologna - Italy Formula™ - Quick Reference Guide Ed.: 12/2008 ALL RIGHTS RESERVED The Datalogic name and logo are registered trademarks of Datalogic S.p.A. in many countries. The Formula name is a trademark of Datalogic Mobile S.r.l. All other brand and product names mentioned herein are for identification purposes only and may be trademarks or registered trademarks of their respective owners.
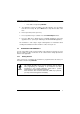
CONTENTS 1 FORMULA™ PROGRAM INSTALLATION AND SETUP ............................ 1 2 2.1 2.2 2.2.1 2.2.2 2.2.3 2.2.4 2.2.5 2.3 2.3.1 2.3.2 2.4 2.4.1 2.4.2 2.5 2.6 2.7 DATA COLLECTION WITH FORMULA™ APPLICATIONS ........................ 2 Quick Start .................................................................................................... 2 Setting up the Formula™ .............................................................................. 3 Getting Started......................................
iv
FORMULA™ QUICK REFERENCE GUIDE 1 FORMULA™ PROGRAM INSTALLATION AND SETUP The Formula™ terminal can accept different program options: - custom programs developed and generated with the Formula™ Software Development Toolkits; - ready to use applications preloaded and distributed with Formula™ CD; - applications created by EasyGen™ application generator. This document describes examples of the last two options. For details on the first option, see the SW Dev Toolkits Developer’s manual.
DATA COLLECTION WITH FORMULA™ SOFTWARE APPLICATIONS 2 DATA COLLECTION WITH FORMULA™ APPLICATIONS 2.1 QUICK START The Formula™ comes with an application named PALPRO loaded in memory. PALPRO includes two useful data-collection programs for using the Formula™ without additional programming. Follow the steps below to begin using the Formula™ with PALPRO immediately. Page references show where to find more information. 1. Turn the Formula™ on by pressing the key.
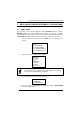
FORMULA™ QUICK REFERENCE GUIDE • Press to begin using PALPRO. 5. The application requests an update to the date and time. You can change them here if necessary. Or, press twice to skip either the date or the time. 6. Enter a password (refer to par. 2.2.3). 7. Press any function key to continue on to the PALPRO Options menu. 8. Press the key to display the list of available applications. Select the application to use. (refer to par. Switching to Another PALPRO Application).
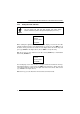
DATA COLLECTION WITH FORMULA™ SOFTWARE APPLICATIONS 2.2.2 Setting the Time and Date You can access the date and time prompts from other display screens and menus (such as the password prompt in par. 2.2.3). NOTE Current Date: 09/23/02 Enter New Date: ¤ F1=US/INT When starting the application for the first time, the display screen shows the date currently loaded in memory. If the displayed date is correct, press the key. If the date is wrong, enter the correct date.
FORMULA™ QUICK REFERENCE GUIDE 2.2.3 Setting a Password A password is required when you install the entire suite of PALPRO applications. Password security allows a manager or supervisor to customize the PALPRO software and then hand it off to a worker. A password can contain up to 128 characters and can use any characters available on the Formula™.
DATA COLLECTION WITH FORMULA™ SOFTWARE APPLICATIONS 2.3 USING PALPRO TO COLLECT DATA When finished setting up the Formula™ (refer to the previous section), the PALPRO Options menu appears on the display screen. Use the menu to choose a PALPRO application. 2.3.1 Installing PALPRO PALPRO comes installed on your Formula™ from the factory. If you need to reinstall PALPRO, refer to par. 3.2 of this document. 2.3.
FORMULA™ QUICK REFERENCE GUIDE Changing Program Titles and Prompts PALPRO allows the user to change the title that appears on the menu for each application, or change the prompts for each application. Changing titles or prompts can be done after selecting an application. To change the title or prompts, complete the following steps: 1. Press the key at the prompt. To use the application’s current title and prompts, select at the prompt in Figure below. CHANGE PROMPTS? F3=YES F4=NO¤ 2.
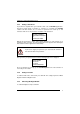
DATA COLLECTION WITH FORMULA™ SOFTWARE APPLICATIONS Switching to Another PALPRO Application To switch from one PALPRO application to another, complete the following steps: 1. Select SHIFT + from the current application’s menu to exit the application. ASSET MGMT¤ F2=COLLECT F3=FILE OPTIONS ShF1=PASSWORD Enter on the keypad by pressing the key and then the key. 2.
FORMULA™ QUICK REFERENCE GUIDE Using ASSETPRO Use ASSETPRO to track assets (such as furniture, phones, computers, and electronic equipment) at various locations (e.g., departments, rooms, floors, buildings). With ASSETPRO, enter an identification code for a location, collect all the asset IDs at the location, and then enter an identification code for a different location. To use ASSETPRO, complete the following steps: 1. From the ASSETPRO application menu, select .
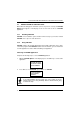
DATA COLLECTION WITH FORMULA™ SOFTWARE APPLICATIONS 4. The location ID and item ID appear together on the third line of the screen, separated by a comma, and the second prompt remains on the screen. • The Formula™ is ready to accept another ID for an asset at the current location. ITEM ID ¤ WH3E, 004322 F3=REV F4=EXIT 5. When finished collecting asset IDs for the location, press the key to return to the first prompt. 6.
FORMULA™ QUICK REFERENCE GUIDE Using INVPRO Use this application to track inventory. INVPRO provides a choice of one prompt or two. For example, use one prompt to scan or enter an ID number or description for each item. Two prompts would be used to scan or enter an item ID and the quantity of that item. To use INVPRO, complete the following steps: 1. At the first screen that appears, press the key to use the application with only one prompt, or use the key for two prompts.
DATA COLLECTION WITH FORMULA™ SOFTWARE APPLICATIONS Using a scanner, the code is entered automatically; with a keypad, press the key. NOTE 3. The item ID number appears on the third line of the screen. The Formula™ is ready to accept another item ID. ITEM ID ¤ 40-000-00 F3=REV F4=EXIT 4. Repeat step 2until all IDs for all items are collected. 5. Press the key to return to the application menu. Refer to par. 3.5 to upload your data.
FORMULA™ QUICK REFERENCE GUIDE Using Two Prompts 1. Select from the application menu. The first prompt appears on the screen. ITEM ID ¤ F3=REV F4=EXIT 2. Scan the bar code for an inventory item, or use the keypad to enter the item’s ID number or description. The code is entered automatically with a scanner; with a keypad, press the key. NOTE 3. The second prompt now appears on the first line of the screen, and the item ID appears on the third line. QUANTITY ¤ 40-000-00 F3=REV F4=EXIT 4.
DATA COLLECTION WITH FORMULA™ SOFTWARE APPLICATIONS number of units of that item. Figure 2-9 shows part of a data file uploaded from a Formula™ that used INVPRO with two prompts to collect data.
FORMULA™ QUICK REFERENCE GUIDE 2.4 UPLOADING COLLECTED PALPRO FILE DATA TO A PC To upload the data (PALPRO file) to a PC, do the steps shown in the following paragraphs. 2.4.
DATA COLLECTION WITH FORMULA™ SOFTWARE APPLICATIONS Select the SETTINGS button to view the following screen; configure the settings according to the figure below and press OK: Select the NETWORK SETUP button to view the following screen; insure the Connection Type is set to USB: 16
FORMULA™ QUICK REFERENCE GUIDE I f you choose COM connection, select the following parameters to allow PALPRO to run: Baud rate: Data bits: Parity: 19200 7 Mark 17
DATA COLLECTION WITH FORMULA™ SOFTWARE APPLICATIONS Select the TERMINALS tab to view the following screen. It is recommended that the FILE NAME for collected data have a .dat extension (default name is TERM001.dat), followed by the PATH where the data will be uploaded to on the PC. Select OK in the Formula Control Properties to return to the main SysTools™ screen. Select CONNECT (the Formula™ will emit a tone). Now Systools™ is ready to receive data from the terminal. 2.4.2 1.
FORMULA™ QUICK REFERENCE GUIDE 3. Select to upload the data via the USB connection. *SEND FILE* F2=USB F3=SERIAL F4=EXIT ¤ During upload, Systools™ assumes the following statuses: STATE: BUSY: appears while data is being uploaded. STATE: CONNECTED: appears after the data is sent. STATE: NOT CONNECTED: the device is not recognizable; check the cables. NOTE 1: Click DISCONNECT or remove the terminal from the dock to end the data transfer session. NOTE 2: The collected .
DATA COLLECTION WITH FORMULA™ SOFTWARE APPLICATIONS 2.
FORMULA™ QUICK REFERENCE GUIDE Select “Label Generator for PAL” to load the utility that generates the labels. Follow these steps: • • • • Select the available Application option Customize the prompts Select the target file name Press the “Save” button to save the customized labels in the selected file.
DATA COLLECTION WITH FORMULA™ SOFTWARE APPLICATIONS Launch Systools application and select the Systools Utility option “Send Customized Label for PAL”. Select the file you generated in the “Open” dialog box.
FORMULA™ QUICK REFERENCE GUIDE 2.6 CONFIGURING WITH BAR CODES This section provides bar codes for common setup parameters that can be used for programming the Formula™. Factory default settings are underlined.
DATA COLLECTION WITH FORMULA™ SOFTWARE APPLICATIONS MAXIMUM LENGTH 10 *$+$-0210EE* 40 *$+$-0240EE* 20 *$+$-0220EE* 50 *$+$-0250EE* 30 *$+$-0230EE* 60 *$+$-0260EE* Off *$+$-030EE* Off *$+$-040EE* Off *$+$-050EE* Off *$+$-060EE* ENABLE CHECKSUM On *$+$-031EE* SEND CHECKSUM On *$+$-041EE* FULL ASCII MODE On *$+$-051EE* Italian Pharmacode ENABLE On 24 *$+$-061EE*
FORMULA™ QUICK REFERENCE GUIDE SEND ITALIAN PHARMACODE CHECK DIGIT On *$+$-071EE* Off *$+$-070EE* Off *$+$-0F0EE* Off *$+$-080EE* SEND ITALIAN PHARMACODE PREFIX On *$+$-0F1EE* Interleaved 2 of 5 ENABLE On *$+$-081EE* MINIMUM LENGTH 2 *$+$-0902EE* 30 *$+$-0930EE* 6 *$+$-0906EE* 40 *$+$-0940EE* 10 *$+$-0910EE* 50 *$+$-0950EE* 20 *$+$-0920EE* 60 *$+$-0960EE* 25
DATA COLLECTION WITH FORMULA™ SOFTWARE APPLICATIONS MAXIMUM LENGTH 10 *$+$-0A10EE* 40 *$+$-0A40EE* 20 *$+$-0A20EE* 50 *$+$-0A50EE* 30 *$+$-0A30EE* 60 *$+$-0A60EE* REQUIRED LENGTH (no default; overrides minumum and maximum settings) 2 *$+$-09020A02EE* 4 *$+$-09040A04EE* 6 *$+$-09060A06EE* 8 *$+$-09080A08EE* 10 *$+$-09100A10EE* 26
FORMULA™ QUICK REFERENCE GUIDE 12 *$+$-09120A12EE* 14 *$+$-09140A14EE* 16 *$+$-09160A16EE* 18 *$+$-09180A18EE* 20 *$+$-09200A20EE* ENABLE CHECKSUM On *$+$-0B1EE* Off *$+$-0B0EE* Off *$+$-0C0EE* SEND CHECKSUM On *$+$-0C1EE* USE LENGTHS 6 AND 14 ONLY (case code) On *$+$-0D1EE* Off *$+$-0D0EE* 27
DATA COLLECTION WITH FORMULA™ SOFTWARE APPLICATIONS Codabar ENABLE On *$+$-201EE* Off *$+$-200EE* MINIMUM LENGTH 04 *$+$-2104EE* 40 *$+$-2140EE* 10 *$+$-2110EE* 50 *$+$-2150EE* 20 *$+$-2120EE* 60 *$+$-2160EE* 30 *$+$-2130EE* MAXIMUM LENGTH 10 *$+$-2210EE* 40 *$+$-2240EE* 20 *$+$-2220EE* 50 *$+$-2250EE* 30 *$+$-2230EE* 60 *$+$-2260EE* 28
FORMULA™ QUICK REFERENCE GUIDE SEND STOP/START On *$+$-231EE* Off *$+$-230EE* Off *$+$-2C0EE* Code 93 ENABLE On *$+$-2C1EE* MINIMUM LENGTH 2 *$+$-2D02EE* 30 *$+$-2D30EE* 10 *$+$-2D10EE* 40 *$+$-2D40EE* 20 *$+$-2D20EE* 50 *$+$-2D50EE* MAXIMUM LENGTH 2 *$+$-2E02EE* 30 *$+$-2E30EE* 10 *$+$-2E10EE* 40 *$+$-2E40EE* 29
DATA COLLECTION WITH FORMULA™ SOFTWARE APPLICATIONS 20 *$+$-2E20EE* 50 *$+$-2E50EE* Off *$+$-300EE* Off *$+$-310EE* Off *$+$-320EE* Off *$+$-330EE* UPC-A ENABLE UPC-A On *$+$-301EE* SEND SYSTEM DIGIT On *$+$-311EE* SEND CHECK DIGIT On *$+$-321EE* CONVERT UPC-A TO EAN-13 On 30 *$+$-331EE*
FORMULA™ QUICK REFERENCE GUIDE UPC-E USE SYSTEM DIGIT 0 On *$+$-341EE* Off *$+$-340EE* Off *$+$-350EE* Off *$+$-360EE* Off *$+$-370EE* Off *$+$-380EE* USE SYSTEM DIGIT 1 On *$+$-351EE* CONVERT UPC-E TO UPC-A On *$+$-361EE* SEND SYSTEM DIGIT On *$+$-371EE* SEND CHECK DIGIT On *$+$-381EE* 31
DATA COLLECTION WITH FORMULA™ SOFTWARE APPLICATIONS EAN/JAN ENABLE EAN-8/JAN-8 On *$+$-391EE* Off *$+$-390EE* Off *$+$-3A0EE* Off *$+$-3B0EE* Off *$+$-3F0EE* Off *$+$-3C0EE* Off *$+$-3D0EE* ENABLE EAN-13/JAN-13 On *$+$-3A1EE* ENABLE EAN-13 TO ISBN On *$+$-3B1EE* SEND CHECK DIGIT On *$+$-3F1EE* UPC/EAN/JAN Extensions ALLOW 2-DIGIT EXTENSIONS On *$+$-3C1EE* ALLOW 5-DIGIT EXTENSIONS On 32 *$+$-3D1EE*
FORMULA™ QUICK REFERENCE GUIDE REQUIRE EXTENSIONS On *$+$-3E1EE* Off *$+$-3E0EE* Off *$+$-400EE* Code 128 ENABLE On *$+$-401EE* MINIMUM LENGTH 2 *$+$-4102EE* 40 *$+$-4140EE* 10 *$+$-4110EE* 50 *$+$-4150EE* 20 *$+$-4120EE* 60 *$+$-4160EE* 30 *$+$-4130EE* 33
DATA COLLECTION WITH FORMULA™ SOFTWARE APPLICATIONS MAXIMUM LENGTH 10 *$+$-4210EE* 40 *$+$-4240EE* 20 *$+$-4220EE* 50 *$+$-4250EE* 30 *$+$-4230EE* 60 *$+$-4260EE* Off *$+$-430EE* Off *$+$-100EE* Off *$+$-110EE* ENABLE UCC128 On *$+$-431EE* GS1 DataBar Omnidirectional ENABLE On *$+$-101EE* GS1 DataBar Limited ENABLE On 34 *$+$-111EE*
FORMULA™ QUICK REFERENCE GUIDE GS1 DataBar Expanded ENABLE On *$+$-121EE* Off *$+$-120EE* MINIMUM LENGTH 1 *$+$-1301EE* 10 *$+$-1310EE* 20 *$+$-1320EE* 40 *$+$-1340EE* 60 *$+$-1360EE* 74 *$+$-1374EE* MAXIMUM LENGTH 1 *$+$-1401EE* 10 *$+$-1410EE* 20 *$+$-1420EE* 40 *$+$-1440EE* 60 *$+$-1460EE* 74 *$+$-1474EE* 35
DATA COLLECTION WITH FORMULA™ SOFTWARE APPLICATIONS Other Controls AUTO-OFF (in minutes) Off *$+$-B200EE* 2 *$+$-B202EE* 5 *$+$-B205EE* 10 *$+$-B210EE* BACKLIGHT DURATION (in seconds) On *$+$-E200EE* 30 *$+$-E230EE* 10 *$+$-E210EE* 60 *$+$-E260EE* Off *$+$-BC00EE* BEEPER VOLUME On *$+$-BC07EE* Clock and Calendar TIME/DATE FORMAT Set Tim e TIME FORMAT 36 *%-* Set Date *%.
FORMULA™ QUICK REFERENCE GUIDE 12Hour *$+$-D80EE* 24Hour *$+$-D81EE* Int. *$+$-D91EE* DATE FORMAT U.S.
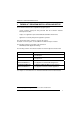
DATA COLLECTION WITH FORMULA™ SOFTWARE APPLICATIONS 2.7 PROGRAMMING PARAMETERS Predefined Defaults Three default sets can be defined: D0 Turns every ON/OFF parameter OFF and sets all minimum and maximum lengths to zero. D1 Turns every ON/OFF parameter ON, sets all minimum lengths as low as possible and sets all maximum lengths as high as possible (see the table below). D2 Default set installed on the terminal at the factory. This default set will work for most applications (see the table below).
FORMULA™ QUICK REFERENCE GUIDE General Programming Parameters Code Parameter ID # Type Acceptable Input Predefined Defaults D1 D2 Enter 1 for On and 0 for Off. Code 39 Enable 00 On/Off On or Off On On Minimum length 01 Value 00–60 00 00 Maximum length 02 Value 00–60 60 20 Enable checksum 03 On/Off On or Off Off Off Send checksum 04 On/Off On or Off Off Off Full ASCII mode 05 On/Off On or Off On On Enter 1 for On and 0 for Off.
DATA COLLECTION WITH FORMULA™ SOFTWARE APPLICATIONS Code Parameter ID # Type Acceptable Input Predefined Defaults D1 D2 Enter 1 for On and 0 for Off. Code 93 Enable 2C On/Off On or Off On On Minimum length 2D Value 00–50 01 02 Maximum length 2E Value 01–50 50 20 Enter 1 for On and 0 for Off.
FORMULA™ QUICK REFERENCE GUIDE Code Parameter ID # Type Acceptable Input Predefined Defaults D1 D2 Enter 1 for On and 0 for Off. Code 128 Enable 40 On/Off On or Off On On Minimum length 41 Value 00-60 02 02 Maximum length 42 Value 00-60 60 20 Enable UCC128 43 On/Off On or Off Off Off Enter 1 for On and 0 for Off.
READY TO USE APPLICATIONS 3 3.1 READY TO USE APPLICATIONS SET UP THE TERMINAL FOR THE CONNECTION WITH THE PC Insert the battery set into the terminal, close the cover, connect the power adapter to the terminal and let it initially charge overnight. Then insure the charging LED light displays a GREEN status (refer to Formula™ User’s manual for further details). The Formula™ Terminal must first be REFLASHED via the following sequence: Press and hold the POWER button, then press the SCAN key.
FORMULA™ QUICK REFERENCE GUIDE 3.2 DOWNLOADING A READY TO USE APPLICATION To correctly download a ready to use application on the Formula™ terminal, open the SYSTOOLS software program. There are two versions of this program: “STANDARD and ENHANCED” mode, and “EASYGEN” mode. Insure the STANDARD and ENHANCED” mode is enabled by selecting Utility Menu – Set SysTools Mode. Select Utility Menu – Send Application and browse to the Enhanced Mode M2 application file, setting type file as “Multibank (*.
READY TO USE APPLICATIONS Select SEND to transmit the file to the Formula™. A second “multi-bank” file (FORMULA_M2_XXX.H01) will also be sent automatically. After it is successfully transmitted, the following message window will be displayed on the screen: The Formula™ LCD screen should now display the following information: Cable Plugged Not Connected Remove the USB cable and wait until the Formula™ LCD screen displays “LOAD PROGRAM”. Connect the USB cable again.
FORMULA™ QUICK REFERENCE GUIDE 3.3 CONFIGURING READY TO USE APPLICATIONS THROUGH SYSTOOLS™ Once the ready to use application has been downloaded to the terminal, both the data collection parameters and the application parameters need to be configured.
READY TO USE APPLICATIONS Select the NETWORK SETUP button to view the following screen; insure the Connection Type is set to USB: I f you choose COM connection, select the following parameters to allow PALPRO to run: Baud rate: Data bits: Parity: 46 19200 7 Mark
FORMULA™ QUICK REFERENCE GUIDE The following instructions are not required for PALPRO. NOTE Select the TERMINALS tab to view the following screen. The FILE NAME for collected data must have a .dat extension (default name is TERM001.dat), followed by the PATH where the data will be uploaded to on the PC. Default symbology setting is Code 39. OPTION 1: Select the BARCODE TYPE button to enable other symbology types before sending it to the terminal.
READY TO USE APPLICATIONS Select OK in the Formula Control Properties to return to the main SysTools™ screen. The Formula™ is now associated with the SysTools™ software program.
FORMULA™ QUICK REFERENCE GUIDE 3.4 TRANSMITTING A CUSTOM CONFIGURATION FILE TO THE FORMULA™ Once the Formula™ has been associated with the SysTools™ Software program, a custom configuration file (.prg) can be sent. Refer to SysTools™ User's manual for further details. Select FILE – NEW in order to create a custom configuration for your needs. In the example below, we will create a two prompts program where: Prompt 1 = CODE for barcode data and Prompt 2 = QUANTITY.
READY TO USE APPLICATIONS For our two prompts example, set the parameters to the following settings. (NOTE: the program name can be changed). The number of maximum records are now set to 500. Select the FIELDS tab to view the following screen. Our program will use CODE as a prompt 1 title (for barcode data) with a maximum length of 13 digits.
FORMULA™ QUICK REFERENCE GUIDE Click on ADD FIELD for a second prompt and set the parameters to the settings shown below, where: NAME = QUANTITY, VERIFY CHARACTERS are only numeric (0-9). For additional fields, simply click on ADD FIELD for a new input. NUMBER (2/2) indicates the number of the fields created, click on the forward or the back arrow to move between the field screens. Once all the parameters has been entered, insure the Formula™ is connected. Select SEND.
READY TO USE APPLICATIONS Select OK. After the program has been installed, the following screen will display: The Formula™ is now ready for use. Collect data using the installed CODE and QUANTITY two prompts program! *NOTE: For barcode programming options, refer to the program document titled “Ready-to-Use Applications Programming BarCode Document” via the installation CD, USER MANUALS section.
FORMULA™ QUICK REFERENCE GUIDE 3.5 UPLOADING COLLECTED .DAT FILE DATA TO A PC To upload the data (.
READY TO USE APPLICATIONS Select CONNECT (the Formula™ will emit a tone). STATE: BUSY appears while data is being uploaded, STATE: CONNECTED: appears after the data is sent. NOTE 1: Click DISCONNECT P to end the data transfer session. NOTE 2: The collected .dat file data will be uploaded to the FILE NAME and PATH settings selected earlier.
FORMULA™ QUICK REFERENCE GUIDE 4 4.1 EASYGEN™ SET UP THE TERMINAL FOR THE CONNECTION WITH THE PC Insert the battery set into the terminal, close the cover, connect the power adapter to the terminal and let it initially charge overnight. Then insure the charging LED light displays a GREEN status (refer to Formula™ User’s manual for further details). The Formula™ Terminal must first be REFLASHED via the following sequence: Press and hold the POWER button, then press SCAN key.
EASYGEN™ Open the EASYGEN software program: Select FILE – OPEN.
FORMULA™ QUICK REFERENCE GUIDE For this example we will install the EXAMPLE 2 (EAN128 – 3 FIELDS) application (.
EASYGEN™ Select OPEN to view the following screen: Insure that Formula is the selected terminal type. displayed. The program steps are also Remove the Formula™ from the cradle, it will display Interpreter for EASYGEN Rel 2.1. Press ENTER on the Formula™ (it will display READ ERROR). Place it back in the cradle.
FORMULA™ QUICK REFERENCE GUIDE In EASYGEN, Select TOOLS – OPTIONS (GENERAL TAB) to view the following protocol settings box. Insure the settings are set to the following parameters: Select OK. To send the program, select the following screen: button or the File – Send menu to display the Select OK (insure the comport of choice is selected). An UPLOADING PLEASE WAIT screen will appear and then disappear when the application is transmitted. Remove the Formula™ from the dock and press ENTER.
EASYGEN™ 4.3 UPLOADING COLLECTED .DAT FILE DATA TO A PC To upload the data (.dat file) to a PC, do the following steps: Open SysTools™ and set EasyGen™ mode to view the following main menu screen: Select the NETWORK SETUP button and insure the Connection Type is set to COM.
FORMULA™ QUICK REFERENCE GUIDE Select CONNECT (the Formula™ will emit a tone). STATE: BUSY appears while data is being uploaded, STATE: CONNECTED: appears after the data is sent. NOTE 1: Click DISCONNECT to end the data transfer session. NOTE 2: The collected .dat file data will be uploaded to the FILE NAME and PATH settings selected earlier.
GLOSSARY OF TERMS APPLICATION DEVELOPMENT: 1. EASYGEN: a Rapid Application Generator to generate easy and quick applications to operate on a Formula™ device. It requires an interpreter file to be installed before installing an application. A set of ready to use EasyGen™ application example programs are also provided. EXAMPLE 1 (CODE + QUANTITY) EXAMPLE 2 ( EAN128 – 3 FIELDS) EXAMPLE 3 (ASSISTED SALES) EXAMPLE 4 (LISTED PICKING) EXAMPLE 5 ( INVENTORY) 2.
Datalogic Formula™ www.mobile.datalogic.com World wide Sales Network available from: www.mobile.datalogic.com/contacts Datalogic Mobile S.r.l. Via S. Vitalino, 13 40012 Lippo di Calderara di Reno Bologna - Italy Telephone: (+39) 051-3147011 Fax: (+39) 051-3147561 Quick Reference Guide ©2008 Datalogic Mobile S.r.l.