
Installation guide
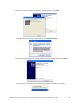
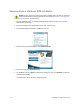
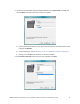
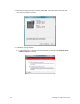
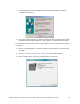
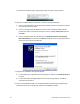
Table Of Contents
- Chapter 1: Planning the Installation
- Chapter 2: Installing the Hardware Components
- Chapter 3: Installing the Smart Card Driver
- Chapter 4: Installing the USB Printer Driver
- Chapter 5: Installing the Status Monitor
- Chapter 6: Network Installation
- Chapter 7: Removing Printer Driver and Status Monitor
- Untitled
46 Installing the USB Printer Driver
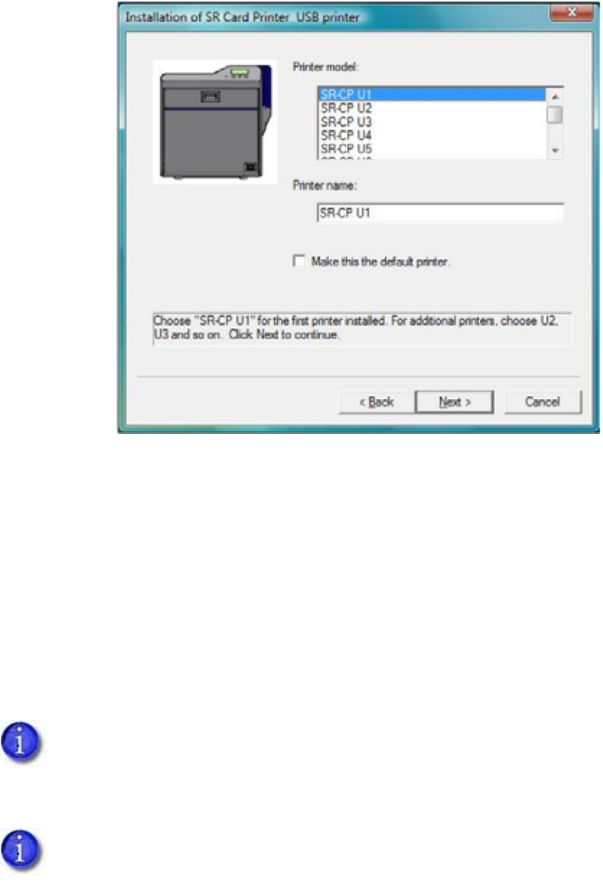
10. SelectthePrintermodelfromthelist.
IfthisisthefirstSR200orSR300printerinstalledonthisPC,thedefaultprinteris
<name>U1.
U1istheunitnumber,anditmustmatchtheUSBportyoucreate(refertostep 14)and
thePrintername.
Usetheselectedprinternameasitisshownor,ifyouplantosharetheprinter,remove
thespaceinthenamesothatitdisplaysasSR‐CPU1.
IfthisisnottheonlyUSB‐connectedprinteronthisPC,settheunitnumberoftheprinter
now.Referto“InstallingtheStatusMonitor”onpage 55.
11. SelecttheMakethisthedefaultprintercheckboxifyouplantouseonlythisprinterfrom
thisPC.ClickNext
.
12. Powerontheprinter.Continuewiththeinstallation.
ThedefaultprinternameistypicallyU1.Theunitnumberselectedheremustmatchthe
unitnumbersetontheprinter’sLCDpanel.(Re ferto“SettingtheUnitNumber,Printer
Name,andConnection”onpage 59tofindorchangetheprinter’sunitnumbersetting.)
Iftheprinterhasbeenusedbeforethisinstallation,makesurethattheunitnumberand
networknamecorrespond.Forexample,iftheprinterisU2,thenthenetworkprinter
namemustbePRINTER02.Iftheprinterwaspreviouslysettoprintoverthenetwork,
youcanchangethedefaultto
USBatthesametime.