
User`s guide


Table Of Contents
- Title page
- Contents
- Chapter 1: Overview
- Chapter 2: Getting started
- General requirements
- Selecting the site
- Electrical requirements
- Physical requirements
- Environmental requirements
- Unpacking the printer
- Who to call for assistance
- Connecting the printer
- Loading cards
- Loading the print ribbon
- Powering on the system
- Installing the printer driver
- Setup tips
- Making and evaluating test cards
- Printer test card
- Chapter 3: Using the printer
- Chapter 4: Maintaining the printer
- Chapter 5: Advanced Information
- Chapter 6: Troubleshooting
- App. A: Safety and compliance
- App. B: Supplies and cards
- App. C: PC settings
- App. D: Magnetic stripe encoding
- Index
C-5
User’s Guide for Express™ and Select™ Class Printers
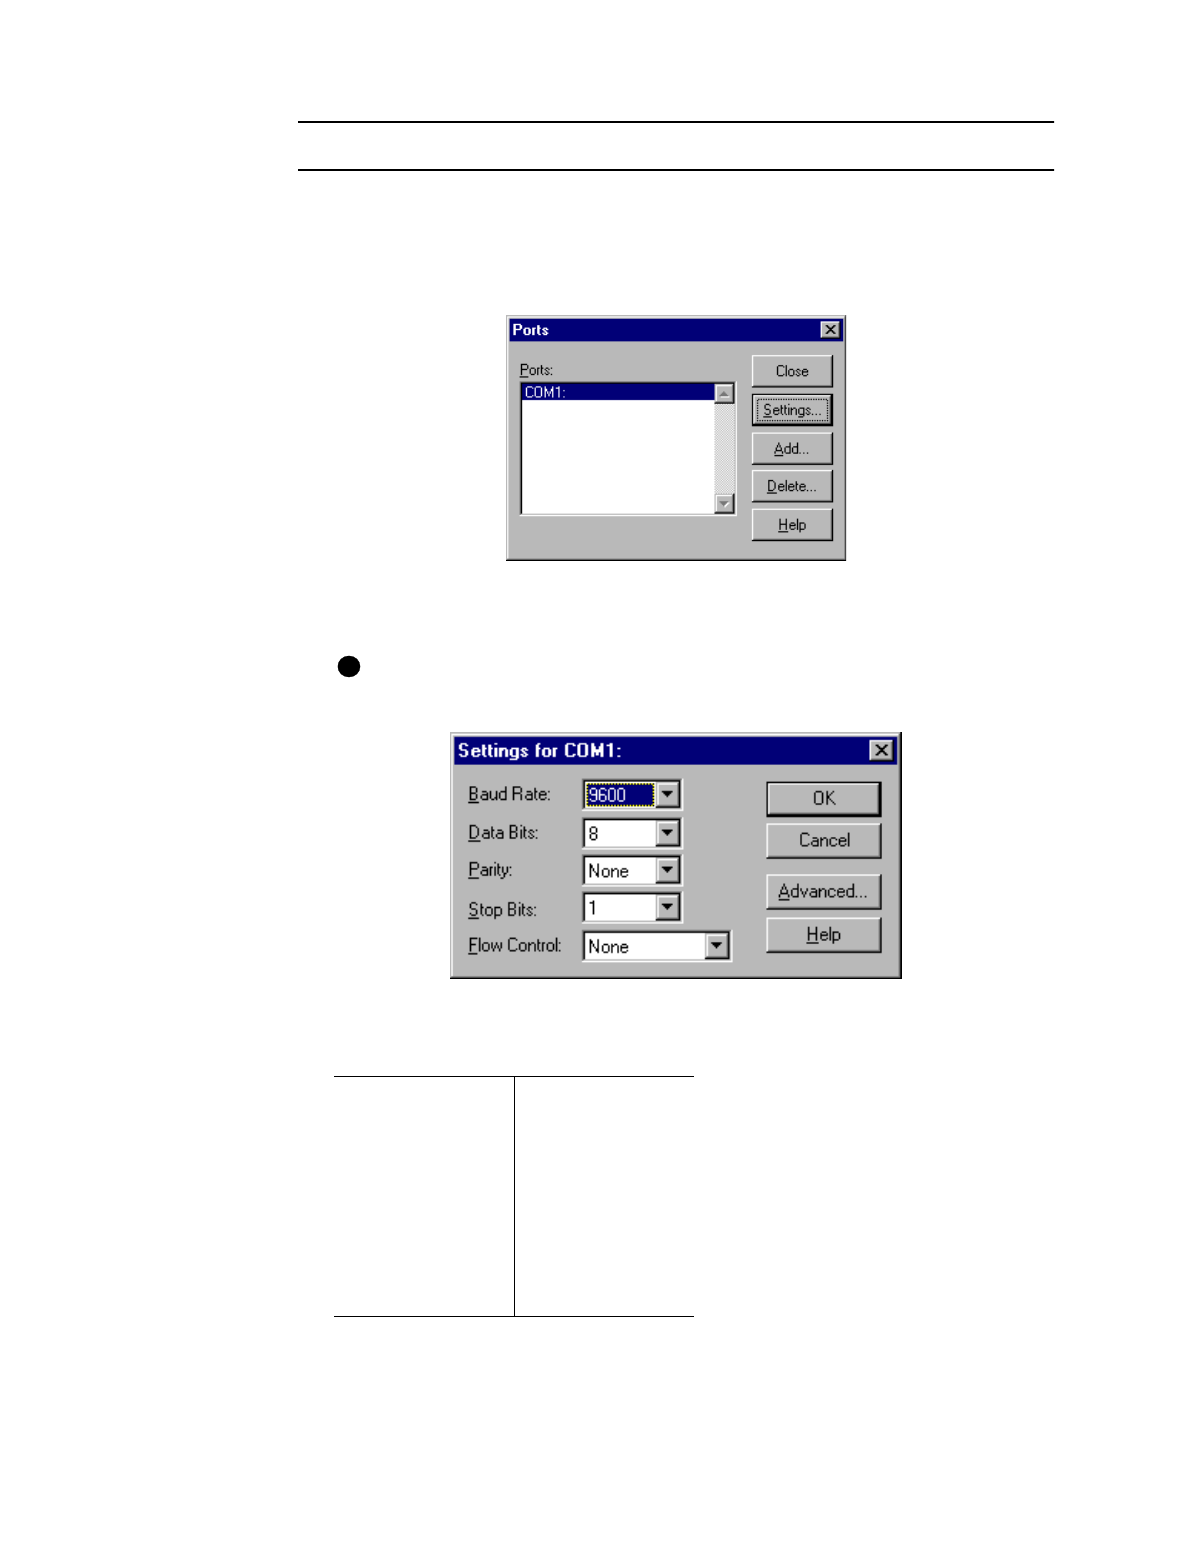
Set the serial port on Windows NT
1 From the Start menu, select Settings and then Control Panel.
2 From the Control Panel, select Ports.
3 From the Ports dialog box, select the port, such as COM1 or COM2 (Figure C-2).
Figure C-2: Ports dialog box
4 Select the Settings button to display the port settings.
If the PC has more than one serial port, make sure you view the settings for
the serial port to which the printer is attached.
Figure C-3: Settings dialog box
5 Select the following settings:
Setting Value
Baud rate 9600
Data bits 8
Parity None
Stop bits 1
Flow control None
i