
User`s guide


Table Of Contents
- Title page
- Contents
- Chapter 1: Overview
- Chapter 2: Getting started
- General requirements
- Selecting the site
- Electrical requirements
- Physical requirements
- Environmental requirements
- Unpacking the printer
- Who to call for assistance
- Connecting the printer
- Loading cards
- Loading the print ribbon
- Powering on the system
- Installing the printer driver
- Setup tips
- Making and evaluating test cards
- Printer test card
- Chapter 3: Using the printer
- Chapter 4: Maintaining the printer
- Chapter 5: Advanced Information
- Chapter 6: Troubleshooting
- App. A: Safety and compliance
- App. B: Supplies and cards
- App. C: PC settings
- App. D: Magnetic stripe encoding
- Index
6-10
Troubleshooting
User’s Guide for Express™ and Select™ Class Printers
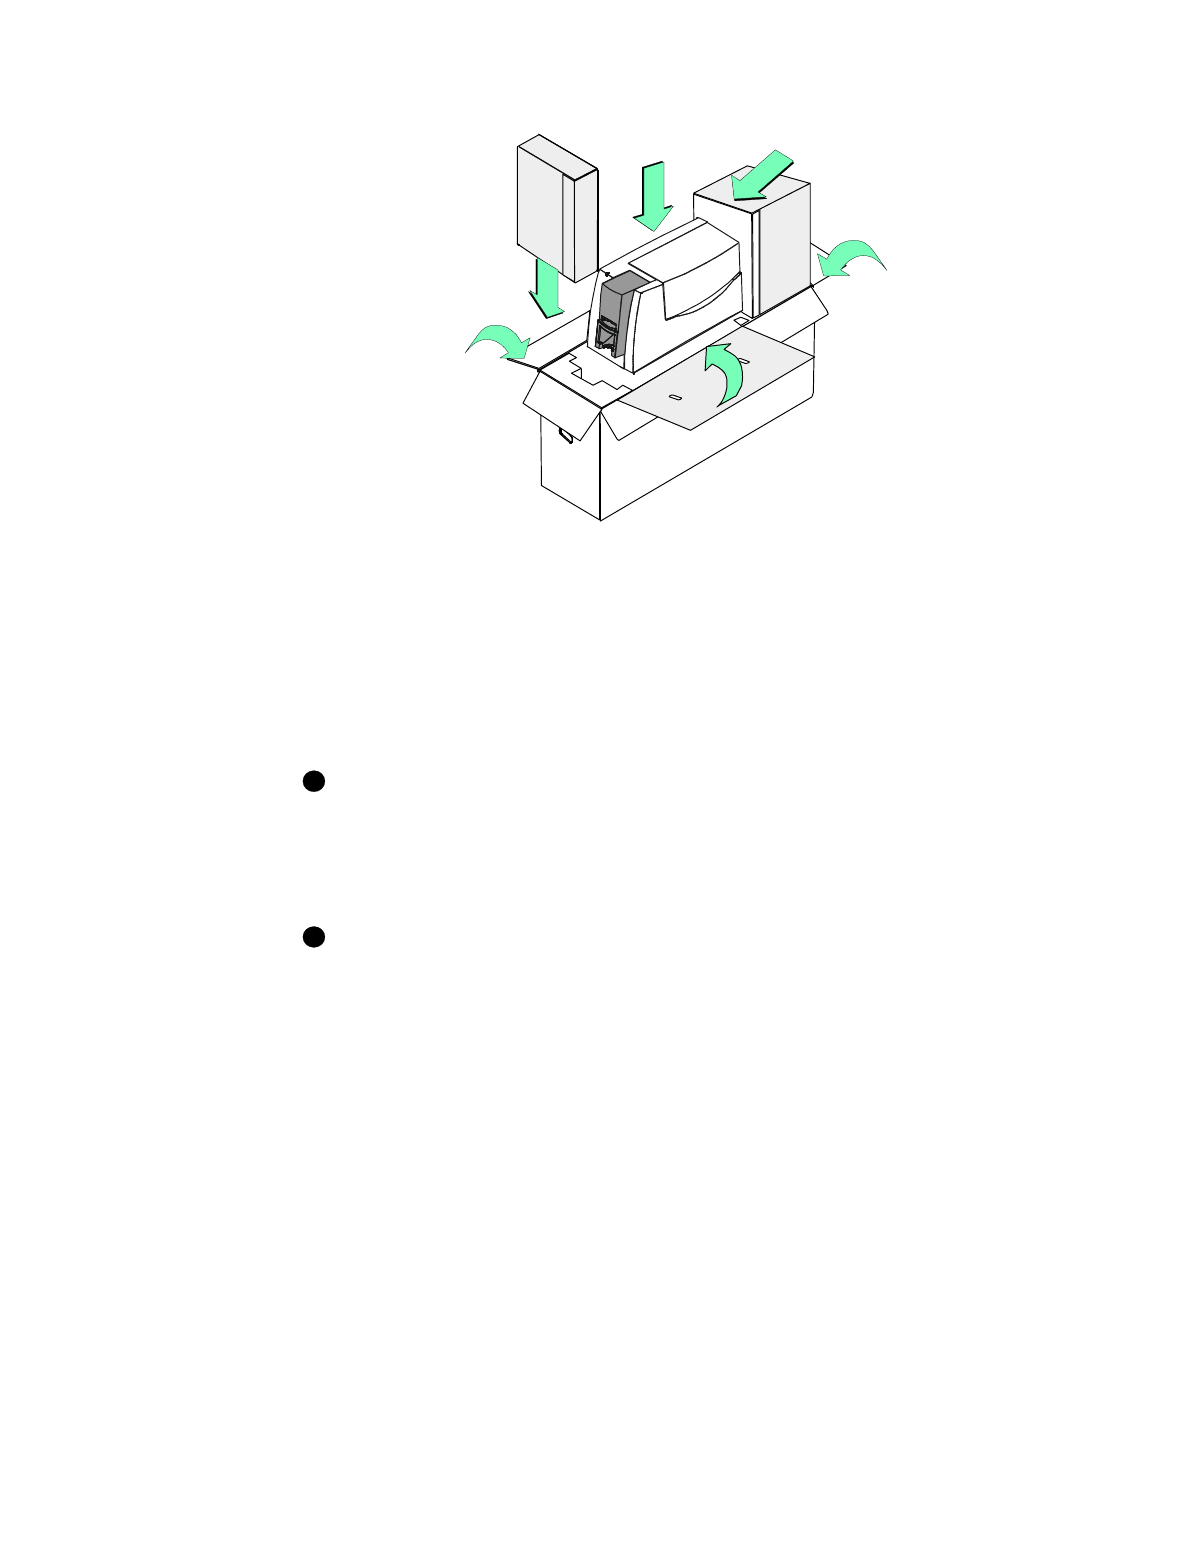
Figure 6-3: Pack an E or S printer for shipping
10 Place the protective box for your printer model:
– For models E and S, place the protective box in the shipping carton with the
closed end of the box toward the printer (step 1 in Figure 6-3).
– For model S2, place the open end of the protective box over the end of the
printer (step 1 in Figure 6-4).
11 Place the printer in the shipping carton (step 2 in Figure 6-3 or Figure 6-4).
Service might ask you to ship cards or additional samples of your current
supplies. If service requests cards or supply samples, place them in an envelope,
plastic bag, or in the accessory box to prevent damage to the printer.
12 Place the accessories box along the end of the shipping cushion, near the front of
the printer (step 3 in Figure 6-3 or Figure 6-4).
If you are transporting the printer to another location for use, be sure to pack the
User’s Guide, the interface cable, the power cord, any smart card serial cables,
printer driver CD, the warranty, and the declaration of conformity in the
accessories box.
13 Fold the top shipping support over the top of the printer (step 4 in Figure 6-3 or
Figure 6-4).
2
5
4
3
1
5
i
i