
User manual


Installation and Setup
2-24 ProMaster 2500 User Manual
2. Press
2
to select LABELER. The 2500 displays this menu:
Label Calibration
Label calibration determines the distance between the edge of the label
and the first printed character. This value is set at the factory and does not
usually need to be changed. If the text is not being printed on the label in
the proper location, ensure that the following conditions have been met:
• Labels have been calibrated.
• Labeler’s pinch rollers are fully engaged against the drive roller.
• ADC value is correctly set to 200 (see page 5-34 for this procedure).
• Correct labels for the 2500 (“QF” in the part number) are installed.
If these actions do not resolve the placement problem, you may need to
adjust label calibration.
To change the current label calibration value from the 2500’s front panel,
put the 2500 in local mode. The 2500 displays:
Press
1
from the LABELER SETUP MENU. The 2500 displays:
Use the 2500’s keyboard to change the setting. The range is from 0 to 255.
After entering the desired value, save it by pressing the
ENTER
key. The
2500 records this value as the new default and returns to the LABELER
SETUP MENU.
Note: If you change the label calibration value, press
CAL
so that the ADC optic
performs the ADC optic label calibration (see page 2-11).
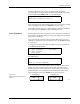
* * * LABELER SETUP MENU * * *
1 - LABEL CALIBRATION 4 - SETUP MENU
2 - LABEL PLACEMENT
3 - LABEL ADJUST
Figure 2-15
Changing the Label Calibration
Value
* * * LABELER SETUP MENU * * *
1 - LABEL CALIBRATION 4 - SETUP MENU
2 - LABEL PLACEMENT
3 - LABEL ADJUST
ENTER LABEL CALIBRATION VALUE (XX):_
1944-1
NORMAL
HIGHER VALUE