
User manual


Local Mode
ProMaster 2500 User Manual F-11
The 2500 displays:
Enter a number from 0 to 254. Entering a “0” (zero) places the left end of
the label on the leading edge of the device; each unit higher moves the
label 0.010-inches away from the leading edge of the device. Press
ENTER
to accept the selection.
This parameter can also be changed by the system administrator using
TaskLink.
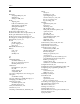
Label Adjust
This is a fine-tune adjustment for the label placement value when it is set
to “autocenter.” To change the value when the 2500 is in the local mode,
go to the Labeler Setup menu and press
3
.
The 2500 displays:
Use the 2500’s key pad to change the displayed setting. Increasing the
number moves the label farther from the leading edge of the device.
When you have entered the desired value, save it by pressing
ENTER
.
The 2500 records this value as the new default and returns to the Labeler
Setup menu.
Note: When you are running a Task or performing any other handler operation,
it is best to use the Stop command
LOWER CASE
+
C
for this parameter.
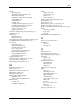
Handler Menu
The items in this menu allow you to alter parameters affecting the
handling of devices on the 2500.
Binning
The binning assignments defined by this command are used to redefine
which output tube on the 2500 will receive the pass and fail devices after
the programming operation. Under normal circumstances these will not
be changed from the factory defaults.
If it should become necessary to change the bin assignments, press
3
from
the System Setup menu to select HANDLER.
ENTER LABEL PLACEMENT VALUE (X):
ENTER "A" FOR AUTO CENTERING
* * * LABELER SETUP MENU * * *
1 - LABEL CALIBRATION 4 - SETUP MENU
2 - LABEL PLACEMENT
3 - LABEL ADJUST
ENTER LABEL ADJUST VALUE (X): _
* * * SYSTEM SETUP MENU * * *
1 - GENERAL 4 - MAIN MENU
2 - LABELER
3 - HANDLER