
User manual


Repair and Replacement Procedures
7-18 ProMaster 2500 User Manual
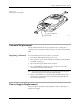
Replacing the
Programming
Module Clamp Air
Cylinder
If the programming module clamp air cylinder fails, follow the steps
below to replace it.
1. Turn off the 2500 and remove the power cord.
2. From above the main plate, remove four of the six 7/64-inch hex
screws (two front ones and two back ones) holding the programming
module clamp assembly to the main plate.
3. Holding the PE from the bottom (below the main plate), remove the
other two screws. Lower the programming module clamp assembly
and let it rest on the black protective shield.
4. Remove the two blue and two red air lines from the four quick
connects, noting their positions for reinstallation.
5. Remove the retaining bar. This bar holds the programming
electronics assembly in place on the underside of the main plate. Use
a 7/64-inch hex wrench to remove the two hex screws that hold the
bar in place. Set them in a safe place to use when you reinstall the
assembly.
6. Use a wrench to remove the air cylinder nut, then pull the air cylinder
away from the programming module clamp assembly.
7. Install the new air cylinder.
8. Ensure that the clamps pull back far enough to clear the inside wall
when retracted. If not, loosen the locking nut attaching the cylinder
shaft to the back of the clamp. Using a small pair of needle-nose
pliers, turn the shaft further into the clamp. Tighten the locking nut
when the clamps pull back far enough.
9. Reinstall all of the removed components.
10. Reinstall the programming module clamp assembly and reconnect
the air lines.