
User manual


Preventive Maintenance
ProMaster 2500 User Manual 5-25
Adjusting Position
of Print on Label
(Dot Matrix Printer)
The left-to-right position of characters on the label is determined by label
calibration.
You can change the label calibration setting during a Task run by
pressing
STOP
and then
LOWER CASE
+
C
. The 2500 displays:
The
X
represents the current setting. The default setting places the first
column of print within 0.040 inches of the leading edge of the label.
Increasing the value one unit moves the print location approximately
0.005 inches to the right; decreasing the value moves it 0.005 inches to the
left. Enter a number from 0 to 255, and press
ENTER
.
If you change label calibration, press
CAL
to calibrate the label (see page
4-19).
Adjusting Position
of Label on Device
(Dot Matrix Printer)
The position of the label on the device is determined by the label
placement value. This is set in the system defaults to “Auto center,”
which instructs the 2500 to place the label on the true center of the device.
You can change label placement using a local mode command described
in Appendix F.
You can use the
Label Adjust
parameter to fine-tune label placement and
thereby adjust its centering while a Task is running. Press
STOP
and then
LOWER CASE
+
A
. The 2500 displays:
Enter a number from 0 to 255; each unit moves the label 0.01 inch closer to
the trailing edge. Press
ENTER
to accept the selection.
Note: This works only when “Auto center” is selected in the 2500 Setup/Labeler
menu.
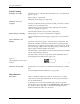
Figure 5-6
Adjusting Label Calibration
ENTER LABEL CALIBRATION VALUE (X):
ENTER LABEL ADJUST VALUE (X):
1944-1
NORMAL
HIGHER VALUE