
Installation manual


5
O
p
en 75
9/25 17:57 P3
U
[
U
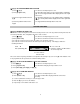
]-[9]-[4] SET KEYPAD NUMBER AND PARTITION
1) Enter [U]-[
9
]-[
4
]
The LCD screen will prompt for a code.
2) Enter [
program code
]
The LCD will now prompt you for the keypad number followed by
[U]. The current keypad number will be displayed in the lower right
hand corner.
3) Enter the keypad number followed
by [U]
The LCD will now prompt you for the partition number followed by
[U]. The current partition will be displayed in the lower right hand
corner.
4) Enter the partition number for the
keypad
The keypad will automatically exit this mode now.
KEYPAD FUNCTIONS
[
U
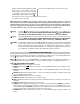
]-[9]-[0] READING THE EVENT LOG
The NX-8 has a 185-event log that can be retrieved using a master code. This log contains a listing of the last 185
events along with date, time, and partition where the event occurred.
1) Press
[
U
]-[9]-[0]
The LCD screen will prompt you for a code.
2) Enter [
master code
]
The LCD screen will now show the most recent event.
3) To view the events from most recent to the oldest, press the down scroll key.
4) To view the events from the oldest to the newest, press the up scroll key. The display contains the
following information.
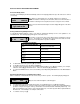
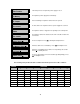
Event
User or Zone ID
Date (Month/Day)
Indicates partition and U indicates
an event not reported
ß
Time shown in
24 hour format
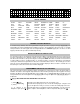
This screen shows an opening of Partition 3 on September 25
th
at 5:27 p.m. by user 75. The [U] shows that this event
is not programmed to be reported to the central monitoring station.
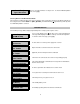
[U]-[9]-[5] SET ELAPSED INCREMENTS SINCE LAST AUTOTEST
1) Enter [U]-[9]-[5] The LCD screen will prompt for a code.
2) Enter [program code]
The LCD will now display the elapsed time screen.
3) Enter [100's digit] -[10's digit]-[1's digit]-[#]
[U]-[9]-[7] SET SYSTEM TIME AND DATE
1) Enter [U]-[9]-[7]
The LCD screen will prompt for a code.
2) Enter [master code]
The date and time will be displayed with the current hour
flashing.
3) Use the up and down scroll keys to select the proper hour.
4) Enter the [U] key to move to the minutes.
5) Repeat steps 3 & 4 until the entire date is set.