
Product Manual


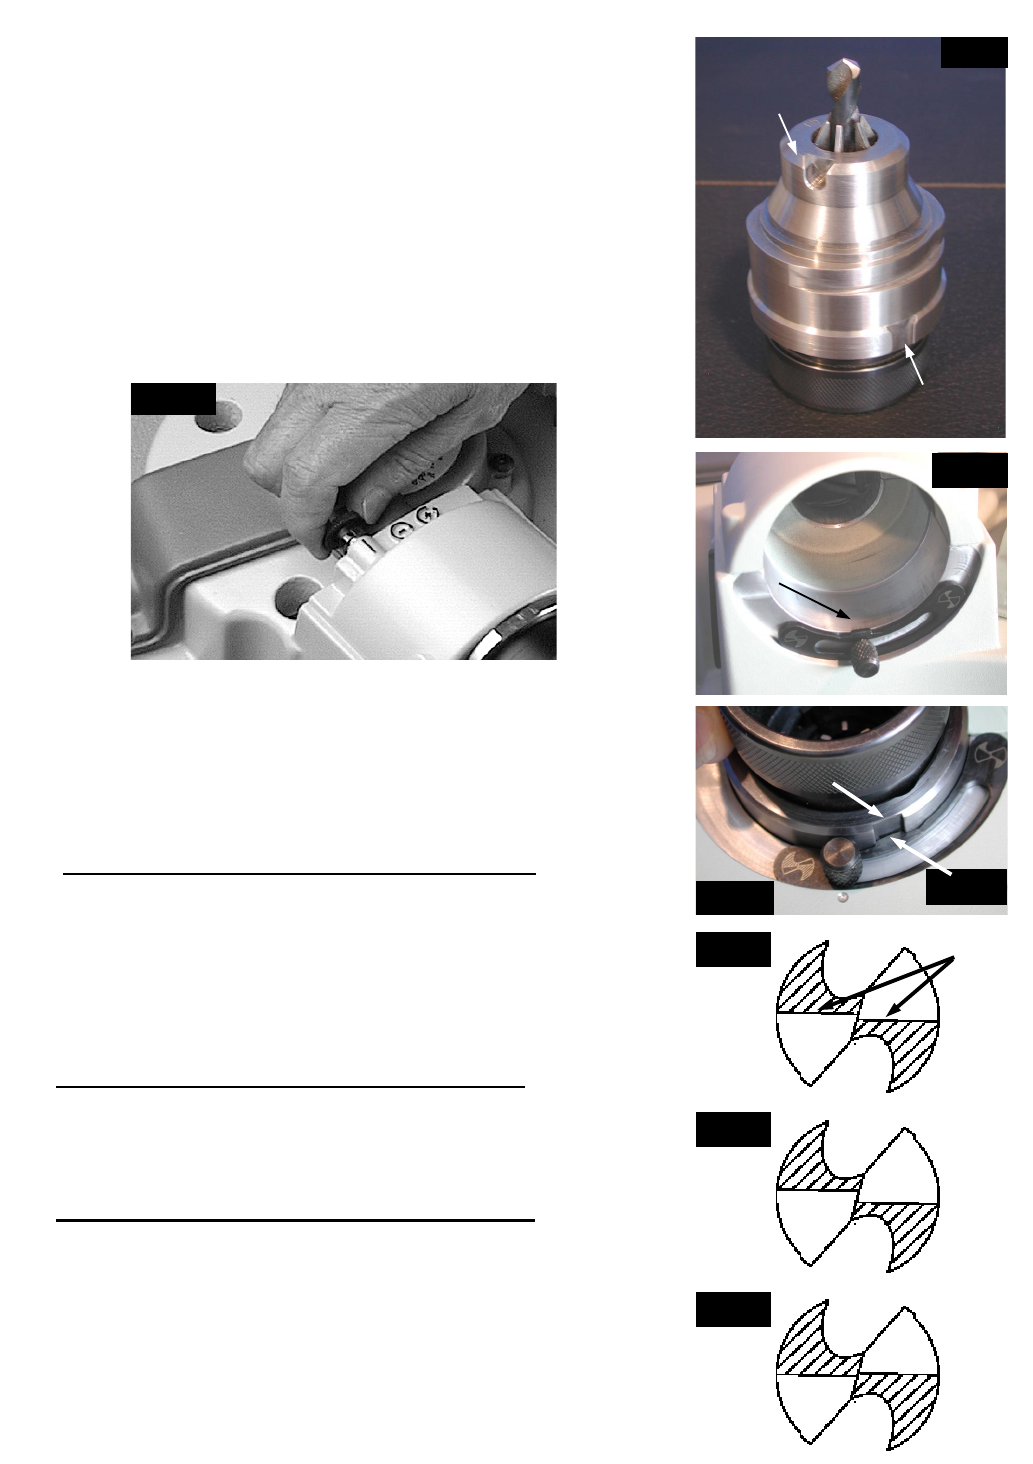
A. Once the drill is sharpened, do not remove it from the chuck.
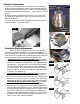
Align the Point Split Tab Notch, on the chuck, with Point Split Tab
on the point split adjustment bracket. Make sure chuck is held in-
line and square with the point split port. (See Picture # 16 & 17a
& 17b)
B. Slide the chuck into the grinding wheel for a “one count” pull
the chuck of the splitting port , about 1/2 inch and rotate it 180
degrees. Repeat “B”.
C. Use the point splitter depth adjustment screw to feed the drill
bit into the wheel. (See Picture #18)
Point Split Depth Adjustment:
What to do if the drill point is split too much or too little:
The point split depth is adjustable. The point split adjustment
screw is located at the rear of the point splitter. (See Picture #18)
If the drill point is changed at the sharpening port then a slight ad-
justment under the following notes will need to be made.
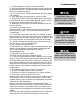
•
Drill point is split correctly: (See Diag ”A”) Use the posi-
tion of the “split line” on the right side of the drill bit as the ref-
erence line. Compare the position of the right “split line” to the
left “split line”. If the “split line” on the right is lower than the
“split line” on the left, the drill bit is under-split or split too lit-
tle. (See Diagram “B”) If the “split line” on the right is higher
than the “split line” on the left, the drill bit is over-split or split
too much. (See Diagram “C”).
•
Drill point is split too little: (See Diag “B”) Turn the ad-
justment screw counterclockwise, (unscrew). Each mark on
the sleeve of the screw will move the drill .002”. Rotate the ad-
justment screw one half of a line, at a time, in the point split
adjustment process. Re-split the point, then check the results.
•
Drill point is split too much: (See Diag “C”) The drill will
need to be realigned and re-sharpened prior to adjusting.
Once the drill is re-sharpened, turn the point split adjustment
knob clockwise approximately one line. Insert the drill into the
point split port and split both sides of the drill. Inspect the drill
point. If the split is now not deep enough then rotate the ad-
justment screw counterclockwise (unscrew), one half of a line.
Re-sharpen, then split the drill point again and check to see if
split is correct, if not, adjust accordingly.
Machine Adjustments
Point Split
Tab Notch
Alignment
Pin Slot
Pic 16
Point Split
Tab
Pic 17a
Pic 18
Diag A
Diag B
Diag C
Split
too
little
Split
too
much
Split
lines
Correct
split
Notch
Tab
Pic 17b