
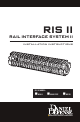
Installation Instructions
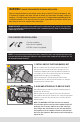


3. TIGHTEN THE RAIL
Insert the four remaining 7/8" screws from the receiver toward
the muzzle through the Bolt-Up Plate into the RIS II, and tighten all
six screws to 29-32 in/lbs using the supplied allen wrench in the
following pattern: the center screws rst, the bottom screws next,
and the top screws last. Reinstall muzzle device.
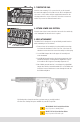
4. ATTACH LOWER RAIL SECTION
Using the four slotted screws, attach the lower rail to the main body
of the handguard. No thread locker is required.
5. M203 ATTACHMENT
The M4A1 RIS II is designed to accept an M203 grenade launcher
while maintaining a free-oat barrel.
1. Remove lower rail assembly by loosening and then removing
four lower rail attachment screws. Place two of the lower rail
attachment screws back into lower rail assembly for safekeeping.
2. Locate M203 hanger tabs inside upper rail assembly and
rotate downward.
3. Install M203 grenade launcher by placing engagement collar
around the M4 barrel, ensuring that the alignment roll pin is
in line with the RIS II upper rail assembly alignment slot.
4. Once M203 grenade launcher is seated properly, align M203
hanger tabs with the forward-threaded holes on the M203 and
install two lower rail attachment screws through the tabs into
the M203 and tighten.
By following these simple instructions, you have now successfully installed
the nest free-oating rail system available for your AR15-style rie.
SPARE LOWER RAIL
ATTACHMENT SCREW
3
SPARE LOWER RAIL
ATTACHMENT SCREW
4
MK18/M4A1 RIS II Installation Video
https://youtu.be/c6wiWgTw0cA
M4A1 FSP RIS II Installation Video
https://youtu.be/lEwL201Jy94