
User`s manual


Genie HM Series-GigE Vision Camera Operational Reference • 65
Flat Field (Image Shading) Correction
Image Shading correction, also known as Flat Field Correction is the process of eliminating small gain differences
between pixels in a sensor, eliminate sensor hotspots by automatically doing pixel replacement, and also to
compensate for light distortion caused by a lens. That sensor when exposed to a uniformly lit field will have no gray
level differences between pixels when calibrated flat field correction is applied to the image. The Genie camera
stores flat field correction data until power off or in its user setting state for recall at any time (see "
Power-up
Configuration" on page 36). Flat field correction data is composed of gain and offset coefficients.
The CamExpert Flat Field Correction tool (or Sapera Flat Field Demo) allows calibrating. saving, and loading the
flat field calibration data for any Genie camera being controlled. CamExpert will automatically apply frame rate and
exposure limits to optimize calibration (see the calibration notes below).
Important Factors about Flat Field Processing
Important: During calibration, no other Genie features should be accessed or modified. The calibration process
will disable functions such as image crop or flip setting. These features need to be re-enabled by the application or
user only after the flat field calibration completes.
Important: Before calibration, the Genie should be powered on long enough to achieve its nominal temperature
(a minimum of 30 minutes). A metallic camera mount or a low ambient temperature may increase the time
required for the Genie to reach a stable internal temperature.
Calibration via CamExpert: The CamExpert calibration function will automatically reduce the frame rate and
the exposure is limited to 40ms maximum. These settings are for optimal performance from the sensor.
Calibration via a User Application: The user application must not exceed 15fps and limit exposure to 40ms
(same conditions set by CamExpert). These requirements are for both free run mode (internal trigger) or when
using an external trigger to capture the calibration frames.
Important Factors about the Flat Field Data (TIF) File
Data Format rules:
Camera Pixel format in 8-bit — Flat Field calibration data (8-bit) is saved as a 8-bit TIF file
Camera Pixel format in 10-bit — Flat Field calibration data (10-bit) is saved as a 16-bit TIF file
Flat Field 8-bit calibration data which is saved as an 8-bit data file (TIF) can only be loaded by a Sapera
application when the application pixel format is 8-bit.
Flat Field 10-bit calibration data which is saved as a 16-bit data file (TIF) can only be loaded by a Sapera
application when the application pixel format is 10-bit.
Flat Field 10-bit calibration data loaded in the camera remains valid if the pixel format is then changed to 8-bit.
Flat Field 8-bit calibration data loaded in the camera loses the 2 LSB DN on the 10-bit image data path if the pixel
format is changed to 10-bit.
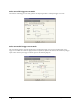
Set up Dark and Bright Acquisitions with the Histogram Tool
Before performing calibration, verify Genie acquisition with a live grab. Also at this time make preparations to grab
a flat light gray level image, required for the calibration, such as a clean evenly lighted white wall or non-glossy
paper with the lens slightly out of focus. Ideally a controlled diffused light source aimed directly at the lens should
be used. Note the lens iris position for a bright but not saturated image. Additionally check that the lens iris closes
well or have a lens cover to grab the dark calibration image.