
Service Manual
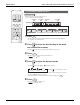
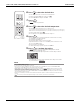


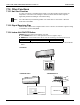
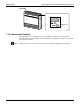

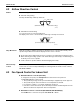
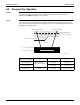
Table Of Contents
- Cover
- Table of contents
- Part 1 List of Functions
- Part 2 Specifications
- Part 3 Printed Circuit Board Connector Wiring Diagram
- Part 4 Refrigerant Circuit
- Part 5 Functions and Control
- Part 6 Test Operation and Field Settings
- Part 7 Remote Controller
- Part 8 Troubleshooting
- 1. Troubleshooting with LED
- 2. Service Diagnosis
- 3. Error Codes and Description
- 4. Troubleshooting for CTXG, CTXS, FTXS, CDXS, FDXS, FVXS Series
- 5. Troubleshooting for FFQ Series
- 6. Troubleshooting for Branch Provider (BP) Unit
- 7. Troubleshooting for Outdoor Unit
- 8. Thermistor Resistance/Temperature Characteristics
- 9. Pressure Sensor
- 10. Method of Replacing Inverter’s Power Transistors Modules
- Part 9 Appendix

CTXG, CTXS, FTXS, CDXS, FDXS, FVXS Series Functions SiUS181631EA
94 Functions and Control
Confirming a reservation
Setting Displays
Normal Confirmation
1.
Press .
3.
Press to exit the confirmation mode.
Display
To deactivate WEEKLY TIMER operation
NOTE
2.
• The reservation can be confirmed.
• The day of the week and the reservation number of the current day will be displayed.
• Pressing displays the reservation details.
•
To change the confirmed reserved settings, select the reservation number and press .
The mode is switched to setting mode. Proceed to Setting mode STEP
4
.
• “ ” is displayed on the LCD and WEEKLY TIMER operation is activated.
• The TIMER lamp periodically lights orange.
The multi-monitor lamp will not light orange if all the reservation settings are deleted.
• “ ” disappears from the LCD.
• The TIMER lamp goes off.
• To reactivate the WEEKLY TIMER operation, press again.
• If a reservation deactivated with is activated once again, the last reservation mode
will be used.
Press to select the day of the week and the
reservation number to be confirmed.
Press while “
” is displayed on the
LCD.
• If not all the reservation settings are reflected, deactivate the WEEKLY TIMER operation once. Then press again to reactivate the
WEEKLY TIMER operation.