
User's Manual


Table Of Contents
- Cybersecurity Recommendations
- Regulatory Information
- Foreword
- 1 Product Introduction
- 2 Basic Settings
- 3 Daily Operation
- 3.1 Live
- 3.2 PTZ
- 3.2.1 Bullet Camera
- 3.2.2 Dome Camera
- 3.2.2.1 Configuring Protocol
- 3.2.2.2 Configuring PTZ Functions
- 3.2.2.2.1 Configuring Preset
- 3.2.2.2.2 Configuring Tour
- 3.2.2.2.3 Configuring Scan
- 3.2.2.2.4 Configuring Pattern
- 3.2.2.2.5 Configuring Pan
- 3.2.2.2.6 Configuring PTZ Speed
- 3.2.2.2.7 Configuring Idle Motion
- 3.2.2.2.8 Configuring Power Up
- 3.2.2.2.9 Configuring Time Task
- 3.2.2.2.10 Restarting PTZ Manually
- 3.2.2.2.11 Restoring PTZ to the Default Settings
- 3.2.2.3 Operating PTZ
- 3.2.2.4 Configuring Preset Backup
- 3.3 Playback
- 3.4 Reports
- 3.5 Alarm
- 4 Setting
- 4.1 Configuring Camera
- 4.1.1 Configuring Lens
- 4.1.2 Configuring Video Parameters
- 4.1.3 Configuring Audio Parameters
- 4.2 Configuring Network
- 4.3 Peripheral
- 4.4 Smart Thermal
- 4.5 Event
- 4.6 Temperature Measuring Settings
- 4.7 Storage Management
- 4.8 System Management
- 4.1 Configuring Camera
- 5 System Maintenance
- 6 Additional Accessing Methods
Setting 84
Peripheral 4.3
Manage the Camera’s components.
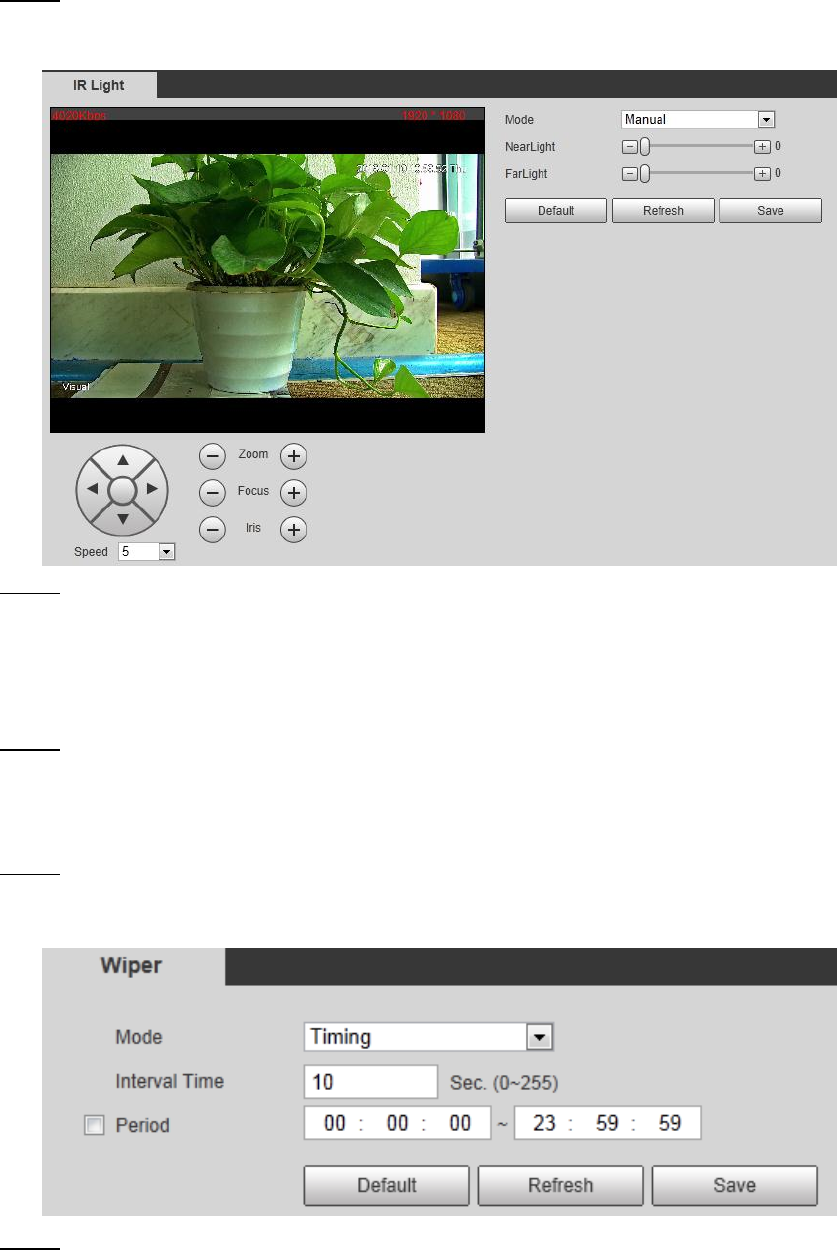
4.3.1 Configuring IR Light
Select Setting > Peripheral > IR Light. Step 1
The IR Light interface is displayed. See Figure 4-38.
IR light Figure 4-38
Configure IR light’s running mode. Step 2
Zoom Prio: When the camera zooms in or out the visible surveillance image, the
IR light’s brightness will be adjusted automatically.
Manual: Adjust the IR light’s brightness manually to realize the best image display
effect under night vision condition.
Click Save to finish configuration. Step 3
4.3.2 Configuring Wiper
Select Setting > Peripheral > Wiper. Step 1
The Wiper interface is displayed. See Figure 4-39.
Wiper Figure 4-39
Configure IR light’s running mode. Step 2