
User's Manual

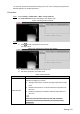


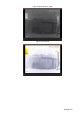


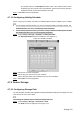
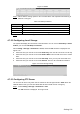
Table Of Contents
- Cybersecurity Recommendations
- Regulatory Information
- Foreword
- 1 Product Introduction
- 2 Basic Settings
- 3 Daily Operation
- 3.1 Live
- 3.2 PTZ
- 3.2.1 Bullet Camera
- 3.2.2 Dome Camera
- 3.2.2.1 Configuring Protocol
- 3.2.2.2 Configuring PTZ Functions
- 3.2.2.2.1 Configuring Preset
- 3.2.2.2.2 Configuring Tour
- 3.2.2.2.3 Configuring Scan
- 3.2.2.2.4 Configuring Pattern
- 3.2.2.2.5 Configuring Pan
- 3.2.2.2.6 Configuring PTZ Speed
- 3.2.2.2.7 Configuring Idle Motion
- 3.2.2.2.8 Configuring Power Up
- 3.2.2.2.9 Configuring Time Task
- 3.2.2.2.10 Restarting PTZ Manually
- 3.2.2.2.11 Restoring PTZ to the Default Settings
- 3.2.2.3 Operating PTZ
- 3.2.2.4 Configuring Preset Backup
- 3.3 Playback
- 3.4 Reports
- 3.5 Alarm
- 4 Setting
- 4.1 Configuring Camera
- 4.1.1 Configuring Lens
- 4.1.2 Configuring Video Parameters
- 4.1.3 Configuring Audio Parameters
- 4.2 Configuring Network
- 4.3 Peripheral
- 4.4 Smart Thermal
- 4.5 Event
- 4.6 Temperature Measuring Settings
- 4.7 Storage Management
- 4.8 System Management
- 4.1 Configuring Camera
- 5 System Maintenance
- 6 Additional Accessing Methods
Setting 128
Select Setting > Storage > Schedule > Record. Step 1
The Record interface is displayed. See Figure 4-73.
Record
Figure 4-73
Select recording type and configure time period. Step 2
Select recording type, and then you can also press and hold the left mouse button to
select the time period as needed in the chart.
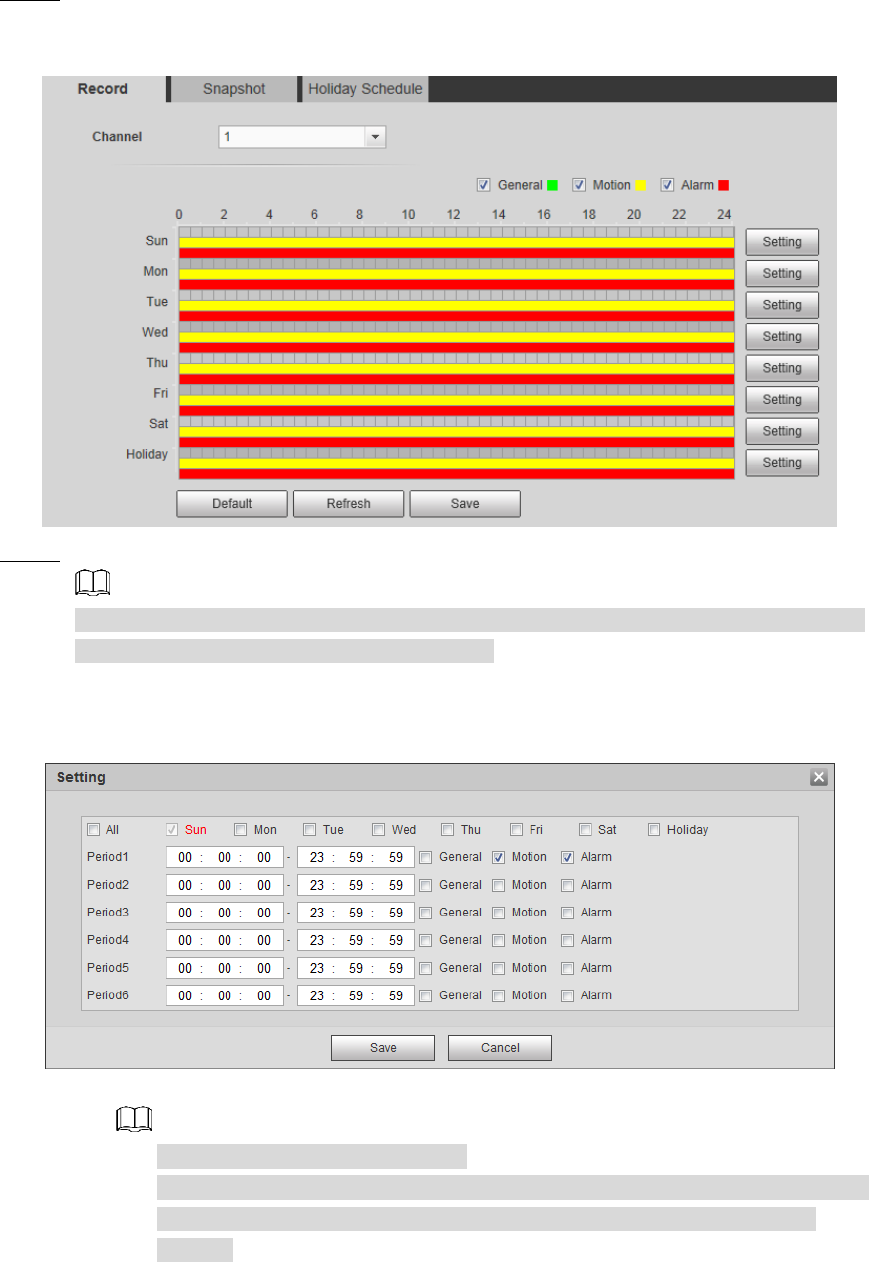
1) Click the Setting for the day that you want to configure time period.
The Setting interface is displayed. See Figure 4-74.
Setting Figure 4-74
2) Select a day in a week and configure its period.
There are 6 periods for each day.
Select the All check box, and the entered time period will apply to the whole
week. Sunday is selected by default, and you can select other days as
needed.
3) Select the record type for the corresponding time period.
4) Click Save.
The system returns to the Record interface. Each color represents a video type.
Green represents general video recording schedule, yellow represents video
recording schedule under motion detection and red represents video recording
schedule under alarm conditions.