
User's Manual
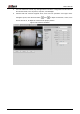
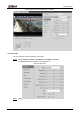
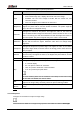
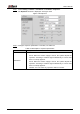

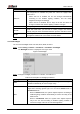
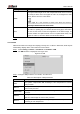


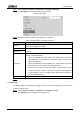
Table Of Contents
- Foreword
- Important Safeguards and Warnings
- 1 Overview
- 2 Configuration Flow
- 3 Device Initialization
- 4 Basic Configuration
- 4.1 Login
- 4.2 Live
- 4.3 PTZ Operation
- 4.4 Playback
- 4.5 Camera
- 4.5.1 Conditions
- 4.5.2 Setting Video Parameters
- 4.5.2.1 Video
- 4.5.2.2 Snapshot
- 4.5.2.3 Overlay
- 4.5.2.3.1 Configuring Privacy Masking
- 4.5.2.3.2 Configuring Channel Title
- 4.5.2.3.3 Configuring Time Title
- 4.5.2.3.4 Configure Text Overlay
- 4.5.2.3.5 Configure Font Attribute
- 4.5.2.3.6 Configure Picture Overlay
- 4.5.2.3.7 Configure Custom Overlay
- 4.5.2.3.8 Configuring OSD Info
- 4.5.2.3.9 Configuring Counting
- 4.5.2.3.10 Configuring Structured Statistics
- 4.5.2.3.11 Configuring Ranging
- 4.5.2.3.12 Configuring ANPR
- 4.5.2.3.13 Configuring Face Statistics
- 4.5.2.4 ROI
- 4.5.2.5 Path
- 4.5.3 Audio
- 4.6 Network
- 4.7 Storage
- 4.8 System
- 5 Event
- 5.1 Setting Alarm Linkage
- 5.2 Setting Smart Track
- 5.3 Setting Panoramic Calibration
- 5.4 Setting Video Detection
- 5.5 Setting Smart Motion Detection
- 5.6 Setting Audio Detection
- 5.7 Setting Smart Plan
- 5.8 Setting IVS
- 5.9 Setting Crowd Map
- 5.10 Setting Face Recognition
- 5.11 Setting Face Detection
- 5.12 Setting People Counting
- 5.13 Setting Heat Map
- 5.14 Setting Stereo Analysis
- 5.15 Setting ANPR
- 5.16 Setting Video Structuralization
- 5.17 Setting Relay-in
- 5.18 Setting Abnormality
- 6 Maintenance
- Appendix 1 Cybersecurity Recommendations

User’s Manual
48
Parameter
Description
Auto Iris
This configuration is available only when the camera is equipped with
auto-iris lens.
When auto iris is enabled, the iris size changes automatically
according to the ambient lighting condition, and the image
brightness changes accordingly.
When auto iris is disabled, the iris stays at full size and does not
change no matter how ambient lighting condition changes.
2D NR
Average single-frame dots and other dots around to reduce noise.
3D NR
Works with multi-frame (no less than 2 frames) images and reduces
noise by using the frame information between previous and latter frames.
Grade
This configuration is available only when the 3D DNR is enabled.
The higher the DNR level is, the better the result will be.
Click Save. Step 3
4.5.1.1.4 Backlight
You can select backlight mode from Auto, BLC, WDR, and HLS.
Select Setting > Camera > Conditions > Conditions > Backlight. Step 1
The Backlight interface is displayed. See Figure 4-36.
Backlight Figure 4-36
Configure backlight parameters. For details, see Table 4-10. Step 2
Table 4-10 Description of backlight parameters
Backlight mode
Description
Auto
The system adjusts image brightness according to ambient lighting
condition automatically to ensure image clarity.
BLC
Enable BLC, the camera can get clearer image of the dark areas on the
target when shooting against light. You can select Default mode or
Customized mode.
When in Default mode, the system adjusts exposure according to
ambient lighting condition automatically to ensure the clarity of the
darkest area.
When in Customized mode, the system auto adjusts exposure
only to the set area according to ambient lighting condition to
ensure the image of the set area at ideal brightness.