Version 1.
Preface D-Link reserves the right to revise this publication and to make changes in the content hereof without obligation to notify any person or organization of such revisions or changes. Manual Revisions Revision Date 1.0 January 16, 2013 Description • Initial release Trademarks D-Link and the D-Link logo are trademarks or registered trademarks of D-Link Corporation or its subsidiaries in the United States or other countries.
Table of Contents Table of Contents Preface ................................................................................. i Manual Revisions ........................................................................... i Trademarks ...................................................................................... i Product Overview .............................................................. 1 Package Contents .........................................................................
Table of Contents Website Filters ......................................................................78 Inbound Filter ......................................................................79 Firewall Settings ..................................................................80 Routing ...................................................................................82 Advanced Wireless .............................................................83 Wi-Fi Protected Setup ...............................
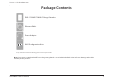
Section 1 - Product Overview Product PackageOverview Contents %"1 "$ 8J 'J 3BOHF &YUFOEFS Ethernet Cable Power Adapter Wi-Fi Configuration Note Wi-Fi Configuration Note If any of the above items are missing, please contact your reseller. Note: Using a power supply with a different voltage rating than the one included with th%"1 L will cause damage and void the warranty for this product.
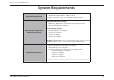
Section 1 - Product Overview System Requirements Network Requirements • An Ethernet-based Cable or DSL modem • 802.11ac (draft), n, g, b, or a wireless or Ethernet port Computer with the following: • Windows®, Macintosh, or Linux-based operating system • An installed Ethernet adapter Web-based Configuration Utility Requirements Browser Requirements: • Internet Explorer 7 or higher • Firefox 3.
Section 1 - Product Overview Introduction The D-Link Wireless AC1750 Dual-Band Gigabit Cloud Router USB 3.0 (%"1 comes equipped with four Gigabit ports to provide speeds up to 10x faster than standard 10/100 ports. It also uses 802.11ac (draft) technology with multiple intelligent antennas to maximize the speed and range of your wireless signal to significantly outperform 802.11n devices.
Section 1 - Product Overview Features • Faster Wireless Networking - The %"1 can provide up to a full 1750Mbps* wireless connection with concurrent 801.11ac and 802.11n wireless clients . It also operates on both the 2.4 GHz and 5 GHz bands to allow separation of traffic so users can participate in high-bandwidth activities, such as video streaming, online gaming, and real-time audio, without affecting low-priority traffic like email and web surfing.
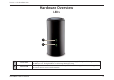
Section 1 - Product Overview Hardware Overview LEDs 1 2 1 Power LED 2 Internet LED D-Link %"1 User Manual A solid green light indicates a proper connection to the power supply. The light will blink green during the WPS process. The light will be a solid orange during boot up. A solid light indicates connection on the Internet port. If the LED is orange, the connection is good but the router cannot connect to the Internet.
Section 2 - Installation Installation This section will walk you through the installation process. Placement of the router is very important. Do not place the router in an enclosed area such as a closet, cabinet, or in the attic or garage. Before you Begin • Please configure the router with the computer that was last connected directly to your modem. • You can only use the Ethernet port on your modem.
Section 2 - Installation Wireless Installation Considerations The D-Link wireless router lets you access your network using a wireless connection from virtually anywhere within the operating range of your wireless network. Keep in mind, however, that the number, thickness and location of walls, ceilings, or other objects that the wireless signals must pass through, may limit the range.
Section 2 - Installation Configuration There are several different ways you can configure your router to connect to the Internet and connect to your clients: • D-Link Setup Wizard - This wizard will launch when you log into the router for the first time. Refer to page 12. • QRS Mobile App - Use your iPhone, iPad, or iPod Touch to configure your router. Refer to page 19. • Manual Setup - Log into the router and manually configure your router (advanced users only). Refer to pagepage 26.
Section 3 - Configuration D-Link Quick Setup Wizard If this is your first time installing the router, open your web browser. You will automatically be directed to the Wizard Setup Screen. If the wizard does not open automatically, you can alternately reach the configuration utility by entering the IP address of the router (http://192.168.0.1). Please refer to page 24. This wizard is designed to guide you through a step-by-step process to configure your new D-Link router and connect to the Internet.
Section 3 - Configuration If the router does not detect a valid Ethernet connection from the Internet port, this screen will appear. Connect your broadband modem to the Internet port and then click Try Again. If the router detects an Ethernet connection but does not detect the type of Internet connection you have, this screen will appear. Click Guide me through the Internet Connection Settings to display a list of connection types to choose from.
Section 3 - Configuration If the router detected or you selected PPPoE, enter your PPPoE username and password and click Next to continue. Note: Make sure to remove your PPPoE software from your computer. The software is no longer needed and will not work through a router. If the router detected or you selected PPTP, enter your PPTP username, password, and other information supplied by your ISP. Click Next to continue.
Section 3 - Configuration If the router detected or you selected Static, enter the IP and DNS settings supplied by your ISP. Click Next to continue. For both the 2.4GHz and 5GHz segments, create a Wi-Fi network name (SSID) using up to 32 characters. Create a Wi-Fi password (between 8-63 characters). Your wireless clients will need to have this passphrase or key entered to be able to connect to your wireless network. Click Next to continue. In order to secure your router, please enter a new password.
Section 3 - Configuration Select your time zone from the drop-down menu and click Next to continue. The Setup Complete window will display your Wi-Fi settings. Click Save and Connect to continue. If you want to create a bookmark to the router, click OK. Click Cancel if you do not want to create a bookmark. If you clicked Yes, a window may appear (depending on what web browser you are using) to create a bookmark.
Section 3 - Configuration To use the mydlink service (mydlink.com or the mydlink Lite app), you must have an account. Select if you do have a mydlink account or if you need to create one. Click Next to continue. If you do not want to register at this time, click Cancel. If you clicked Yes, enter your mydlink account name (email address) and password. Click Login to register your router. If you clicked No, fill out the requested information and click Next to create your mydlink account.
Section 3 - Configuration The mydlink App will allow you to receive notices, browse network users, and configure your router from an iPhone/iPad/iPod Touch (iOS 3.0 or higher), Android device (1.6 or higher). To download the "mydlink lite" app, visit the Apple Store, Android Market or http://mydlink.com/Lite. PC and Mac users can use the mydlink portal at http://mydlink.com.
Section 3 - Configuration QRS Mobile App (iOS, Android) D-Link offers an app for your iOS or Android device to install and configure your router. Step 1 From an iOS device, go to the iTunes Store. From an Android device go to Google Play. Search for ‘D-Link’, select QRS Mobile, and download the app to your device. You may also scan the appropriate code on the right to locate the app download page. iOS Android Step 2 Once your app is installed, you may now configure your router.
Section 3 - Configuration SharePort Mobile App (iOS, Android) The SharePort Mobile app will allow you to access files from a USB storage drive that is plugged into your router. You must enable file sharing from the Setup > Storage page (refer to page 22) for this app to work properly. 1. Plug your USB storage drive into the USB port. Note: The %"1 supports hard drives with up to one terabyte of storage capacity. 2.
Section 3 - Configuration 4. Click Wi-Fi, select the Wi-Fi Network Name (SSID) that you created during setup and then enter the default Wi-Fi password located on your Wi-Fi configuration note. 5. Once connected, tap on the SharePort Mobile icon. 6. The following screen will appear.
Section 3 - Configuration 7. Tap on the Settings icon located on the right top corner of the screen. Tap Edit to enter your User Name and Password (the default username is admin and the password field should be left blank). Once you finish, click Done to continue. 8. For the Movie section, click the movie icon to play your movie from your USB flash drive. 9. For the Music section, click the music icon to play your music from your USB flash drive.
Section 3 - Configuration 10. For the Photo section, click the Photo icon to view your photos from your USB flash drive. 11. For the Files section, click on the Files icon to view your files from your USB flash drive. 12. For the Folder section, click the folder icon to view your folders from your USB flash drive.
Section 3 - Configuration Web-based Configuration Utility To access the configuration utility, open a web-browser such as Internet Explorer and enter http://dlinkrouter.local. Windows and Mac users may also connect by typing the IP address of the router (http://192.168.0.1) in the address bar. Enter your password. The password should be left blank by default.
Section 3 - Configuration Internet Connection Setup If you want to configure your router to connect to the Internet using the wizard, click Internet Connection Setup Wizard. You will be directed to the Quick Setup Wizard. Please refer to page 12. Click Manual Internet Connection Setup to configure your connection manually and continue to the next page.
Section 3 - Configuration Manual Internet Setup Static IP Select your connection type from the My Internet Connect Is drop-down box. Choose Static IP if all of the port’s IP information has been provided by your ISP. You will need to enter the IP address, subnet mask, gateway address, and DNS address(es). Each IP address entered in the fields must be in the appropriate IP form, which are four octets separated by a dot (x.x.x.x). The Router will not accept the IP address if it is not in this format.
Section 3 - Configuration Dynamic IP (DHCP) If you are unsure what method you use to connect to the Internet, try this first. Cable modems usually use this type of connection My Internet Select Dynamic IP (DHCP) to obtain IP Address information automatically Connection: from your ISP. Select this option if your ISP does not give you any IP numbers to use. This option is commonly used for cable modem services.
Section 3 - Configuration PPPoE (Username/Password) Choose PPPoE (Point to Point Protocol over Ethernet) if your ISP uses a PPPoE connection. Your ISP will provide you with a username and password. This option is typically used for DSL services. Make sure to remove your PPPoE software from your computer. The software is no longer needed and will not work through a router. My Internet Connection: Select PPPoE (Username/Password) from the drop-down menu.
Section 3 - Configuration Maximum Enter a maximum idle time during which the Internet connection is maintained during inactivity. To disable this feature, enable Idle Time: Auto-reconnect. DNS Addresses: Enter the Primary and Secondary DNS Server Addresses (Static PPPoE only). MTU: Maximum Transmission Unit - you may need to change the MTU for optimal performance with your specific ISP. 1492 is the default MTU.
Section 3 - Configuration PPTP Choose PPTP (Point-to-Point-Tunneling Protocol ) if your ISP uses a PPTP connection. Your ISP will provide you with a username and password. This option is typically used for DSL services. My Internet Connection: Select PPTP (Username/Password) from the drop-down menu. Enable Advanced Advanced Domain Name System (DNS) services enhances your Internet DNS Service: performance by getting you the information and web pages you are looking for faster and more reliably.
Section 3 - Configuration L2TP Choose L2TP (Layer 2 Tunneling Protocol ) if your ISP uses a L2TP connection. Your ISP will provide you with a username and password. This option is typically used for DSL services. My Internet Connection: Select L2TP (Username/Password) from the drop-down menu. Enable Advanced Advanced Domain Name System (DNS) services enhances your Internet DNS Service: performance by getting you the information and web pages you are looking for faster and more reliably.
Section 3 - Configuration Maximum Idle Enter a maximum idle time during which the Internet connection is maintained during inactivity. To disable this feature, enable Time: Auto-reconnect. DNS Servers: The DNS server information will be supplied by your ISP (Internet Service Provider.) MTU: Maximum Transmission Unit - you may need to change the MTU for optimal performance with your specific ISP. 1400 is the default MTU.
Section 3 - Configuration DS-Lite DS-Lite is an IPv6 connection type. After selecting DS-Lite, the following parameters will be available for configuration: DS-Lite Select the DS-Lite DHCPv6 option to let the router allocate the AFTR Configuration: IPv6 address automatically. Select the Manual Configuration to enter the AFTR IPv6 address in manually. AFTR IPv6 Address: After selecting the Manual Configuration option above, enter the AFTR IPv6 address used here.
Section 3 - Configuration Wireless Settings If you want to configure the wireless settings on your router using the wizard, click Wireless Network Setup Wizard and refer to page 42. Click Add Wireless Device with WPS if you want to add a wireless device using Wi-Fi Protected Setup (WPS) and refer to page 44. If you want to manually configure the wireless settings on your router click Manual Wireless Network Setup and refer to the next page.
Section 4 - Security Wireless Connection Setup Wizard To run the security wizard, click on Setup at the top and then click Wireless Connection Setup Wizard. STEP 1: Type your desired wireless network names (SSIDs) for both the 2.4 GHz band and the 5 GHz band. Automatically: Select this option to automatically generate the router’s network key and click Next. Manually: Select this option to manually enter your network key and click Next.
Section 4 - Security If you selected Automatically, the option to make your password the same on both bands with be offered. If you choose to make them the same, you can select your own password in the box below. Click Next. You will now see a summary window that displays your settings. Write down the security key and enter this on your wireless clients. Click Save to save your settings.
Section 4 - Security If you selected Manually, the option to make your password the same on both bands with be offered. Enter your wireless password in the box below. Click Next. You will now see a summary window that displays your settings. Write down the security key and enter this on your wireless clients. Click Save to save your settings.
Section 4 - Security Wireless Security Setup Wizard If you are unfamiliar with the types of wireless security, more information is located in the appendix at back of this manual. To run the security wizard, click on Setup at the top and then click Wireless Network Setup Wizard. Type your desired wireless network name (SSID). Automatically: Select this option to automatically generate the router’s network key and click Next. Manually: Select this option to manually enter your network key and click Next.
Section 4 - Security If you selected Automatically, the summary window will display your settings. Write down the security key and enter this on your wireless clients. Click Save to save your settings. If you selected Manually, the following screen will appear. Create a passphrase for your security password. Click Next to continue.
Section 4 - Security Add Wireless Device with WPS Wizard If you are unfamiliar with the types of wireless security, more information is located in the appendix at back of this manual. From the Setup > Wireless Settings screen, click Add Wireless Device with WPS. Select Auto to add a wireless client using WPS (Wi-Fi Protected Setup) and then click Next. Skip to the next page. If you select Manual, a settings summary screen will appear. Write down the security key and enter this on your wireless clients.
Section 4 - Security PIN: Select this option to use PIN method. In order to use this method you must know the wireless client’s 8 digit PIN and click Connect. PBC: Select this option to use PBC (Push Button) method to add a wireless client. Click Connect. Once you click Connect, you will have a 120 second time limit to apply the settings to your wireless client(s) and successfully establish a connection.
Section 3 - Configuration Manual Wireless Settings 802.11 b/g/n (2.4GHz) If you are unfamiliar with the types of wireless security, more information is located in the appendix at back of this manual. Enable Wireless: Check the box to enable the wireless function. If you do not want to use wireless, uncheck the box to disable all the wireless functions. Schedule: Select the time frame that you would like your wireless network enabled. The schedule may be set to Always.
Section 3 - Configuration 802.11ac draft (5GHz) Enable Wireless: Check the box to enable the wireless function. If you do not want to use wireless, uncheck the box to disable all the wireless functions. Schedule: Select the time frame that you would like your wireless network enabled. The schedule may be set to Always. Any schedule you create will be available in the drop-down menu. Click New Schedule to create a schedule. Wireless Network Service Set Identifier (SSID) is the name of your wireless network.
Section 3 - Configuration Network Settings This section will allow you to change the local network settings of the router and to configure the DHCP settings.
Section 3 - Configuration Router Settings This section will allow you to configure the router settings. Router IP Address: Enter the IP address of the router. The default IP address is 192.168.0.1. If you change the IP address, once you click Save Settings, you will need to enter the new IP address in your browser to get back into the configuration utility. Subnet Mask: Enter the Subnet Mask. The default subnet mask is 255.255.255.0. Device Name: Enter a name for the router.
Section 3 - Configuration DHCP Server Settings DHCP stands for Dynamic Host Control Protocol. The %"1 has a built-in DHCP server. The DHCP Server will automatically assign an IP address to the computers on the LAN/private network. Be sure to set your computers to be DHCP clients by setting their TCP/IP settings to “Obtain an IP Address Automatically.
Section 3 - Configuration DHCP Reservation If you want a computer or device to always have the same IP address assigned, you can create a DHCP reservation. The router will assign the IP address only to that computer or device. Note: This IP address must be within the DHCP IP Address Range. Enable: Check this box to enable the reservation. Computer Name: Enter the computer name or select from the drop-down menu and click <<. IP Address: Enter the IP address you want to assign to the computer or device.
Section 3 - Configuration Storage This page will allow you to set up access to files on an external USB hard drive1 or thumb drive that is plugged into the router. You can do this through local network or from the Internet using either a web browser or an app on your smartphone or tablet. You can create users that can be allowed access to these files through SharePort Mobile services accessible through a web UI or on mobile devices using the SharePort Mobile app available for iOS and Android.
Section 3 - Configuration Media Server This page will allow you to enable a DLNA Media Server. DLNA (Digital Living Network Alliance) is the standard for the interoperability of Network Media Devices (NMDs). The user can enjoy multimedia applications (music, pictures and videos) on your network connected PC or media devices. If you agree to share media with devices, any computer or device that connects to your network can play your shared music, pictures and videos.
Section 3 - Configuration IPv6 On this page, you can configure the IPv6 Connection type. There are two ways to set up the IPv6 Internet connection. You can use the Web-based IPv6 Internet Connection Setup Wizard, or you can manually configure the connection. If you are a beginner that has not configured a router before, click on the IPv6 Internet Connection Setup Wizard button and the router will guide you through a few simple steps to get your network up and running.
Section 3 - Configuration IPv6 Internet Connection Setup Wizard On this page, the user can configure the IPv6 Connection type using the IPv6 Internet Connection Setup Wizard. Click the IPv6 Internet Connection Setup Wizard button and the router will guide you through a few simple steps to get your network up and running. Click Next to continue to the next page. Click Cancel to discard the changes made and return to the main page.
Section 3 - Configuration However, if the automatic detection fails, the user will be prompt to either Try again or to click on the Guide me through the IPv6 settings button to initiate the manual continual of the wizard. There are several connection types to choose from. If you are unsure of your connection method, please contact your IPv6 Internet Service Provider. Note: If using the PPPoE option, you will need to ensure that any PPPoE client software on your computers has been removed or disabled.
Section 3 - Configuration IPv6 over PPPoE After selecting the IPv6 over PPPoE option, the user will be able to configure the IPv6 Internet connection that requires a username and password to get online. Most DSL modems use this type of connection. The following parameters will be available for configuration: PPPoE Session: Select the PPPoE Session value used here.
Section 3 - Configuration Static IPv6 Address Connection This mode is used when your ISP provides you with a set IPv6 addresses that does not change. The IPv6 information is manually entered in your IPv6 configuration settings. You must enter the IPv6 address, Subnet Prefix Length, Default Gateway, Primary DNS Server, and Secondary DNS Server. Your ISP provides you with all this information.
Section 3 - Configuration Tunneling Connection (6rd) After selecting the Tunneling Connection (6rd) option, the user can configure the IPv6 6rd connection settings. 6rd IPv6 Prefix: Enter the 6rd IPv6 address and prefix value used here. IPv4 Address: Enter the IPv4 address used here. Mask Length: Enter the IPv4 mask length used here. Assigned IPv6 Prefix: Displays the IPv6 assigned prefix value here. 6rd Border Relay IPv4 Address: Enter the 6rd border relay IPv4 address used here.
Section 3 - Configuration Manual IPv6 Local Connectivity Setup You can set up a local-only IPv6 Internet connection as well. If you want to configure an IPv6 connection that will not connect to the Internet, click on the Manual IPv6 Local Connectivity Settings button. Enable ULA: Click here to enable Unique Local IPv6 Unicast Addresses settings. Use Default Checking this box will automatically configure ULA Prefix: the ULA prefix for the default setting.
Section 3 - Configuration IPv6 Manual Setup There are several connection types to choose from: Auto Detection, Static IPv6, Autoconfiguration (SLAAC/DHCPv6), PPPoE, IPv6 in IPv4 Tunnel, 6to4, 6rd, and Link-local. If you are unsure of your connection method, please contact your IPv6 Internet Service Provider. Note: If using the PPPoE option, you will need to ensure that any PPPoE client software on your computers has been removed or disabled.
Section 3 - Configuration Static IPv6 My IPv6 Connection Is: Select Static IPv6 from the drop-down menu. Use Link-Local Address: Enter the address settings supplied by your Internet provider (ISP). Subnet Prefix Length: Enter a subnet prefix length. IPv6 Default Gateway: Enter the default gateway for your IPv6 connection. Primary/ Secondary IPv6 DNS Servers: Enter the primary and secondary DNS server addresses. LAN IPv6 Address: Enter the LAN (local) IPv6 address for the router.
Section 3 - Configuration Auto Detection My IPv6 Select Auto Detection from the drop-down menu. Connection Is: Select either Obtain DNS server address automatically or Use the IPv6 DNS Settings: following DNS Address. Primary/Secondary DNS Address: Enter the primary and secondary DNS server addresses. Enable DHCP-PD: Check this box to enable DHCP-PD services. LAN IPv6 Address: Enter the LAN (local) IPv6 address for the router. LAN Link-Local Address: Displays the Router’s LAN Link-Local Address.
Section 3 - Configuration PPPoE My IPv6 Connection Is: Select PPPoE from the drop-down menu. PPPoE Session: Enter the PPPoE account settings supplied by your Internet provider. Address Mode: Select Static if your ISP assigned you the IP address, subnet mask, gateway, and DNS server addresses. In most cases, select Dynamic. IP Address: Enter the IP address (Static PPPoE only). Username: Enter your PPPoE user name. Password: Enter your PPPoE password and retype the password in the next box.
Section 3 - Configuration Enable DHCP-D: Check this box to enable DHCP prefix delegation for each LAN on the network. LAN IPv6 Address: Enter the LAN (local) IPv6 address for the router. LAN Link-Local Address: Displays the router’s LAN Link-Local Address. Enable Automatic IPv6 Address Assignment: Check to enable the Automatic IPv6 Address Assignment feature. Enable Automatic Check this box to enable automatica configuration of the DHCP prefix DHCP-PD in LAN: delegation for each LAN on the network.
Section 3 - Configuration IPv6 in IPv4 Tunneling My IPv6 Connection Is: Select IPv6 in IPv4 Tunnel from the drop-down menu. Remote IPv4 Address: Enter the IPv4 remote address you will use. Remote IPv6 Address: Enter the IPv6 remote address you will use. Local IPv4 Address: Enter the IPv4 local address you will use. Local IPv6 Address: Enter the IPv6 local address you will use. IPv6 DNS Settings: Select either Obtain DNS server address automatically or Use the following DNS Address.
Section 3 - Configuration Enable Automatic IPv6 Address Assignment: Check to enable the Automatic IPv6 Address Assignment feature. Enable Automatic Check this box to enable automatic configuration of the DHCP prefix DHCP-PD in LAN: delegation for each LAN on the network. Autoconfiguration Select Stateful (DHCPv6), SLAAC + RDNSS or SLAAC + Stateless Type: DHCPv6. Router Advertisement Lifetime: Enter the Router Advertisement Lifetime (in minutes).
Section 3 - Configuration 6to4 My IPv6 Connection Is: Select 6to4 from the drop-down menu. 6to4 Address: Enter the IPv6 settings supplied by your ISP. 6to4 Relay: Enter the IPv6 relay supplied by your ISP. Primary/Secondary DNS Address: Enter the primary and secondary DNS server addresses. LAN IPv6 Address: Enter the LAN (local) IPv6 address for the router. LAN Link-Local Address: Displays the Router’s LAN Link-Local Address.
Section 3 - Configuration 6rd My IPv6 Connection Is: Select 6rd from the drop-down menu. Enable Hub and Check this box if you want to minimize the number of routes to the Spoke Mode: destination by using a hub and spoke method of networking. 6rd Configuration: Choose the 6rd DHCPv4 Option to automatically discover and populate the data values, or Manual Configuration to enter the settings yourself. 6rd IPv6 Prefix: Enter the 6rd IPv6 prefix settings supplied by your ISP.
Section 3 - Configuration Enable Automatic IPv6 Address Assignment: Check to enable the Automatic IPv6 Address Assignment feature. Autoconfiguration Select Stateful (DHCPv6), SLAAC + RDNSS or SLAAC + Stateless Type: DHCPv6. Router Advertisement Lifetime: Enter the IPv6 Address Lifetime (in minutes).
Section 3 - Configuration Link-Local Connectivity My IPv6 Connection Is: Select Link-Local Only from the drop-down menu. LAN IPv6 Address Settings: Displays the IPv6 address of the router.
Section 3 - Configuration mydlink Settings Devices that are mydlink-enabled can be accessed and managed through the mydlink website and by using mydlink mobile apps for iOS and Android. You cannot take advantage of these features without a mydlink account. If you have a mydlink account already, you can log in when you first set up the router, or by visitng this setup page. mydlink Service: Displays whether your device is registered with a mydlink account or not.
Section 3 - Configuration Advanced Virtual Server This page will allow you to open a single port. If you would like to open a range of ports, refer to the next page. Name: Enter a name for the rule or select an application from the drop-down menu. Select an application and click << to populate the fields. IP Address: Enter the IP address of the computer on your local network that you want to allow the incoming service to.
Section 3 - Configuration Port Forwarding This page will allow you to open a single port or a range of ports. Name: Enter a name for the rule or select an application from the drop-down menu. Select an application and click to populate the fields. IP Address: Enter the IP address of the computer on your local network that you want to allow the incoming service to.
Section 3 - Configuration Application Rules Some applications require multiple connections, such as Internet gaming, video conferencing, Internet telephony and others. These applications have difficulties working through NAT (Network Address Translation).
Section 3 - Configuration QoS Engine The QoS Engine option helps improve your network gaming performance by prioritizing applications. By default the QoS Engine settings are disabled and application priority is not classified automatically. Enable QoS This option is disabled by default. Enable this option for better Engine: performance and experience with online games and other interactive applications, such as VoIP.
Section 3 - Configuration Protocol: The protocol used by the messages. Local IP Range: The rule applies to a flow of messages whose LAN-side IP address falls within the range set here. Local Port Range: The rule applies to a flow of messages whose LAN-side port number is within the range set here. Remote IP Range: The rule applies to a flow of messages whose WAN-side IP address falls within the range set here.
Section 3 - Configuration Network Filters Use MAC (Media Access Control) Filters to allow or deny LAN (Local Area Network) computers by their MAC addresses from accessing the network. You can either manually add a MAC address or select the MAC address from the list of clients that are currently connected to the Broadband Router. Configure MAC Select Turn MAC Filtering Off, Allow MAC addresses listed Filtering: below, or Deny MAC addresses listed below from the dropdown menu.
Section 3 - Configuration Access Control The Access Control section allows you to control access in and out of your network. Use this feature as Parental Controls to only grant access to approved sites, limit web access based on time or dates, and/or block access from applications like P2P utilities or games. Add Policy: Click the Add Policy button to start the Access Control Wizard. Access Control Wizard Click Next to continue with the wizard.
Section 3 - Configuration Enter a name for the policy and then click Next to continue. Select a schedule (I.E. Always) from the drop-down menu and then click Next to continue. Enter the following information and then click Next to continue. • Address Type - Select IP address, MAC address, or Other Machines. • IP Address - Enter the IP address of the computer you want to apply the rule to. • Machine Address - Enter the PC MAC address (i.e. 00:00.00.00.00).
Section 3 - Configuration Enter the rule: Enable - Check to enable the rule. Name - Enter a name for your rule. Dest IP Start - Enter the starting IP address. Dest IP End - Enter the ending IP address. Protocol - Select the protocol. Dest Port Start - Enter the starting port number. Dest Port End - Enter the ending port number. To enable web logging, click Enable. Click Save to save the access control rule. Your newly created policy will now show up under Policy Table.
Section 3 - Configuration Website Filters Website Filters are used to allow you to set up a list of Web sites that can be viewed by multiple users through the network. To use this feature select to Allow or Deny, enter the domain or website and click Save Settings. You must also select Apply Web Filter under the Access Control section. Configure Website Select either DENY computers access to ONLY these sites Filter: or ALLOW computers access to ONLY these sites.
Section 3 - Configuration Inbound Filter The Inbound Filter option is an advanced method of controlling data received from the Internet. With this feature you can configure inbound data filtering rules that control data based on an IP address range. Inbound Filters can be used with Virtual Server, Port Forwarding, or Remote Administration features. Name: Enter a name for the inbound filter rule. Action: Select Allow or Deny. Enable: Check to enable rule. Remote IP Start: Enter the starting IP address.
Section 3 - Configuration Firewall Settings A firewall protects your network from the outside world. The %"1 offers a firewall type functionality. The SPI feature helps prevent cyber attacks. Sometimes you may want a computer exposed to the outside world for certain types of applications. If you choose to expose a computer, you can enable DMZ. DMZ is short for Demilitarized Zone. This option will expose the chosen computer completely to the outside world.
Section 3 - Configuration NAT. This ALG may interfere with the operation of such VPN clients. If you are having trouble connecting with your corporate network, try turning this ALG off. Please check with the system administrator of your corporate network whether your VPN client supports NAT traversal. RTSP: Allows application that uses Real Time Streaming Protocol to receive streaming media from the Internet. QuickTime and Real Player are some of the common applications using this protocol.
Section 3 - Configuration Routing The Routing option is an advanced method of customizing specific routes of data through your network. Name: Enter a name for your route. Destination IP: Enter the IP address of packets that will take this route. Netmask: Enter the netmask of the route, please note that the octets must match your destination IP address. Gateway: Enter your next hop gateway to be taken if this route is used.
Section 3 - Configuration Advanced Wireless This page allows you to change some of the advanced wireless settings of the %"1 It is recommended that you only change these settings if you are familiar with their functions and proper settings, or are instructed to do so. Wireless Band: This will display which radio band the following settings will be ued for. This top box will be the settings for the 2.4 GHz band. Transmit Power: Set the transmit power of the antennas for the 2.4 GHz band.
Section 3 - Configuration Wi-Fi Protected Setup Wi-Fi Protected Setup (WPS) System is a simplified method for securing your wireless network during the “Initial setup” as well as the “Add New Device” processes. The Wi-Fi Alliance (WFA) has certified it across different products as well as manufacturers. The process is just as easy as pressing a button for the Push-Button Method or correctly entering the 8-digit code for the PIN Code Method.
Section 3 - Configuration Add Wireless This Wizard helps you add wireless devices to the wireless network. Station: The wizard will either display the wireless network settings to guide you through manual configuration, prompt you to enter the PIN for the device, or ask you to press the configuration button on the device.
Section 3 - Configuration Advanced Network This page allows you to change some of the advanced network settings of the %"1 It is recommended that you only change these settings if you are familiar with their functions and proper settings, or are instructed to do so. Enable UPnP: To use the Universal Plug and Play (UPnP™) feature click on Enabled. UPnP provides compatibility with networking equipment, software and peripherals. WAN Ping: Checking the box will allow the %"1 to respond to pings.
Section 3 - Configuration Guest Zone The Guest Zone feature will allow you to create temporary zones that can be used by guests to access the Internet. These zones will be separate from your main wireless network. You may configure different zones for the 2.4GHz and 5GHz wireless bands. Enable Routing Check to allow network connectivity between the different Between Zones: zones created. Enable Guest Zone: Check to enable the Guest Zone feature for the 2.4 GHz band.
Section 3 - Configuration IPv6 Firewall The DAP-1750’s IPv6 Firewall feature allows you to configure which kind of IPv6 traffic is allowed to pass through the device. The DAP-1750’s IPv6 Firewall functions in a similar way to the IP Filters feature. Enable IPv6 Simple Security: Check the box to enable the IPv6 firewall simple security. Configure IPv6 Firewall: Select an action from the drop-down menu. Name: Enter a name to identify the IPv6 firewall rule.
Section 3 - Configuration IPv6 Routing This page allows you to specify custom routes that determine how data is moved around your network. Route List: Check the box next to the route you wish to enable. Name: Enter a specific name to identify this route. Destination IP/ This is the IP address of the router used to reach the specified Prefix Length: destination or enter the IPv6 address prefix length of the packets that will take this route. Metric: Enter the metric value for this rule here.
Section 3 - Configuration Tools Admin This page will allow you to change the Administrator and User passwords. You can also enable Remote Management. There are two accounts that can access the management interface through the web browser. The accounts are admin and user. Admin has read/write access while user has read-only access. User can only view the settings but cannot make any changes. Only the admin account has the ability to change both admin and user account passwords.
Section 3 - Configuration Time The Time Configuration option allows you to configure, update, and maintain the correct time on the internal system clock. From this section you can set the time zone that you are in and set the Time Server. Daylight Saving can also be configured to automatically adjust the time when needed. Time: Displays the current date and time of the router. Time Zone: Select your Time Zone from the drop-down menu.
Section 3 - Configuration SysLog The Broadband Router keeps a running log of events and activities occurring on the Router. You may send these logs to a SysLog server on your network. Enable Logging to SysLog Server: Check this box to send the router logs to a SysLog Server.
Section 3 - Configuration Email Settings The Email feature can be used to send the system log files, router alert messages, and firmware update notification to your email address. Enable Email When this option is enabled, router activity logs are emailed Notification: to a designated email address. From Email This email address will appear as the sender when you receive Address: a log file or firmware upgrade notification via email. To Email Address: Enter the email address where you want the email sent.
Section 3 - Configuration System This section allows you to manage the router’s configuration settings, reboot the router, and restore the router to the factory default settings. Restoring the unit to the factory default settings will erase all settings, including any rules that you’ve created. Save Settings to Use this option to save the current router configuration settings Local Hard Drive: to a file on the hard disk of the computer you are using. First, click the Save Configuration button.
Section 3 - Configuration Firmware You can upgrade the firmware of the access point here. Make sure the firmware you want to use is on the local hard drive of the computer. Click on Choose File to locate the firmware file to be used for the update. Please check the D-Link support website for firmware updates at http://support. dlink.com. You can download firmware upgrades to your hard drive from this site. Check Now: Click Check Now to check for new firmware and language pack versions online.
Section 3 - Configuration Dynamic DNS The DDNS feature allows you to host a server (Web, FTP, Game Server, etc…) using a domain name that you have purchased (www.yourname.com) with your dynamically assigned IP address. Most broadband Internet Service Providers assign dynamic (changing) IP addresses. Using a DDNS service provider, your friends can enter in your domain name to connect to your server no matter what your IP address is.
Section 3 - Configuration System Check Ping Test: The Ping Test is used to send Ping packets to test if a computer is on the Internet. Enter the IP address that you wish to Ping and click Ping. IPv6 Ping Test: Enter the IPv6 address that you wish to Ping and click Ping. Ping Results: The results of your ping attempts will be displayed here.
Section 3 - Configuration Schedules Schedules can be created for use with enforcing rules. For example, if you want to restrict web access to Mon-Fri from 3pm to 8pm, you could create a schedule selecting Mon, Tue, Wed, Thu, and Fri and enter a Start Time of 3pm and End Time of 8pm. Name: Enter a name for your new schedule. Days: Select a day, a range of days, or All Week to include every day. All Day - 24 Hrs: Check All Day - 24hrs to schedule the entire day.
Section 3 - Configuration Status Device Info This page displays the current information for the %"1 It will display the LAN, WAN (Internet), and Wireless information. If your Internet connection is set up for a Dynamic IP address then a Release button and a Renew button will be displayed. Use Release to disconnect from your ISP and use Renew to connect to your ISP. If your Internet connection is set up for PPPoE, a Connect button and a Disconnect button will be displayed.
Section 3 - Configuration Logs The router automatically logs (records) events of possible interest in it’s internal memory. If there isn’t enough internal memory for all events, logs of older events are deleted but logs of the latest events are retained. The Logs option allows you to view the router logs. You can define what types of events you want to view and the level of the events to view.
Section 3 - Configuration Statistics The screen below displays the Traffic Statistics. Here you can view the amount of packets that pass through th%"1 L on both the WAN, LAN ports and the wireless segments. The traffic counter will reset if the device is rebooted.
Section 3 - Configuration Internet Sessions The Internet Sessions page displays full details of active Internet sessions through your router. An Internet session is a conversation between a program or application on a LAN-side computer and a program or application on a WAN-side computer.
Section 3 - Configuration Routing This page will display your current routing table.
Section 3 - Configuration Wireless The wireless client table displays a list of current connected wireless clients. This table also displays the connection time and MAC address of the connected wireless clients.
Section 3 - Configuration IPv6 The IPv6 page displays a summary of the Router’s IPv6 settings and lists the IPv6 address and host name of any IPv6 clients.
Section 3 - Configuration IPv6 Routing This page displays the IPV6 routing details configured for your router.
Section 3 - Configuration Support The Support pages let you jump to descriptions of the settings and their functions.
Section 4 - Security Connect a Wireless Client to your Router WPS Button The easiest and most secure way to connect your wireless devices to the router is WPS (Wi-Fi Protected Setup). Most wireless devices such as wireless adapters, media players, Blu-ray DVD players, wireless printers and cameras will have a WPS button (or a software utility with WPS) that you can press to connect to the %"1 router.
Section 4 - Security Windows® 7 WPA/WPA2 It is recommended to enable wireless security (WPA/WPA2) on your wireless router or access point before configuring your wireless adapter. If you are joining an existing network, you will need to know the security key or passphrase being used. 1. Click on the wireless icon in your system tray (lower-right corner). Wireless Icon 2. The utility will display any available wireless networks in your area.
Section 4 - Security 3. Highlight the wireless connection with Wi-Fi name (SSID) you would like to connect to and click the Connect button. If you get a good signal but cannot access the Internet, check your TCP/IP settings for your wireless adapter. Refer to the Networking Basics section in this manual for more information. 4. The following window appears while your computer tries to connect to the router.
Section 4 - Security 5. Enter the same security key or passphrase (Wi-Fi password) that is on your router and click Connect. You can also connect by pushing the WPS button on the router. It may take 20-30 seconds to connect to the wireless network. If the connection fails, please verify that the security settings are correct. The key or passphrase must be exactly the same as on the wireless router.
Section 4 - Security WPS The WPS feature of the %"1 can be configured using Windows® 7. Carry out the following steps to use Windows® 7 to configure the WPS feature: 1. Click the Start button and select Computer from the Start menu. 2. Click Network on the left side.
Section 4 - Security 3. Double-click the %"1 4. Input the WPS PIN number (displayed in the WPS window on the Router’s LCD screen or in the Setup > Wireless Setup menu in the Router’s Web UI) and click Next.
Section 4 - Security 5. Type a name to identify the network. 6. To configure advanced settings, click the icon. Click Next to continue.
Section 4 - Security 7. The following window appears while the Router is being configured. Wait for the configuration to complete. 8. The following window informs you that WPS on the router has been setup successfully. Make a note of the security key as you may need to provide this security key if adding an older wireless device to the network in the future. 9. Click Close to complete WPS setup.
Section 5 - Connecting to a Wireless Network Windows Vista® Windows Vista® users may use the built-in wireless utility. If you are using another company’s utility, please refer to the user manual of your wireless adapter for help with connecting to a wireless network. Most utilities will have a “site survey” option similar to the Windows Vista® utility as seen below. If you receive the Wireless Networks Detected bubble, click on the center of the bubble to access the utility.
Section 5 - Connecting to a Wireless Network WPA/WPA2 It is recommended to enable wireless security (WPA/WPA2) on your wireless router or access point before configuring your wireless adapter. If you are joining an existing network, you will need to know the security key or passphrase being used. 1. Open the Windows Vista® Wireless Utility by right-clicking on the wireless computer icon in your system tray (lower right corner of screen). Select Connect to a network. 2.
Section 5 - Connecting to a Wireless Network 3. Enter the same security key or passphrase (Wi-Fi password) that is on your router and click Connect. It may take 20-30 seconds to connect to the wireless network. If the connection fails, please verify that the security settings are correct. The key or passphrase must be exactly the same as on the wireless router.
Section 5 - Connecting to a Wireless Network WPS/WCN 2.0 The router supports Wi-Fi protection, referred to as WCN 2.0 in Windows Vista®. The following instructions for setting this up depends on whether you are using Windows Vista® to configure the router or third party software. When you first set up the router, Wi-Fi protection is disabled and unconfigured. To enjoy the benefits of Wi-Fi protection, the router must be both enabled and configured.
Section 5 - Connecting to a Wireless Network Windows® XP Windows® XP users may use the built-in wireless utility (Zero Configuration Utility). The following instructions are for Service Pack 2 users. If you are using another company’s utility, please refer to the user manual of your wireless adapter for help with connecting to a wireless network. Most utilities will have a “site survey” option similar to the Windows® XP utility as seen below.
Section 5 - Connecting to a Wireless Network WPA/WPA2 It is recommended to enable WPA on your wireless router or access point before configuring your wireless adapter. If you are joining an existing network, you will need to know the WPA key being used. 1. Open the Windows® XP Wireless Utility by right-clicking on the wireless computer icon in your system tray (lower-right corner of screen). Select View Available Wireless Networks. 2.
Section 5 - Connecting to a Wireless Network 3. The Wireless Network Connection box will appear. Enter the WPA-PSK Wi-Fi password and click Connect. It may take 20-30 seconds to connect to the wireless network. If the connection fails, please verify that the WPA-PSK settings are correct. The Wi-Fi password must be exactly the same as on the wireless router.
Section 6 - Troubleshooting Troubleshooting This chapter provides solutions to problems that can occur during the installation and operation of the %"1 Read the following descriptions if you are having problems. The examples below are illustrated in Windows® XP. If you have a different operating system, the screenshots on your computer will look similar to the following examples. 1. Why can’t I access the web-based configuration utility? When entering the IP address of the D-Link router (192.168.0.
Section 6 - Troubleshooting • Configure your Internet settings: • Go to Start > Settings > Control Panel. Double-click the Internet Options Icon. From the Security tab, click the button to restore the settings to their defaults. • Click the Connection tab and set the dial-up option to Never Dial a Connection. Click the LAN Settings button. Make sure nothing is checked. Click OK. • Go to the Advanced tab and click the button to restore these settings to their defaults. Click OK three times.
Section 6 - Troubleshooting 3. Why can’t I connect to certain sites or send and receive emails when connecting through my router? If you are having a problem sending or receiving email, or connecting to secure sites such as eBay, banking sites, and Hotmail, we suggest lowering the MTU in increments of ten (Ex. 1492, 1482, 1472, etc). To find the proper MTU Size, you’ll have to do a special ping of the destination you’re trying to go to. A destination could be another computer, or a URL.
Section 6 - Troubleshooting You should start at 1472 and work your way down by 10 each time. Once you get a reply, go up by 2 until you get a fragmented packet. Take that value and add 28 to the value to account for the various TCP/IP headers. For example, lets say that 1452 was the proper value, the actual MTU size would be 1480, which is the optimum for the network we’re working with (1452+28=1480). Once you find your MTU, you can now configure your router with the proper MTU size.
Appendix A - Wireless Basics Wireless Basics D-Link wireless products are based on industry standards to provide easy-to-use and compatible high-speed wireless connectivity within your home, business or public access wireless networks. Strictly adhering to the IEEE standard, the D-Link wireless family of products will allow you to securely access the data you want, when and where you want it. You will be able to enjoy the freedom that wireless networking delivers.
Appendix A - Wireless Basics What is Wireless? Wireless or Wi-Fi technology is another way of connecting your computer to the network without using wires. Wi-Fi uses radio frequency to connect wirelessly, so you have the freedom to connect computers anywhere in your home or office network. Why D-Link Wireless? D-Link is the worldwide leader and award winning designer, developer, and manufacturer of networking products. D-Link delivers the performance you need at a price you can afford.
Appendix A - Wireless Basics Wireless Personal Area Network (WPAN) Bluetooth is the industry standard wireless technology used for WPAN. Bluetooth devices in WPAN operate in a range up to 30 feet away. Compared to WLAN the speed and wireless operation range are both less than WLAN, but in return it doesn’t use nearly as much power which makes it ideal for personal devices, such as mobile phones, PDAs, headphones, laptops, speakers, and other devices that operate on batteries.
Appendix A - Wireless Basics Where is wireless used? Wireless technology is expanding everywhere not just at home or office. People like the freedom of mobility and it’s becoming so popular that more and more public facilities now provide wireless access to attract people. The wireless connection in public places is usually called “hotspots”.
Appendix A - Wireless Basics Don’t let you next-door neighbors or intruders connect to your wireless network. Secure your wireless network by turning on the WPA or WEP security feature on the router. Refer to product manual for detail information on how to set it up. Wireless Modes There are basically two modes of networking: • Infrastructure – All wireless clients will connect to an access point or wireless router.
Appendix B - Networking Basics Networking Basics Check your IP address After you install your new D-Link adapter, by default, the TCP/IP settings should be set to obtain an IP address from a DHCP server (i.e. wireless router) automatically. To verify your IP address, please follow the steps below. Click on Start > Run. In the run box type cmd and click OK. (Windows® 7/Vista® users type cmd in the Start Search box.) At the prompt, type ipconfig and press Enter.
Appendix B - Networking Basics Statically Assign an IP address If you are not using a DHCP capable gateway/router, or you need to assign a static IP address, please follow the steps below: Step 1 Windows® 7 Click on Start > Control Panel > Network and Internet > Network and Sharing Center. Windows Vista® - Click on Start > Control Panel > Network and Internet > Network and Sharing Center > Manage Network Connections. Windows® XP Click on Start > Control Panel > Network Connections.
Appendix B - Networking Basics Wireless Security This section will show you the different levels of security you can use to protect your data from intruders. The %"1 offers the following types of security: • WPA2 (Wi-Fi Protected Access 2) • WPA (Wi-Fi Protected Access) • WPA2-PSK (Pre-Shared Key) • WPA-PSK (Pre-Shared Key) What is WPA? WPA (Wi-Fi Protected Access), is a Wi-Fi standard that was designed to improve the security features of WEP (Wired Equivalent Privacy).
Appendix C - Technical Specifications Technical Specifications Device Interfaces • 802.11 a/b/g/n/ac wireless LAN • Four 10/100/1000 Gigabit LAN ports • USB 3.0 port USB Port Power • 5 V / 0.9 A Antenna Types • Six internal antennas Humidity • 95% maximum (non-condensing) Standards • IEEE 802.11ac • IEEE 802.11n • IEEE 802.11g • IEEE 802.11b • IEEE 802.11a • IEEE 802.3 • IEEE 802.
Federal Communica on Commission Interference Statement This device complies with Part 15 of the FCC Rules. Opera on is subject to the following two condi ons: (1) This device may not cause harmful interference, and (2) this device must accept any interference received, including interference that may cause undesired opera on. This equipment has been tested and found to comply with the limits for a Class B digital device, pursuant to Part 15 of the FCC Rules.
Industry Canada statement: This device complies with RSS-210 of the Industry Canada Rules. Opera on is subject to the following two condi ons: (1) This device may not cause harmful interference, and (2) this device must accept any interference received, including interference that may cause undesired opera on. Ce disposi f est conforme à la norme CNR-210 d'Industrie Canada applicable aux appareils radio exempts de licence.
"This unit is to be used with a power supply, Model AMS3-1202500FU,AMS3-1202500FV,AMS3-1202500FB, WA-30B12,AMS115-12000FU,AMS115-12000FB,AMS115-12000FV, WA-24Q12R." ! #!!$% AMS3-1202500FV,AMS3-1202500FB,WA-30B12,AMS115-12000FU,AMS115-12000FB,AMS115-12000FV, WA-24Q12R.