
User`s guide


XStack Storage User’s Guide 73
If you selected None or Mirror for Data Redundancy, the Access and
Efficiency Settings screen contains only the Access Bandwidth Weight
setting.
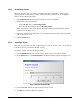
6. Click the Finish button. The main screen reappears and the volume you created appears
under Blade A Base Pool in the Logical Resources tab.
A plus sign appears next to Blade A Base Pool. Click it to see the volume you
created.
5.3.1.1.2 Creating Volumes Manually
You use the Manual Create Volume Wizard to create volumes manually. The following steps
describe this procedure. As you create volumes, record the information in
Table D-1 on page 162.
1. In the Logical Resources tab, click the plus sign next to Blade A Base Pool. All drives
available for volume creation appear under Blade A Base Pool.
2. In the Logical Resources tab, click the plus sign next to Available Pool.
3. If drives to be used for this volume are not already in the Blade A Base Pool, those drives
need to be moved to that Pool. To do this, drag one of the desired drives from Available Pool
to Blade A Base Pool. Repeat this step for each additional drive that you want included in
the volume.
4. In the Logical Resources tab, click Blade A Base Pool.
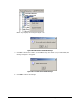
5. Perform one of the following steps in the Logical Resources tab:
– Click the Manual Create Volume button on the toolbar:
– On the Storage menu, click Manual Create Volume.
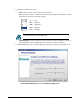
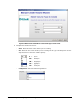
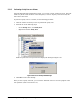
The Manual Create Volume Wizard launches and the Select Volume Type to Create screen
appears (see
Figure 5-14).