
User`s guide


66 Chapter 5 Configuring the XStack Storage
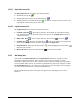
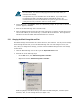
For convenience, the current settings appear below the fields where you
enter the new settings.
It is important for you to remember the new IP address, as you will need it
for subsequent logins to the XStack Storage management console. We
recommend that you write the IP address on a piece of paper and store it in
a safe place in case you need to refer to it in the future.
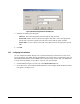
4. On the File menu, click Restart. When the confirmation prompt “Do you want to restart the
system?” appears, click Yes.
5. Wait for the XStack Storage unit to become ready.
6. After the XStack Storage unit has become ready and reboot is complete, launch the browser,
enter the IP address you saved from step 2, and click Go on the browser. The Login Screen
initializes and the User Name and Password must be re-entered.
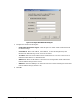
5.2.2 Changing the XStack Storage Date and Time
The XStack Storage unit maintains the current timezone, date and time. You may need to change
these settings the first time you use the XStack Storage unit or if time changes occur in your
area, After you change these settings, you must restart the XStack Storage for the new settings
to take effect.
1. Click the XStack Storage icon at the top of the Physical Resources tab.
2. Perform one of the following steps:
– On the File menu, click XStack Storage Date and Time.
– Right-click and click XStack Storage Date and Time.
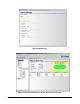
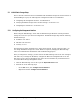
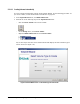
Either step displays the XStack Storage unit’s Date and Time dialog box, with the system
timezone, date, or time settings shown (see
Figure 5-10).